
Hello my fluffy bunnies, welcome to Manicure Monday! Easter is around the corner and I would like to share this Easter theme nail art to get you in the spirit. I tried to put all the design into this one tutorial so you can see more options. You are welcome to pick one design to do as an accent but they go cohesively together too. All you need for this design are dotting tools and some toothpicks. Let’s get started:
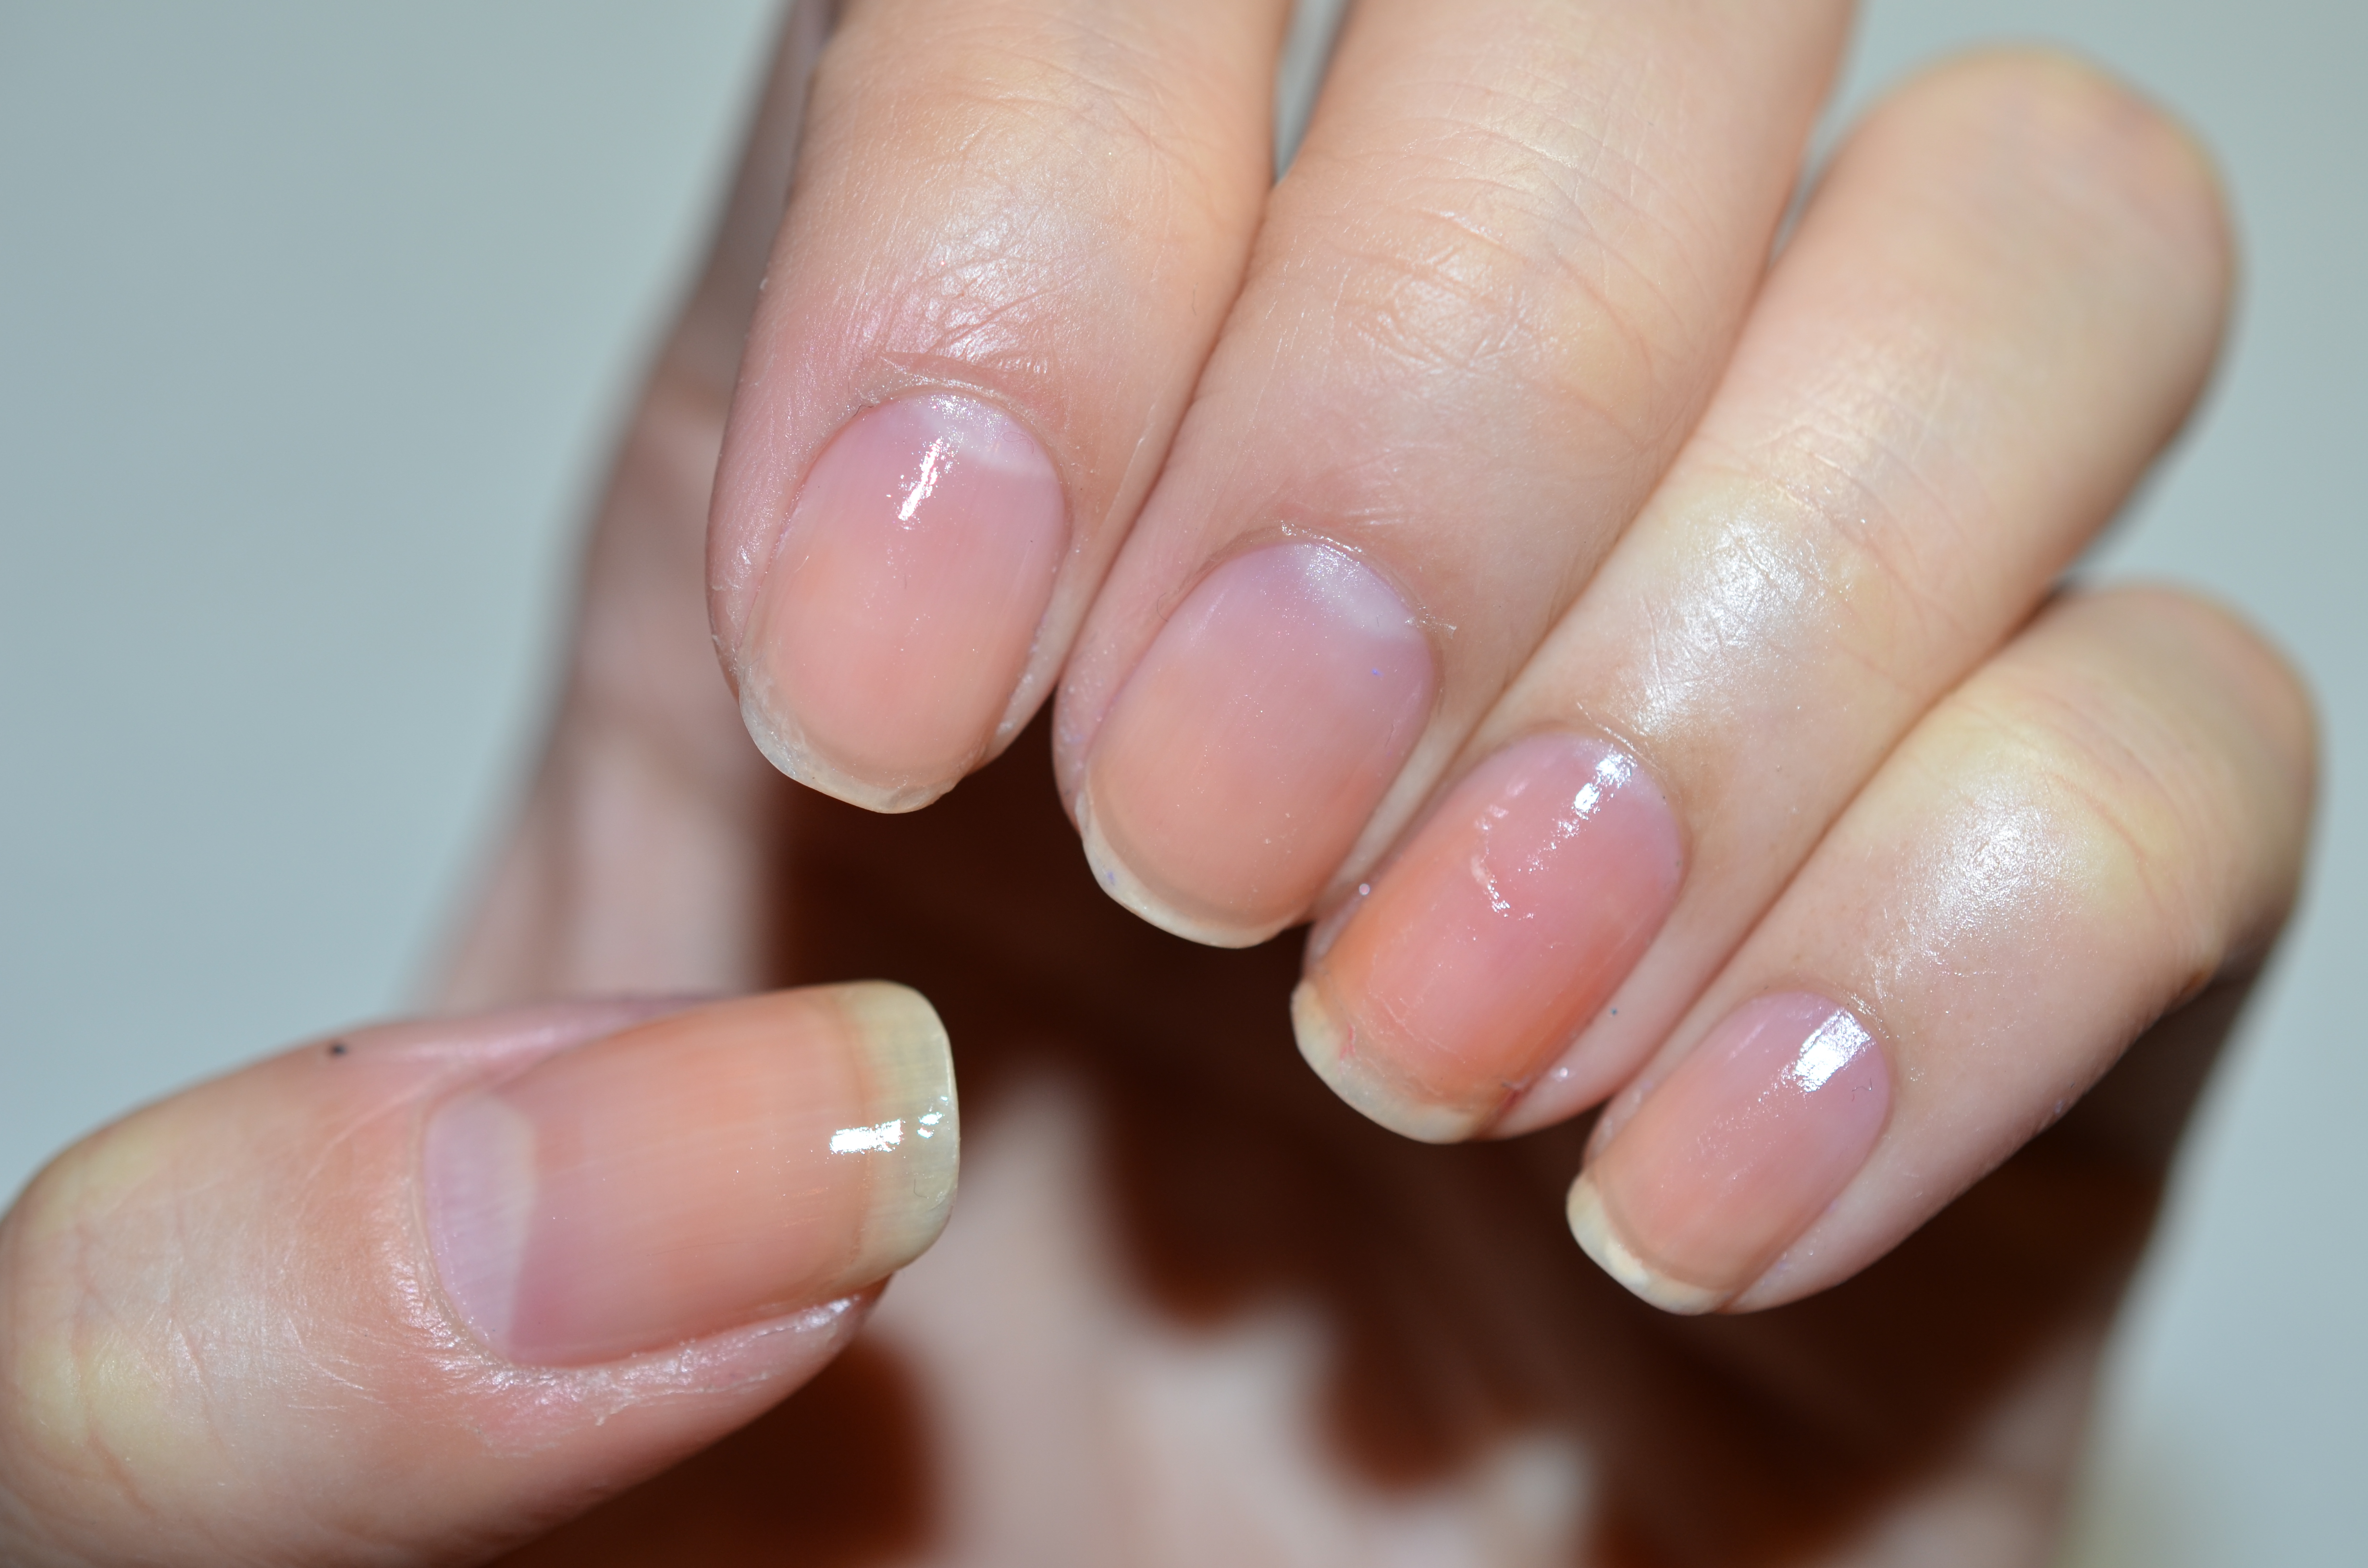
Step 1: Apply your favourite base coat (Natural Base Coat by OPI) to protect your natural nail.
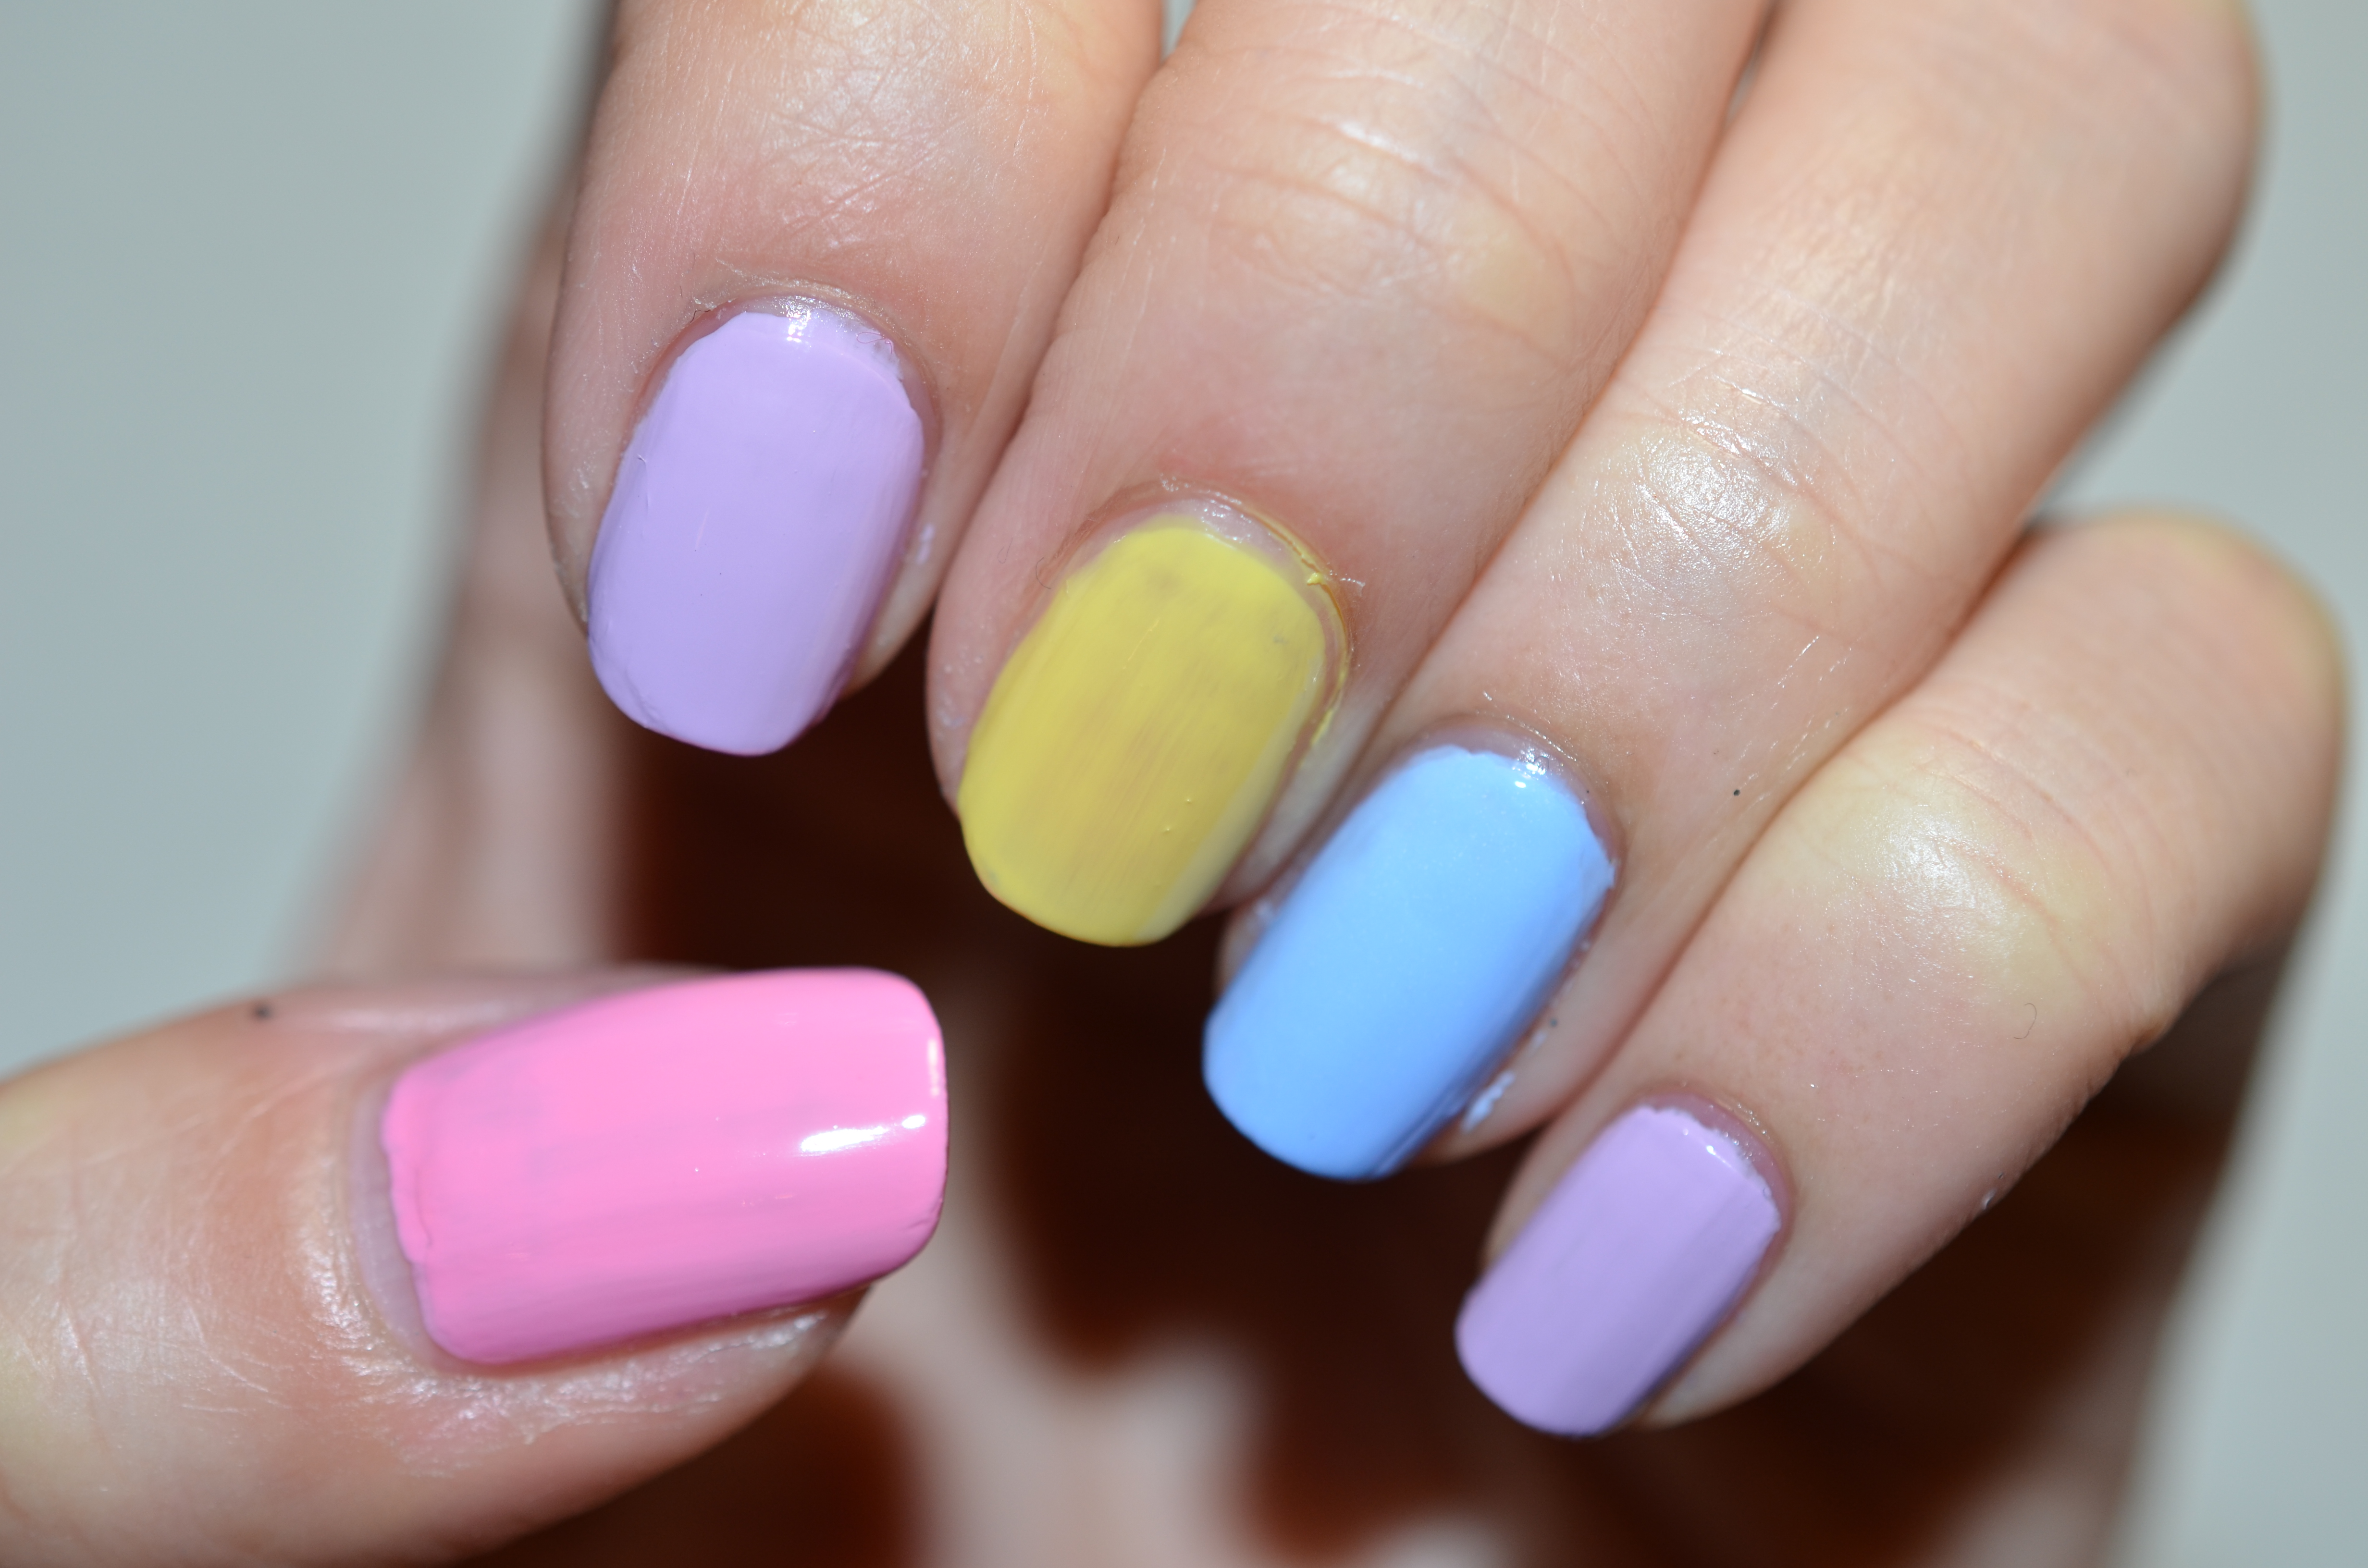
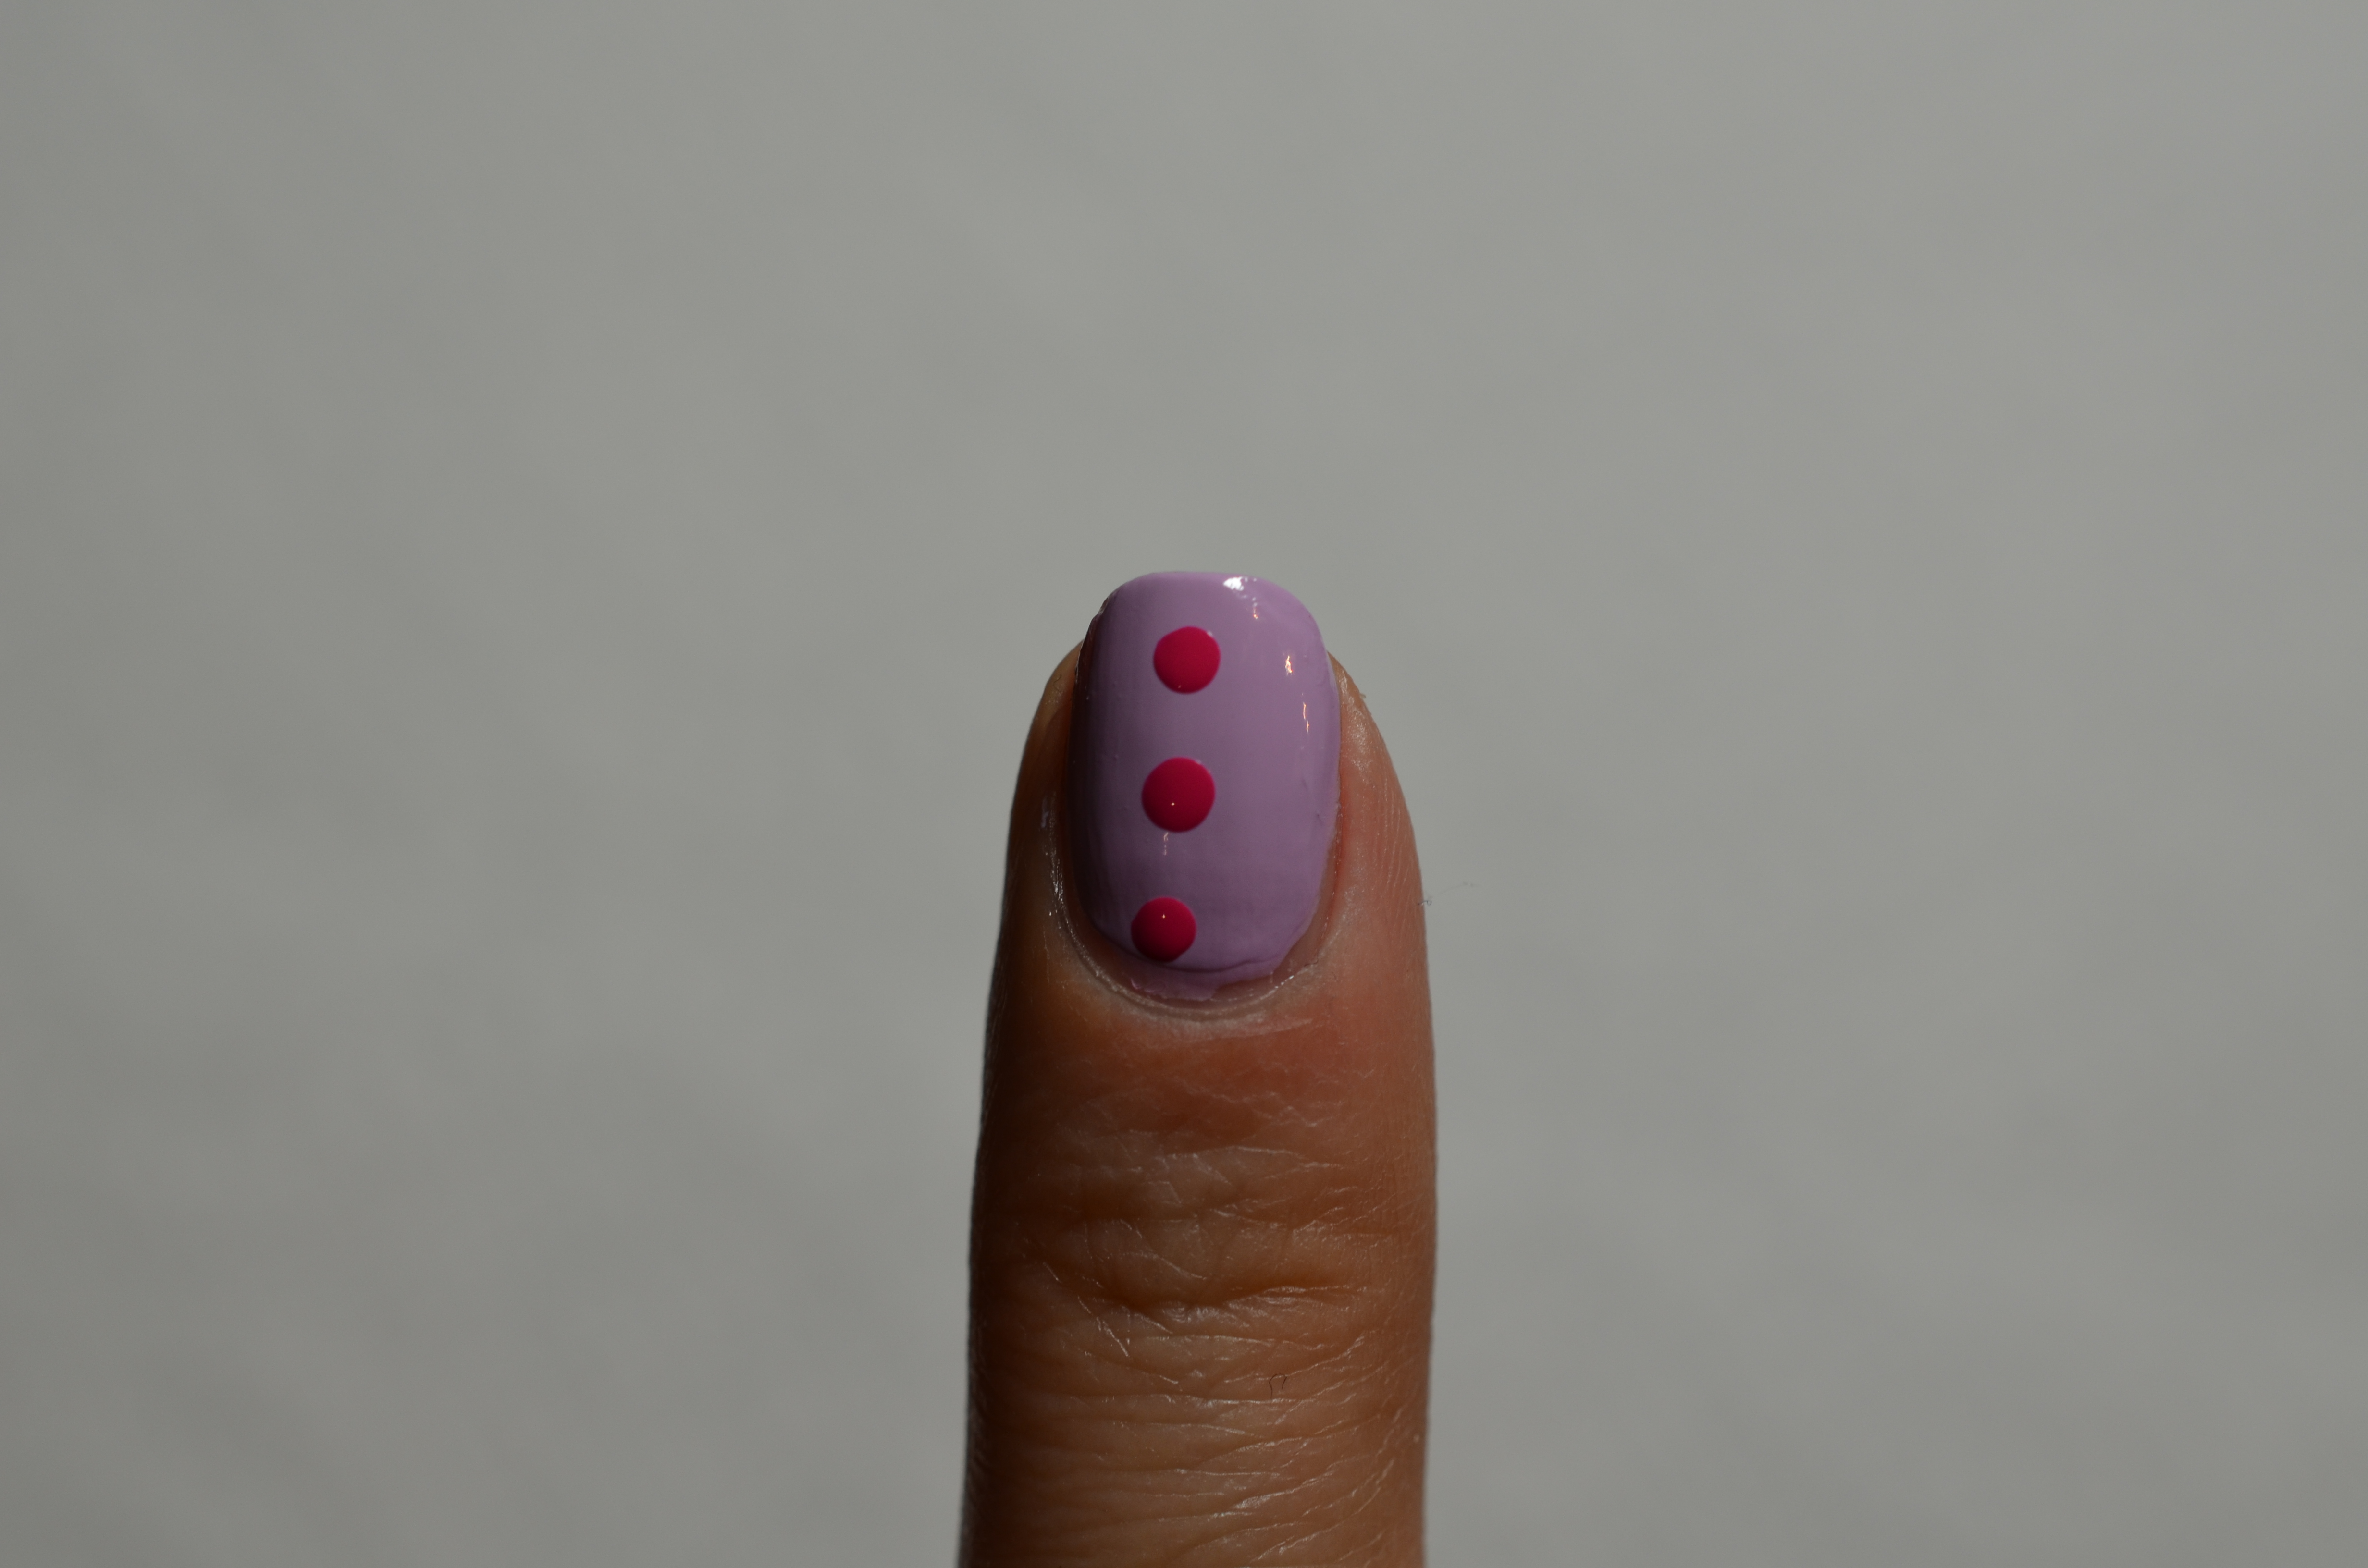
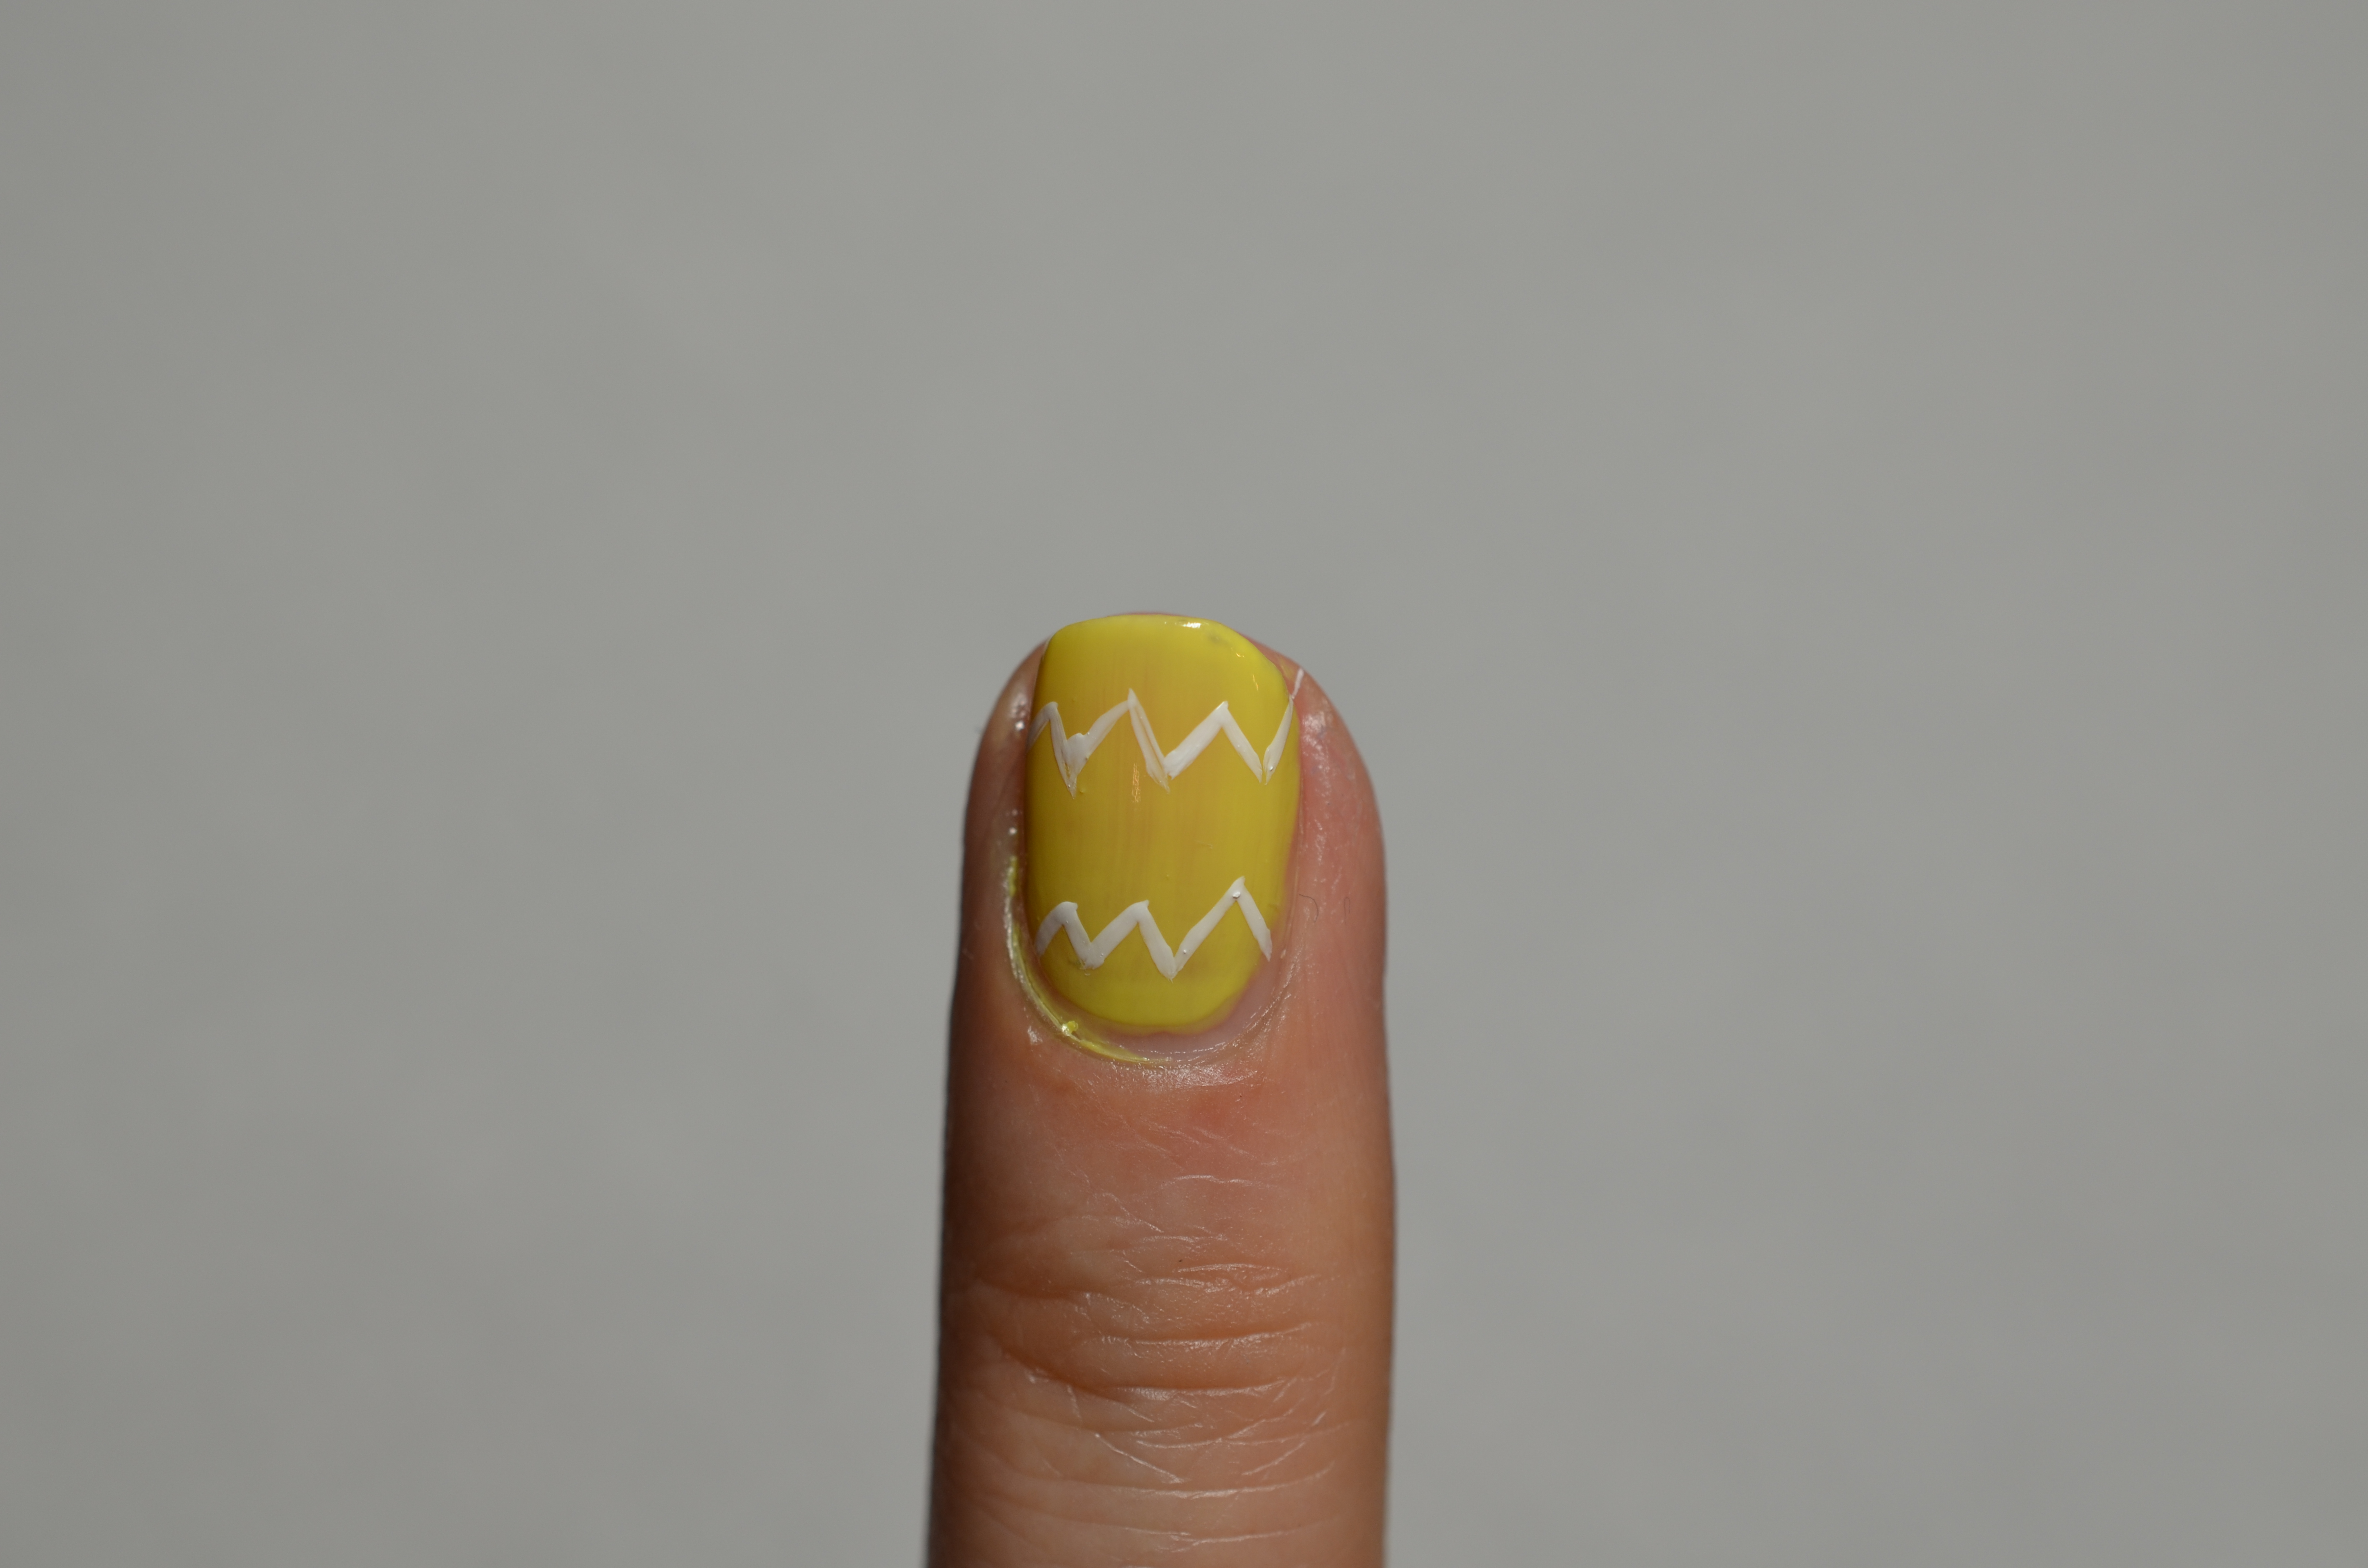
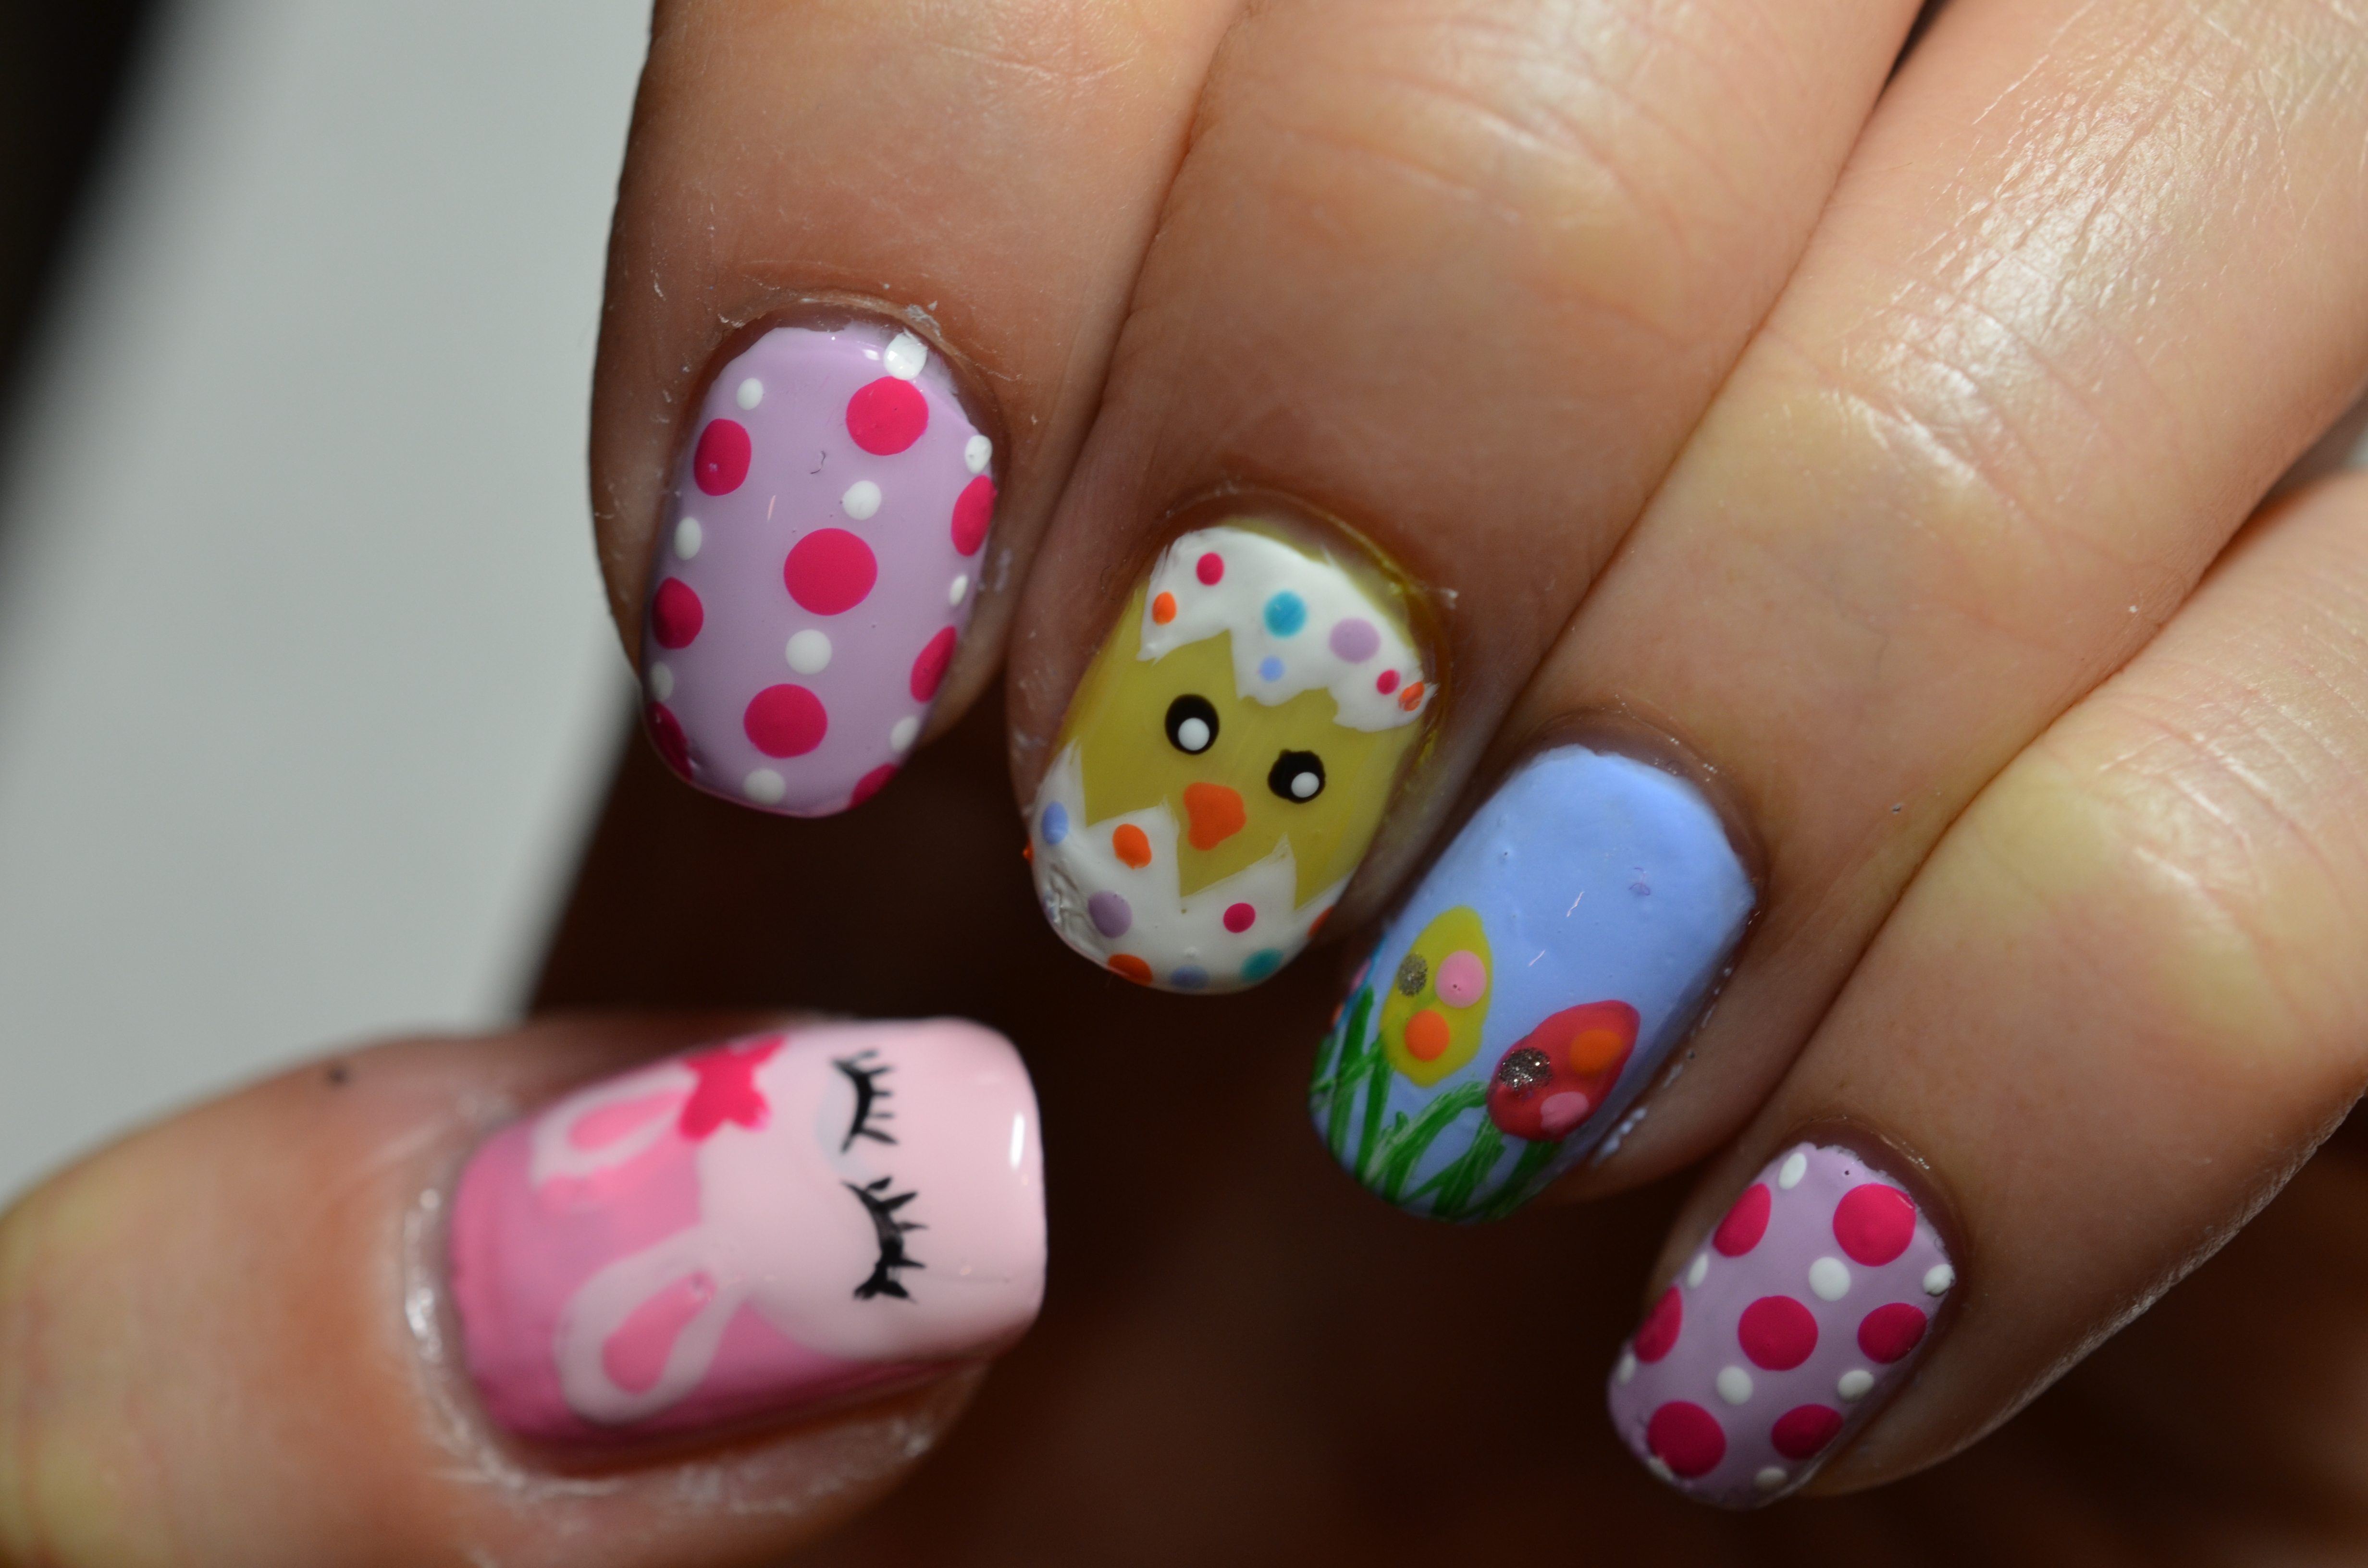
Step 2: Apply 2 coats of Pink (Pink Cadillaquer by Sally Hansen Miracle Gel) on thumb; apply 2 coats of light purple (It’s Hippo to be Square by Sephora by OPI) on index and pinky; apply 2 coats of yellow (IM Beauty by Sephora by OPI) on middle finger and apply 2 coats of light blue (Bikini so Teeny by Essie) on ring finger.
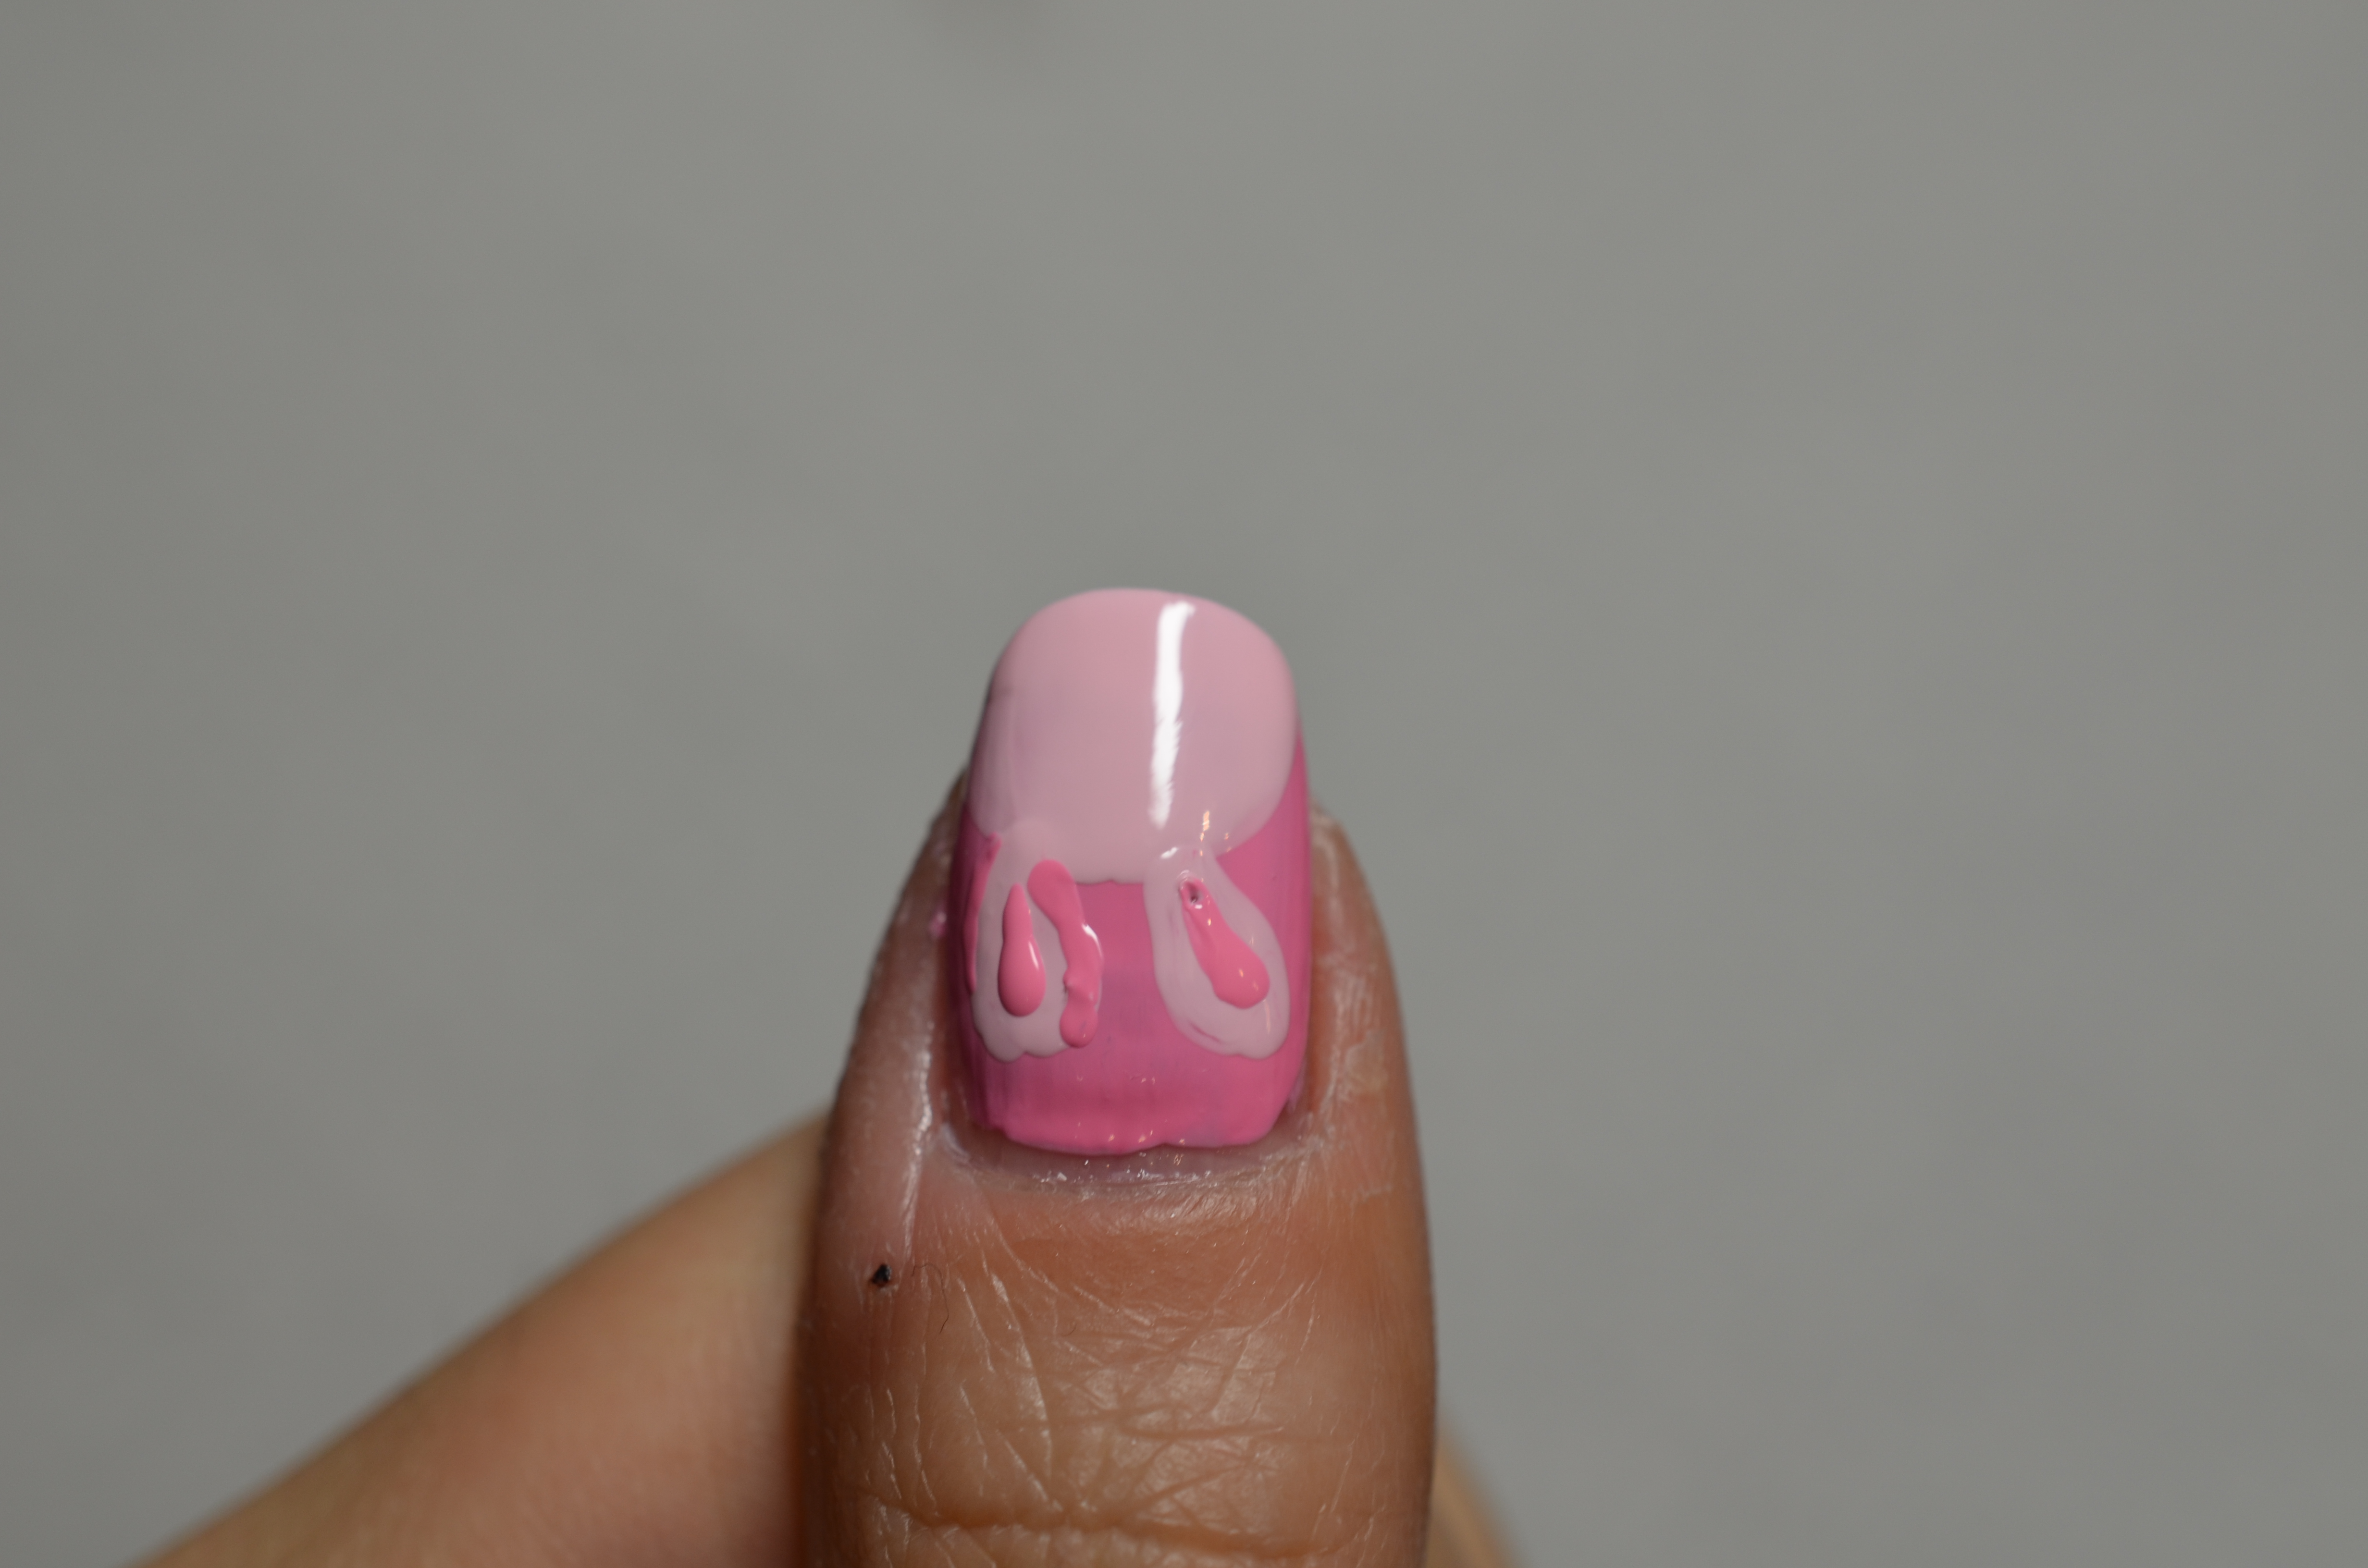
Step 3: For the thumb, use a light pink (Fiji by Essie) to draw a half circle to create the bunny face and use a large dotting tool to create bunny ears then put the darker pink (Pink Cadillaquer by Sally Hansen Miracle Gel) for the middle of the bunny ears.
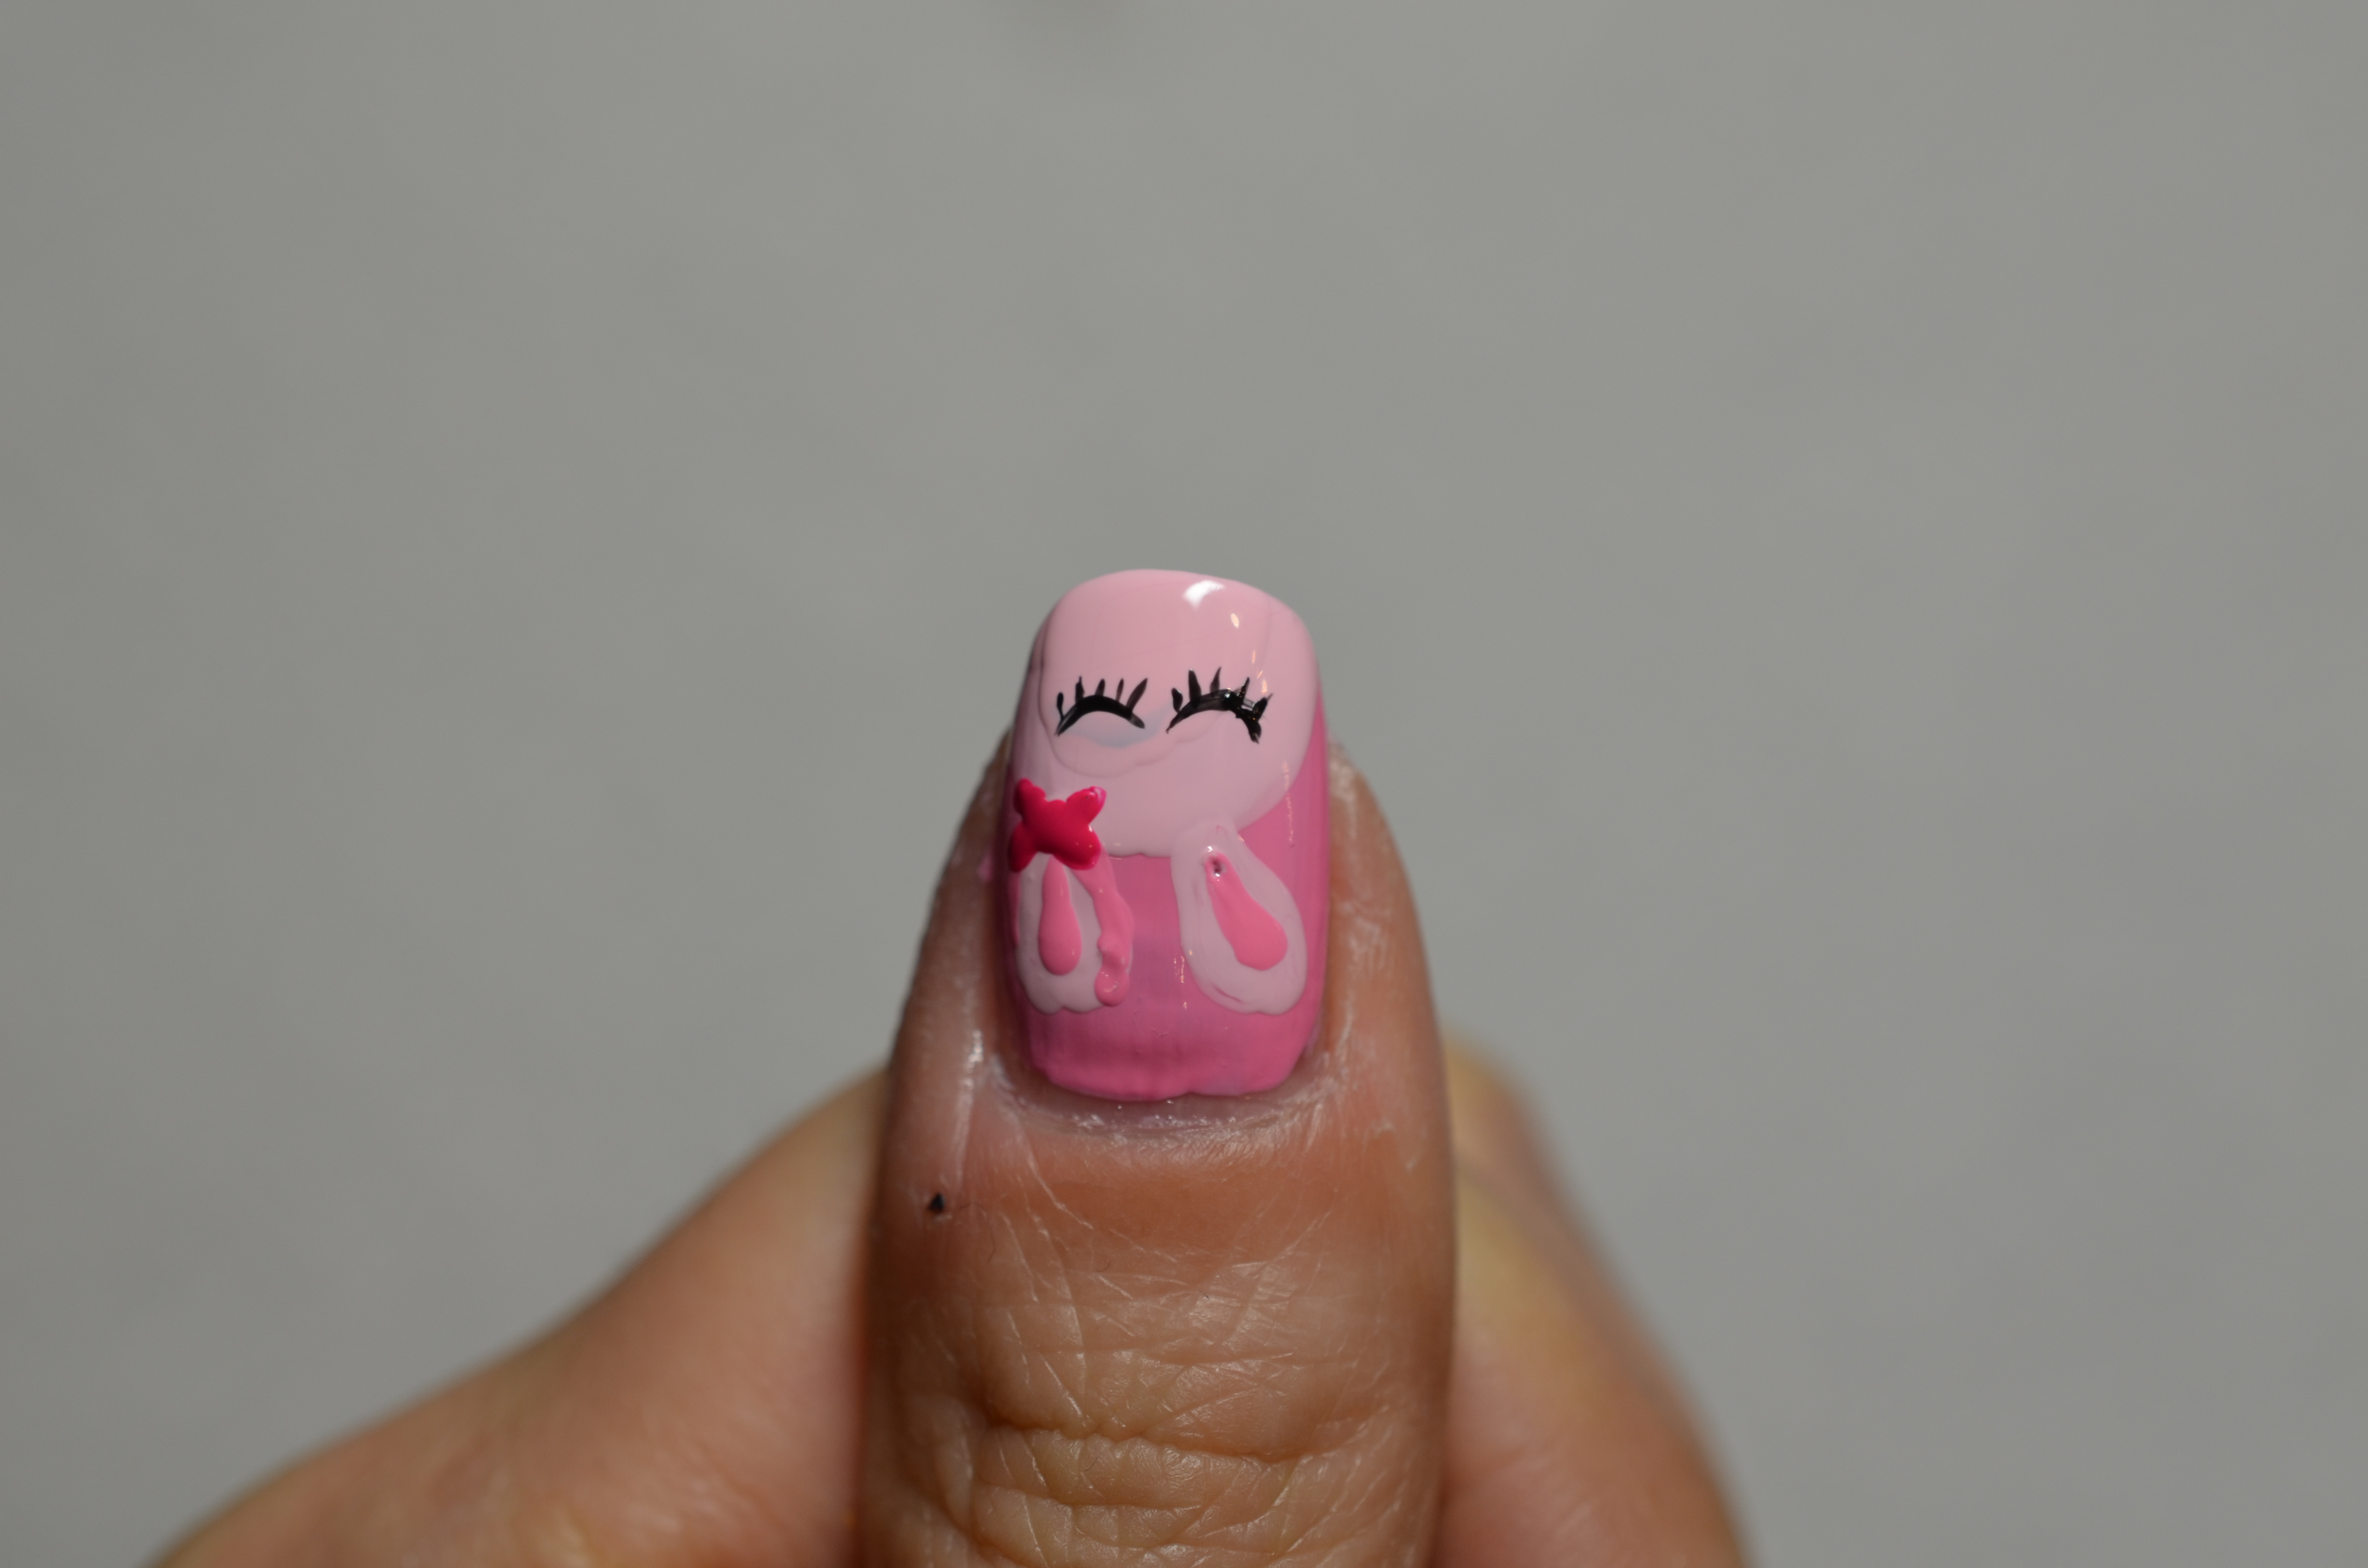
Step 4: Dip a toothpick into black nail polish (Black Out by Sally Hansen) to draw the eyes of the bunny with lashes.

Step 5: Use a magenta nail polish (Crazy for Chic by L’Oreal) to draw the bow. To create a box, first dot a circle in the middle then draw two triangles to either sides.
Step 6: For index and pinky, use magenta and white nail polish to put polka dots onto both fingers.

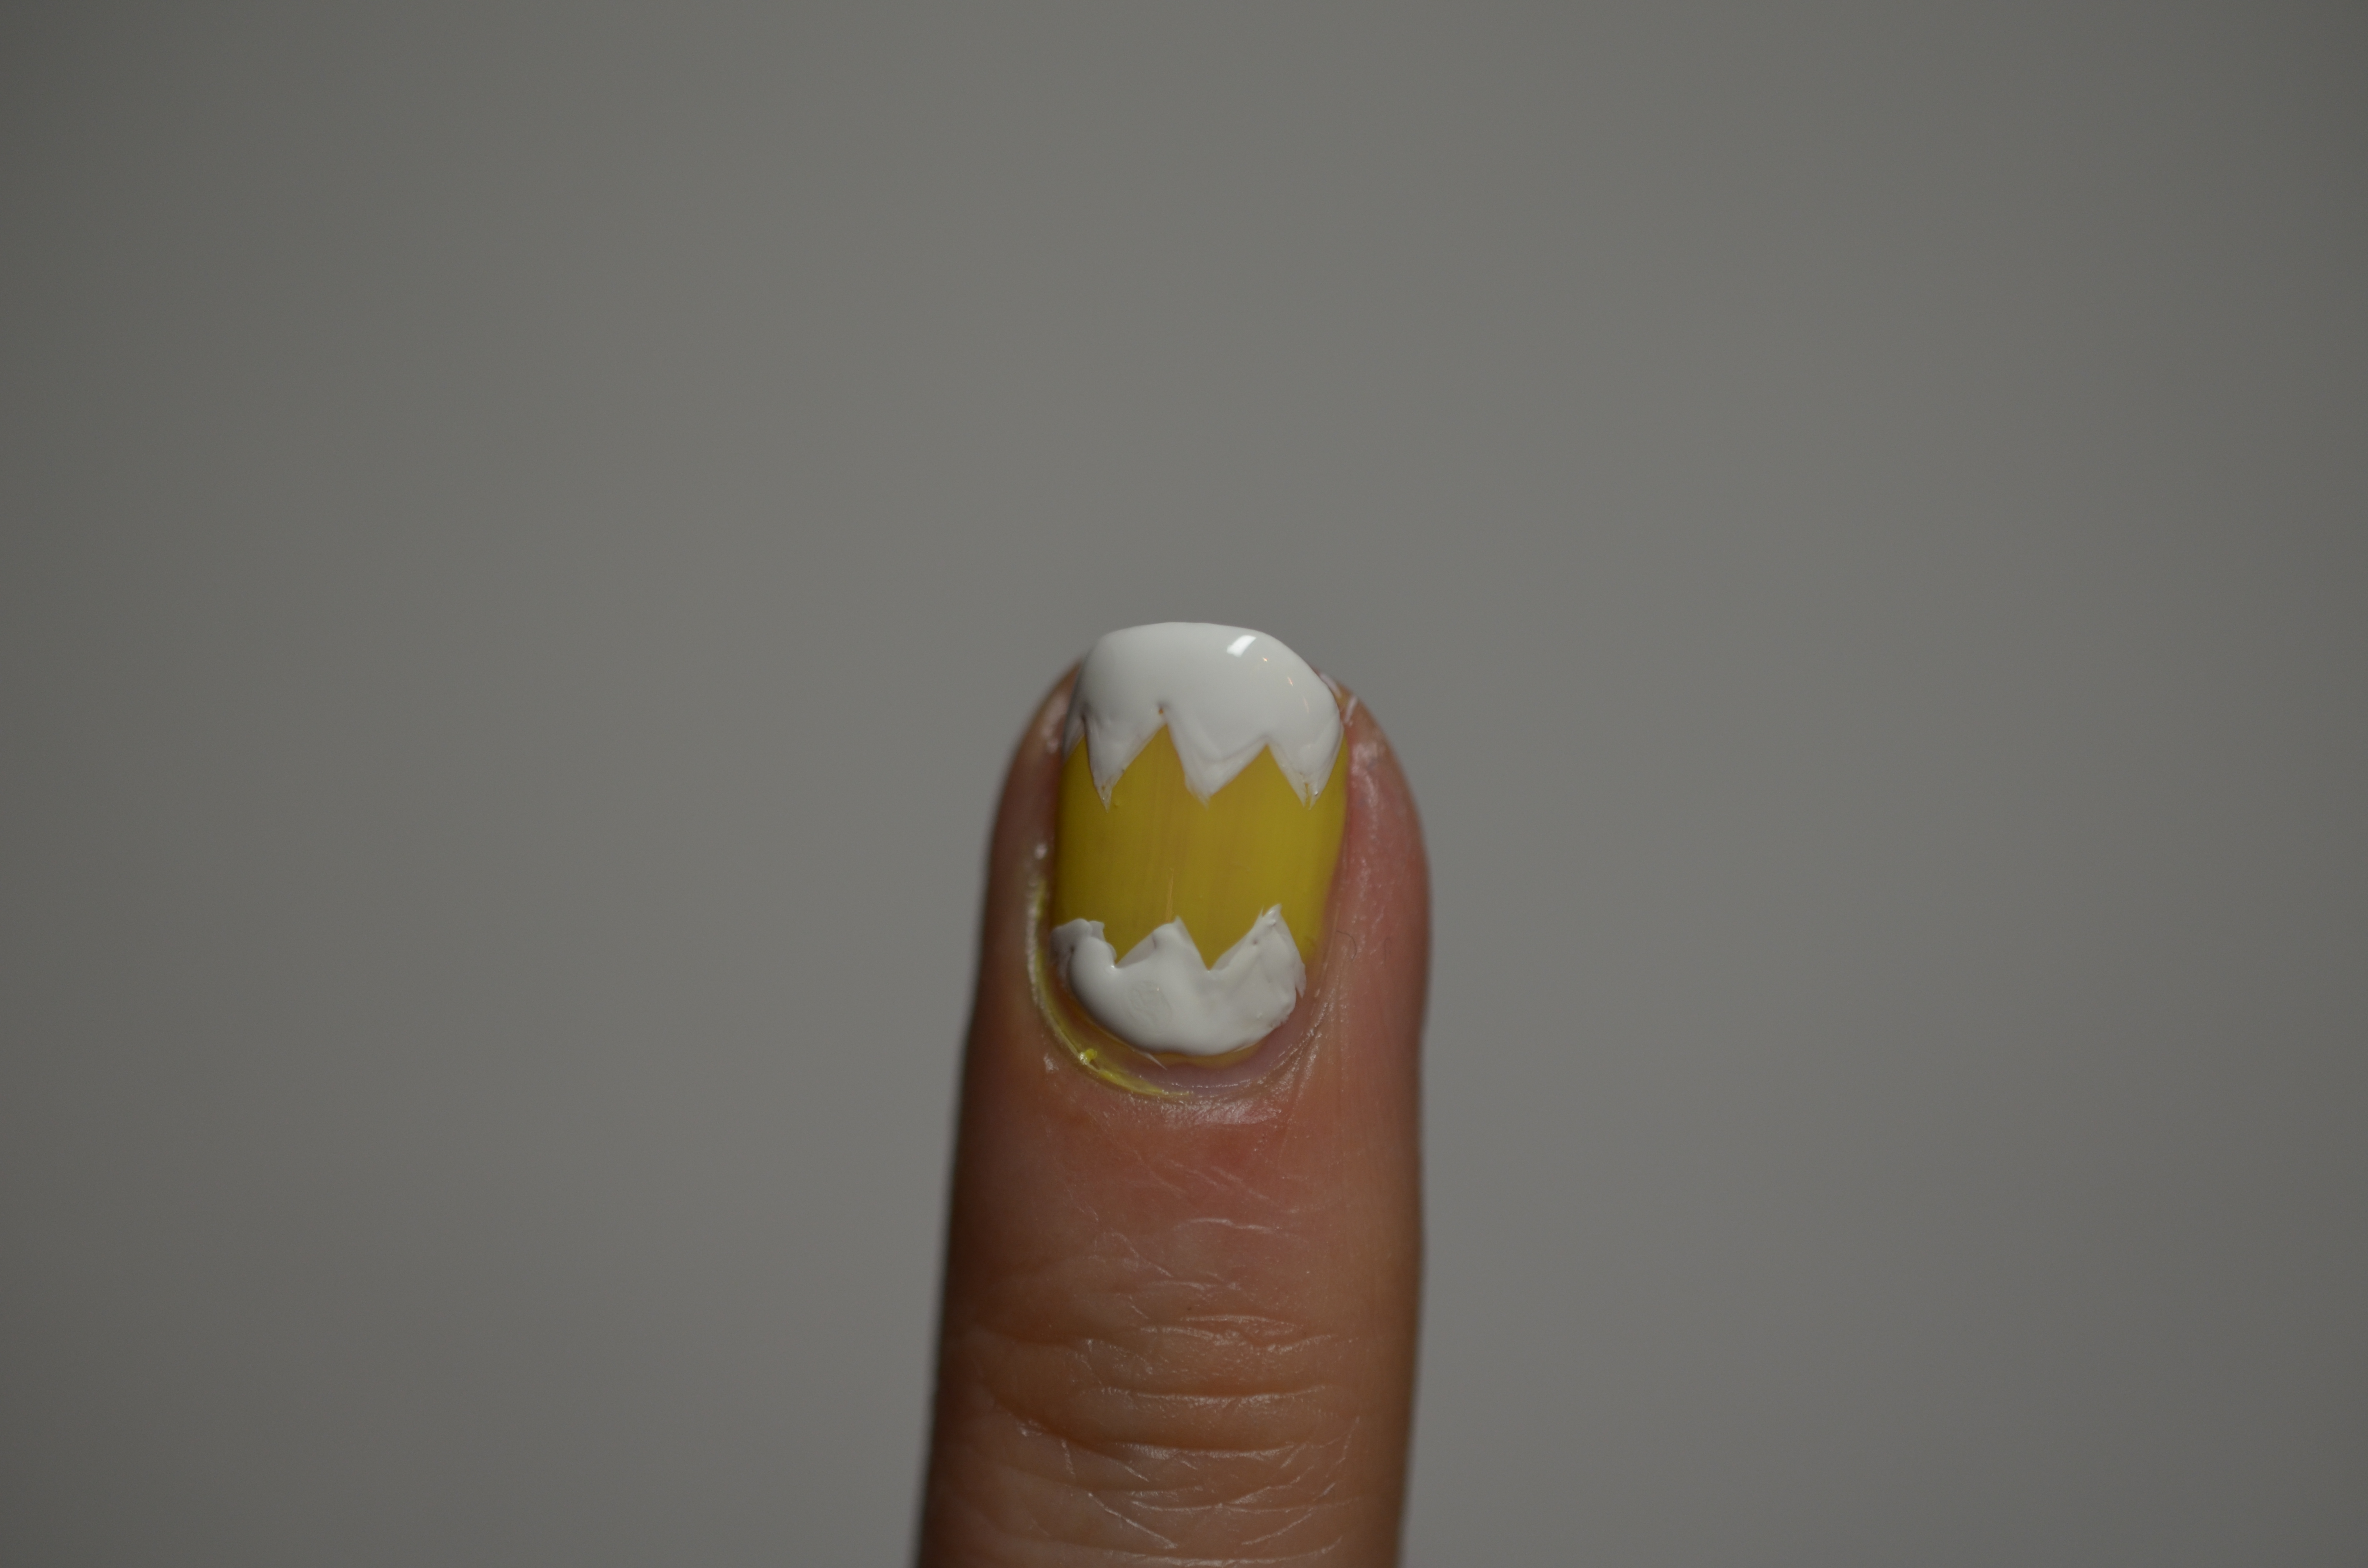
Step 7: For the middle finger, dip the toothpick into white nail polish (White On by Sally Hansen) then draw some zig-zag lines to create the cracks the egg. Once it is outlines, fill in the empty space with white nail polish.
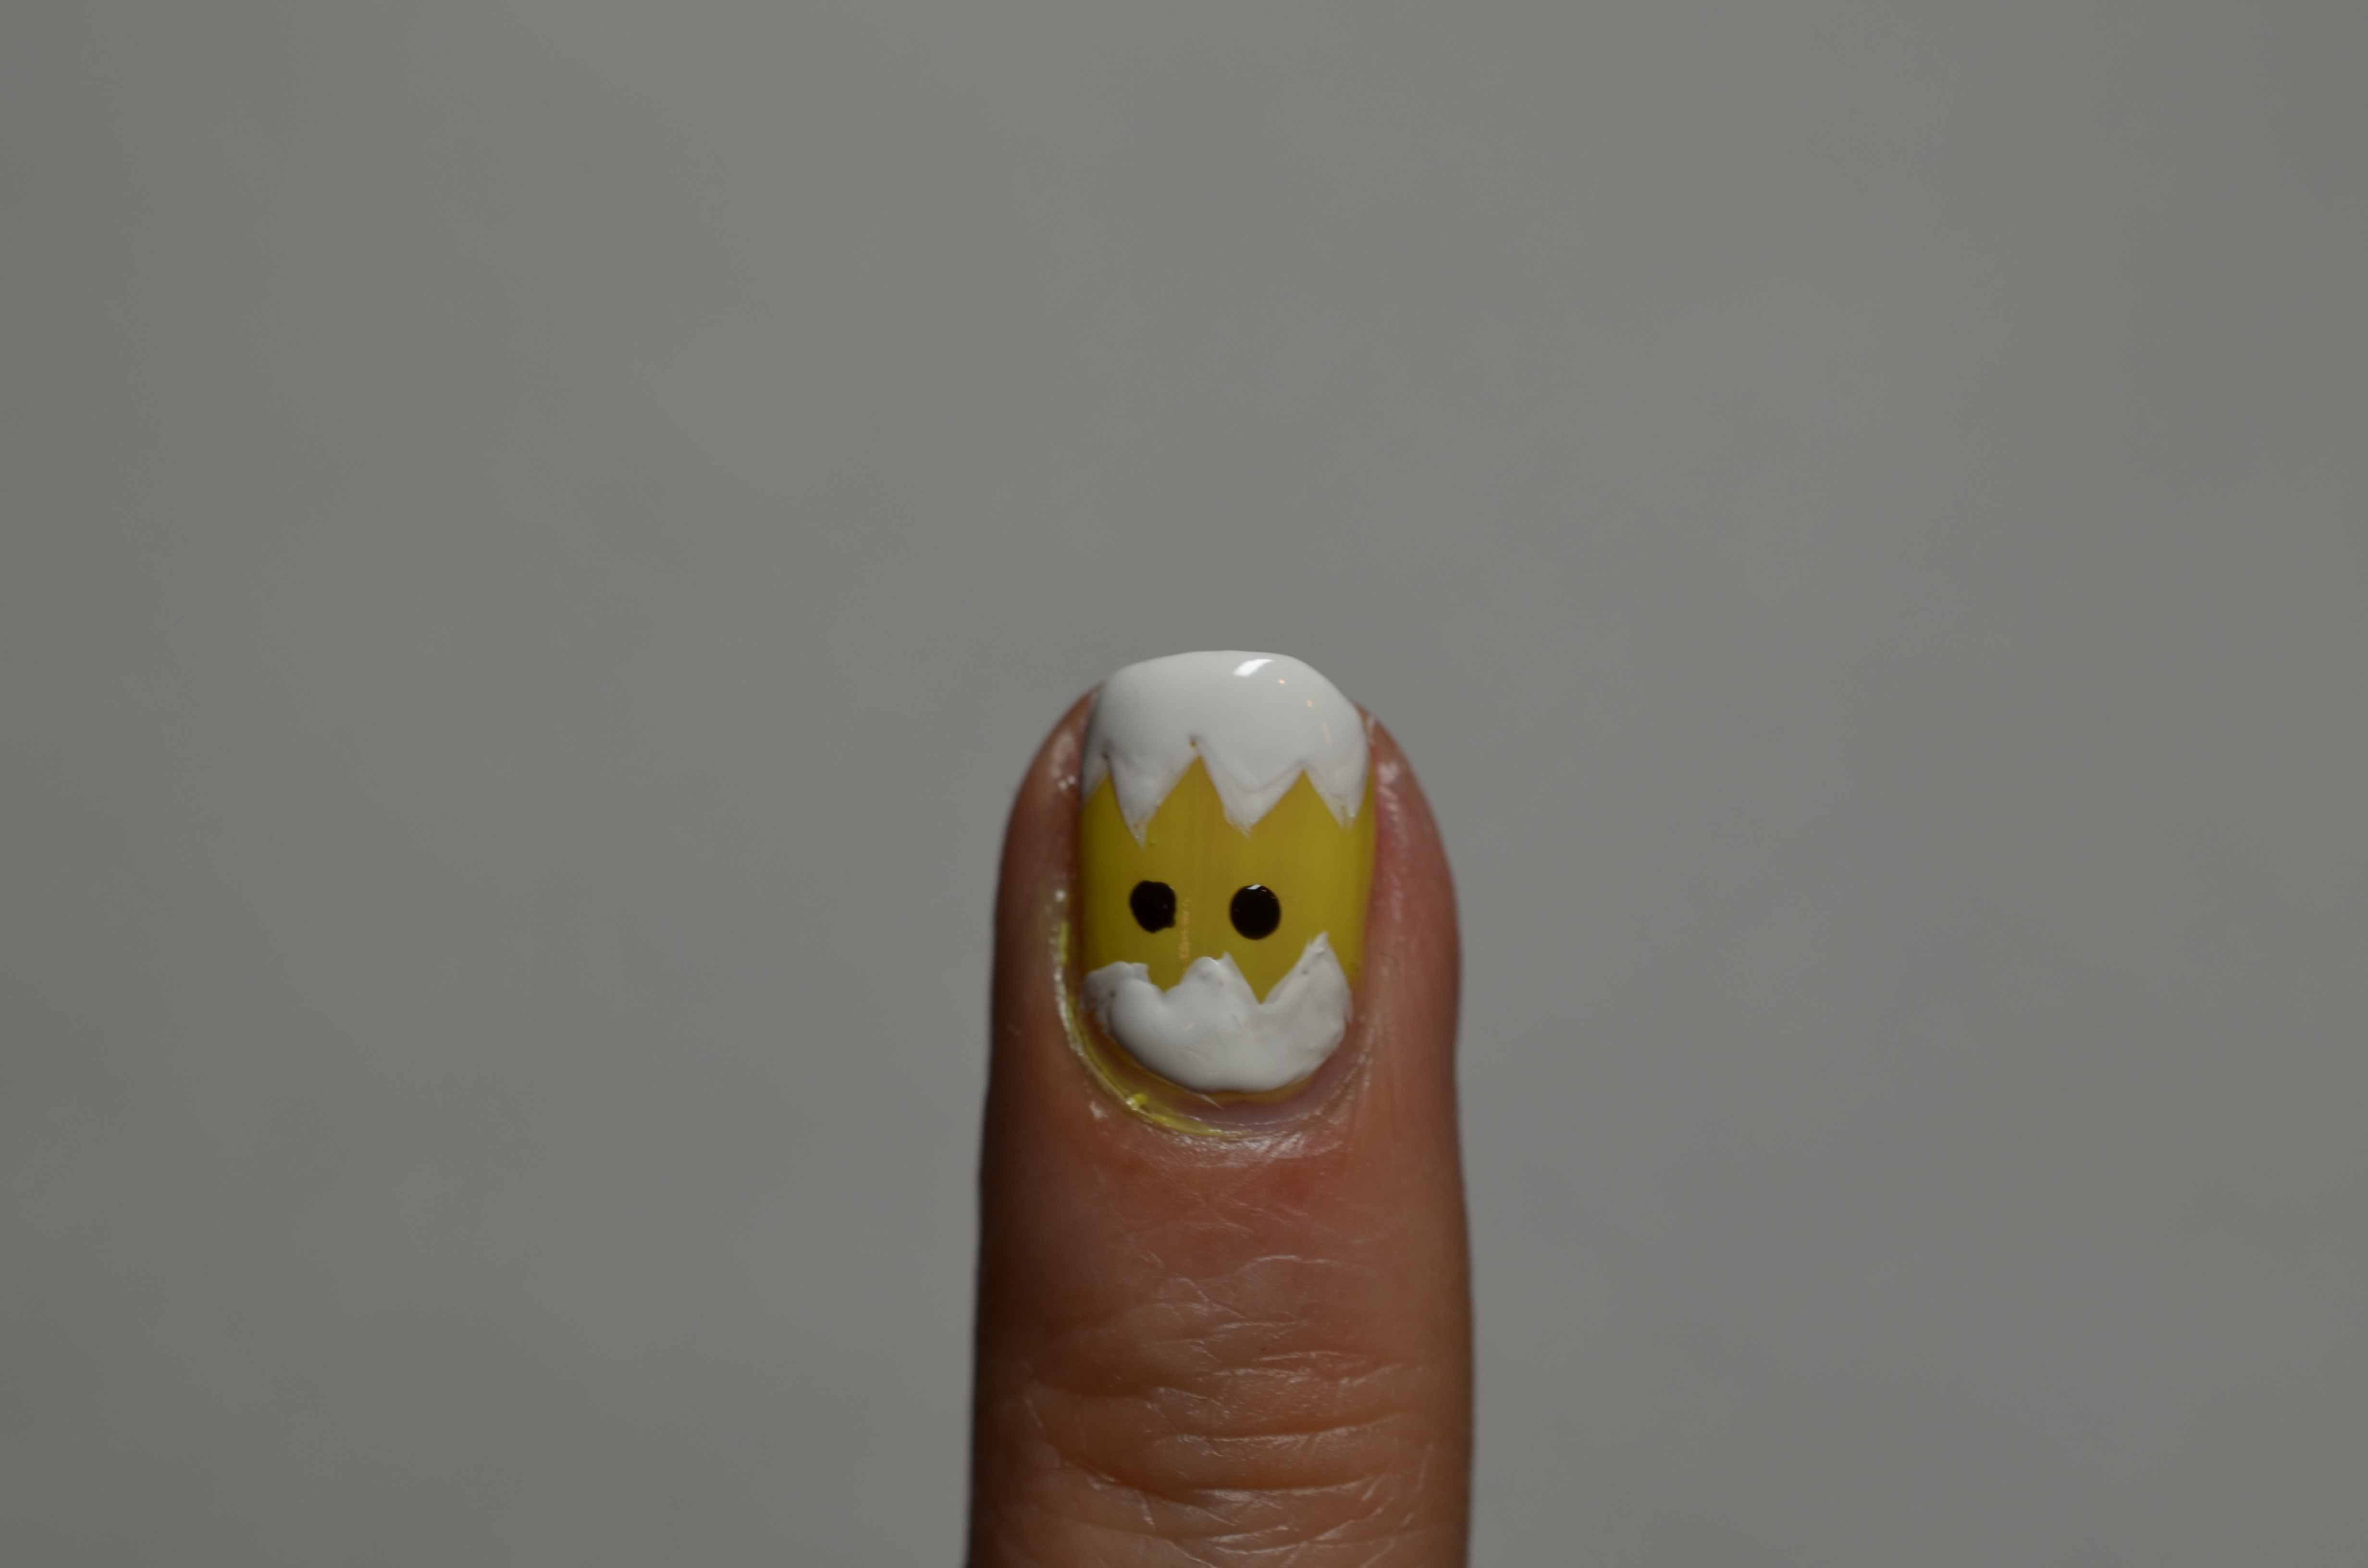
Step 8: Use the smallest dotting tool to dip into black nail polish (Black Out by Sally Hansen) to create the eyes of the chick. Then dot the middle of the eye with white (White On by Sally Hansen). After that draw an orange (Sun Kissed by Sally Hansen) triangle as the mouth. Finally, put random colour dots onto the white part of the egg.

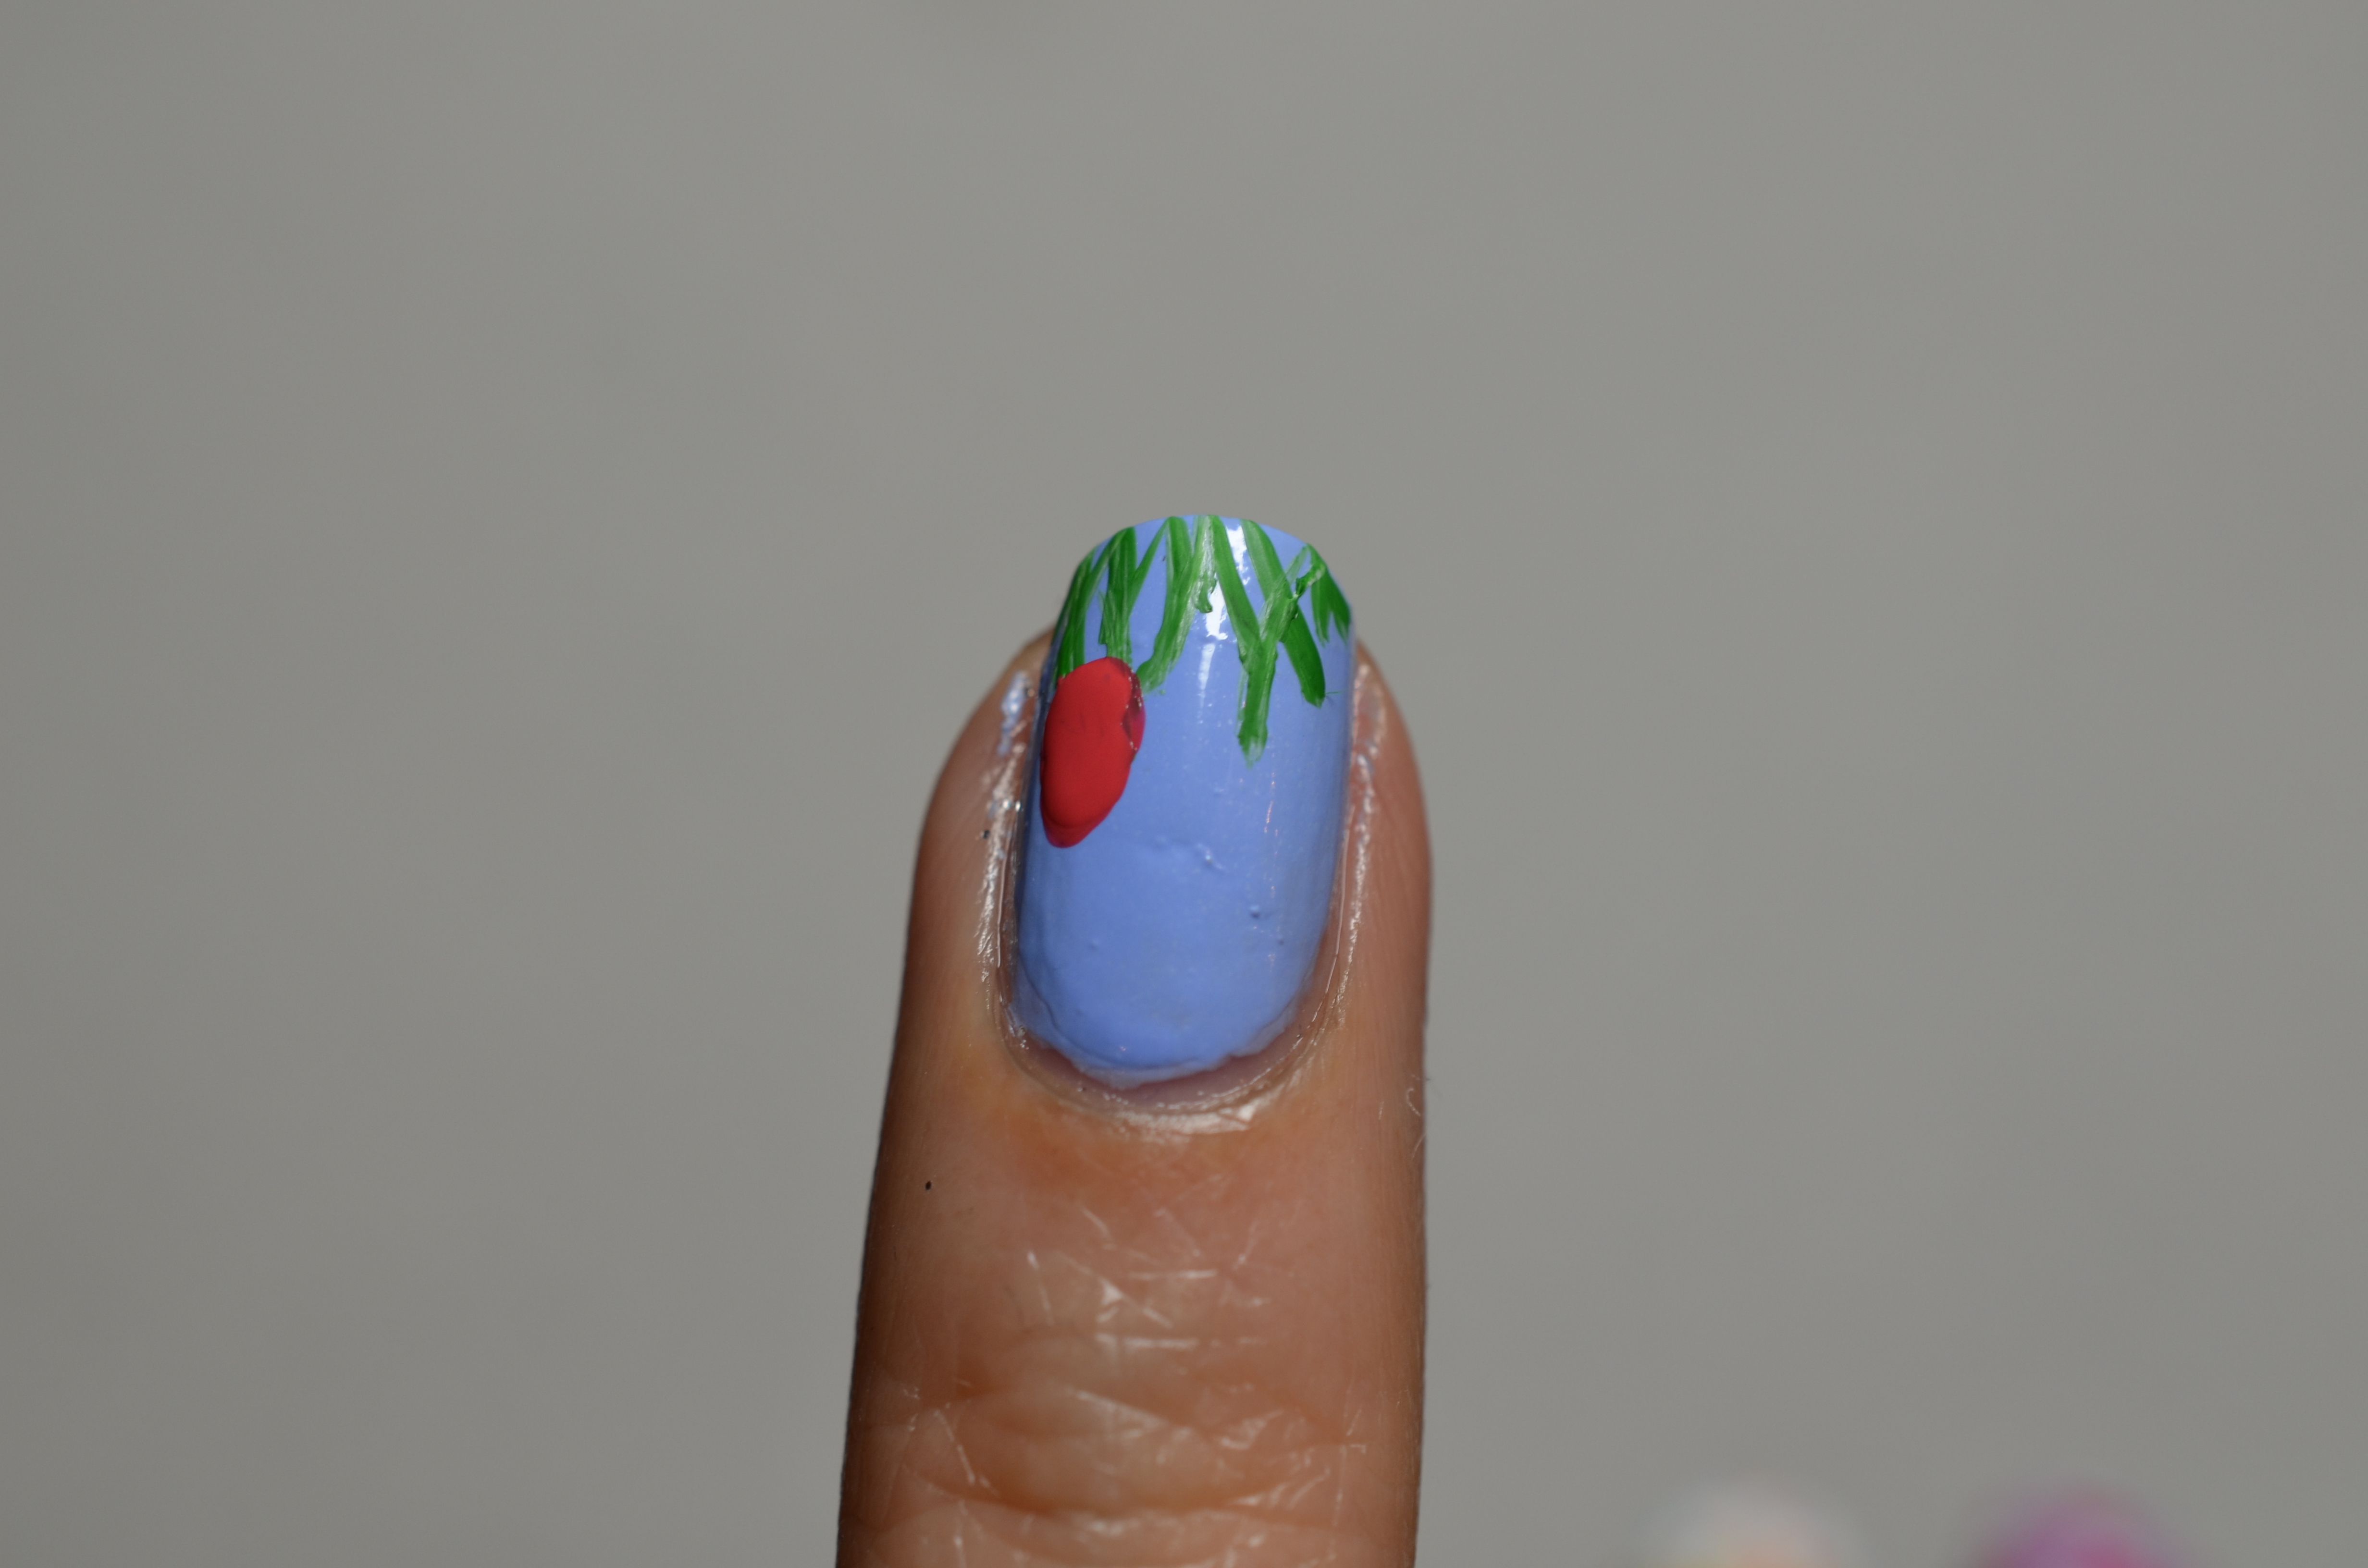
Step 9: Dip toothpick into green nail polish to create grass. Then use the largest dotting tool to create an oval shape as eggs on the grass. Then random put dots onto the egg to create design.

Step 10: Apply your favourite top coat (Seche Vite) to seal in your design and add a beautiful shine.
Then you are DONE!! All the designs are super simple and cute, so please give it a try. Share your re-creation with me on my GlitterMommy Facebook Page or #GlitterMommyNailArt on Instagram. Also, I would love to know what you guys are up to during Easter, so please comment below or on my Facebook Page. As for us, we will be doing our first egg hunt with all 3 of the kids this year and I think it’s going to be interesting.
Good luck and have a wonderful night!!!