Hi my beautiful starlights!!
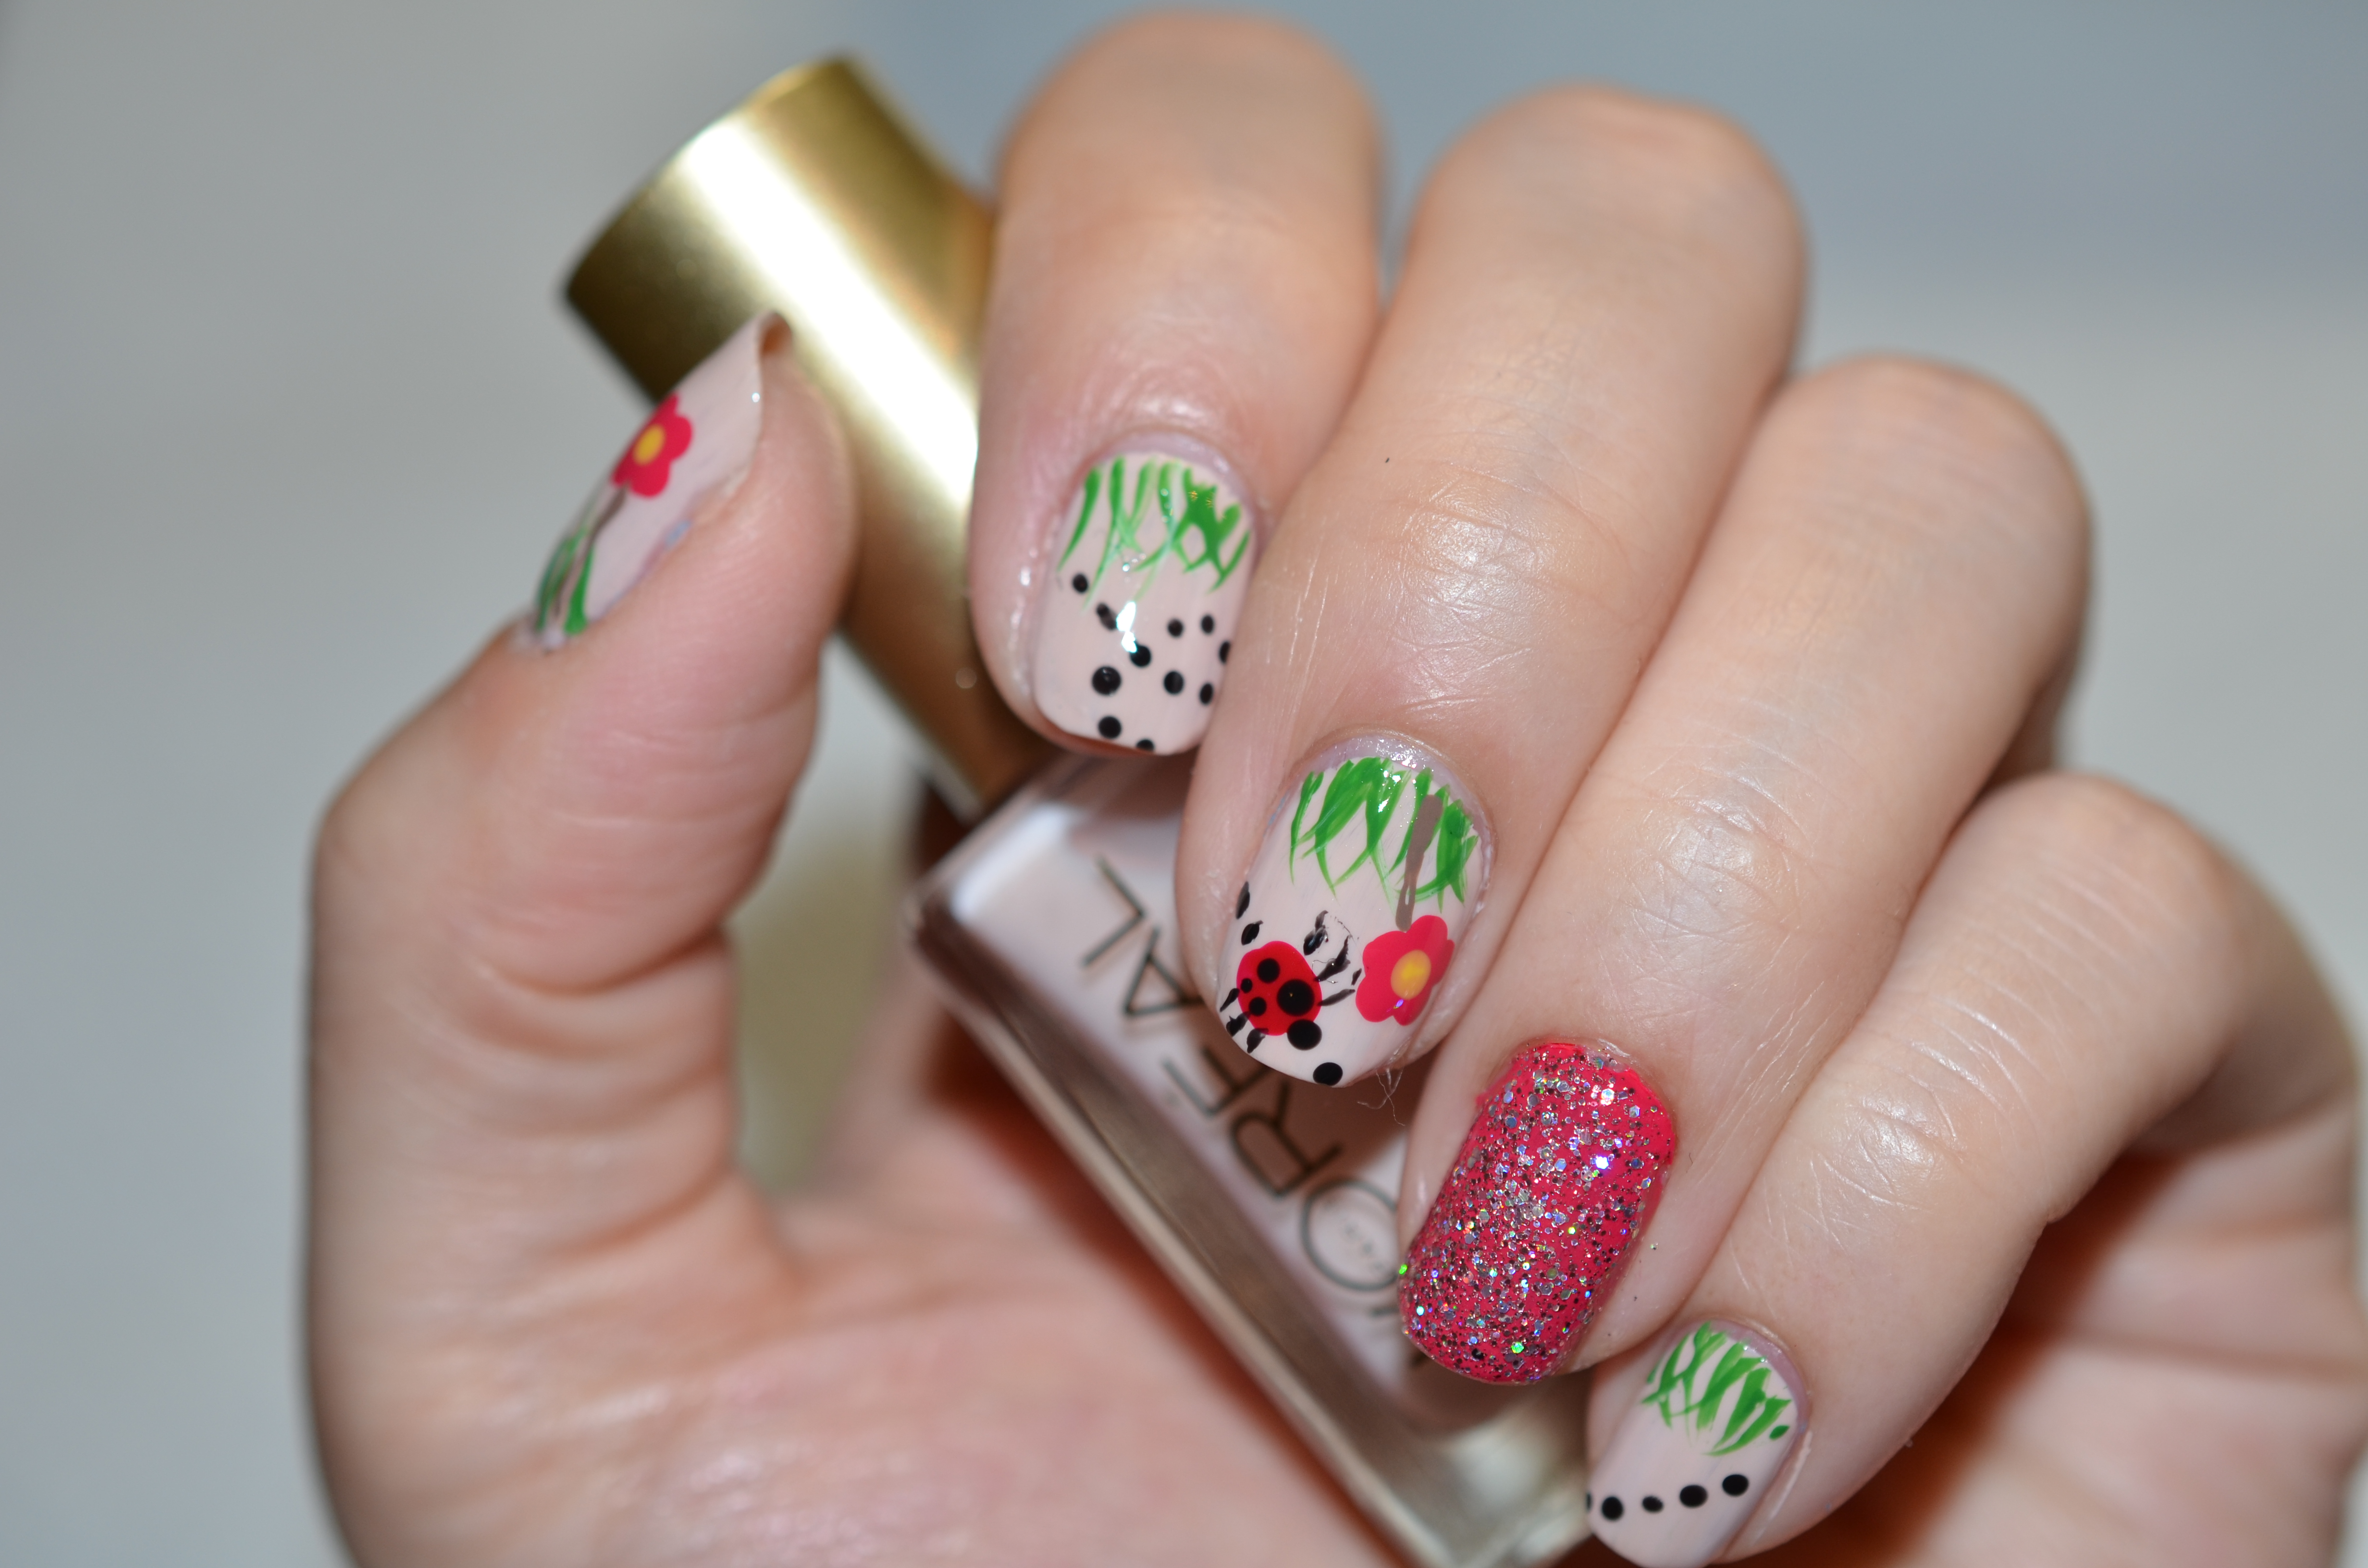
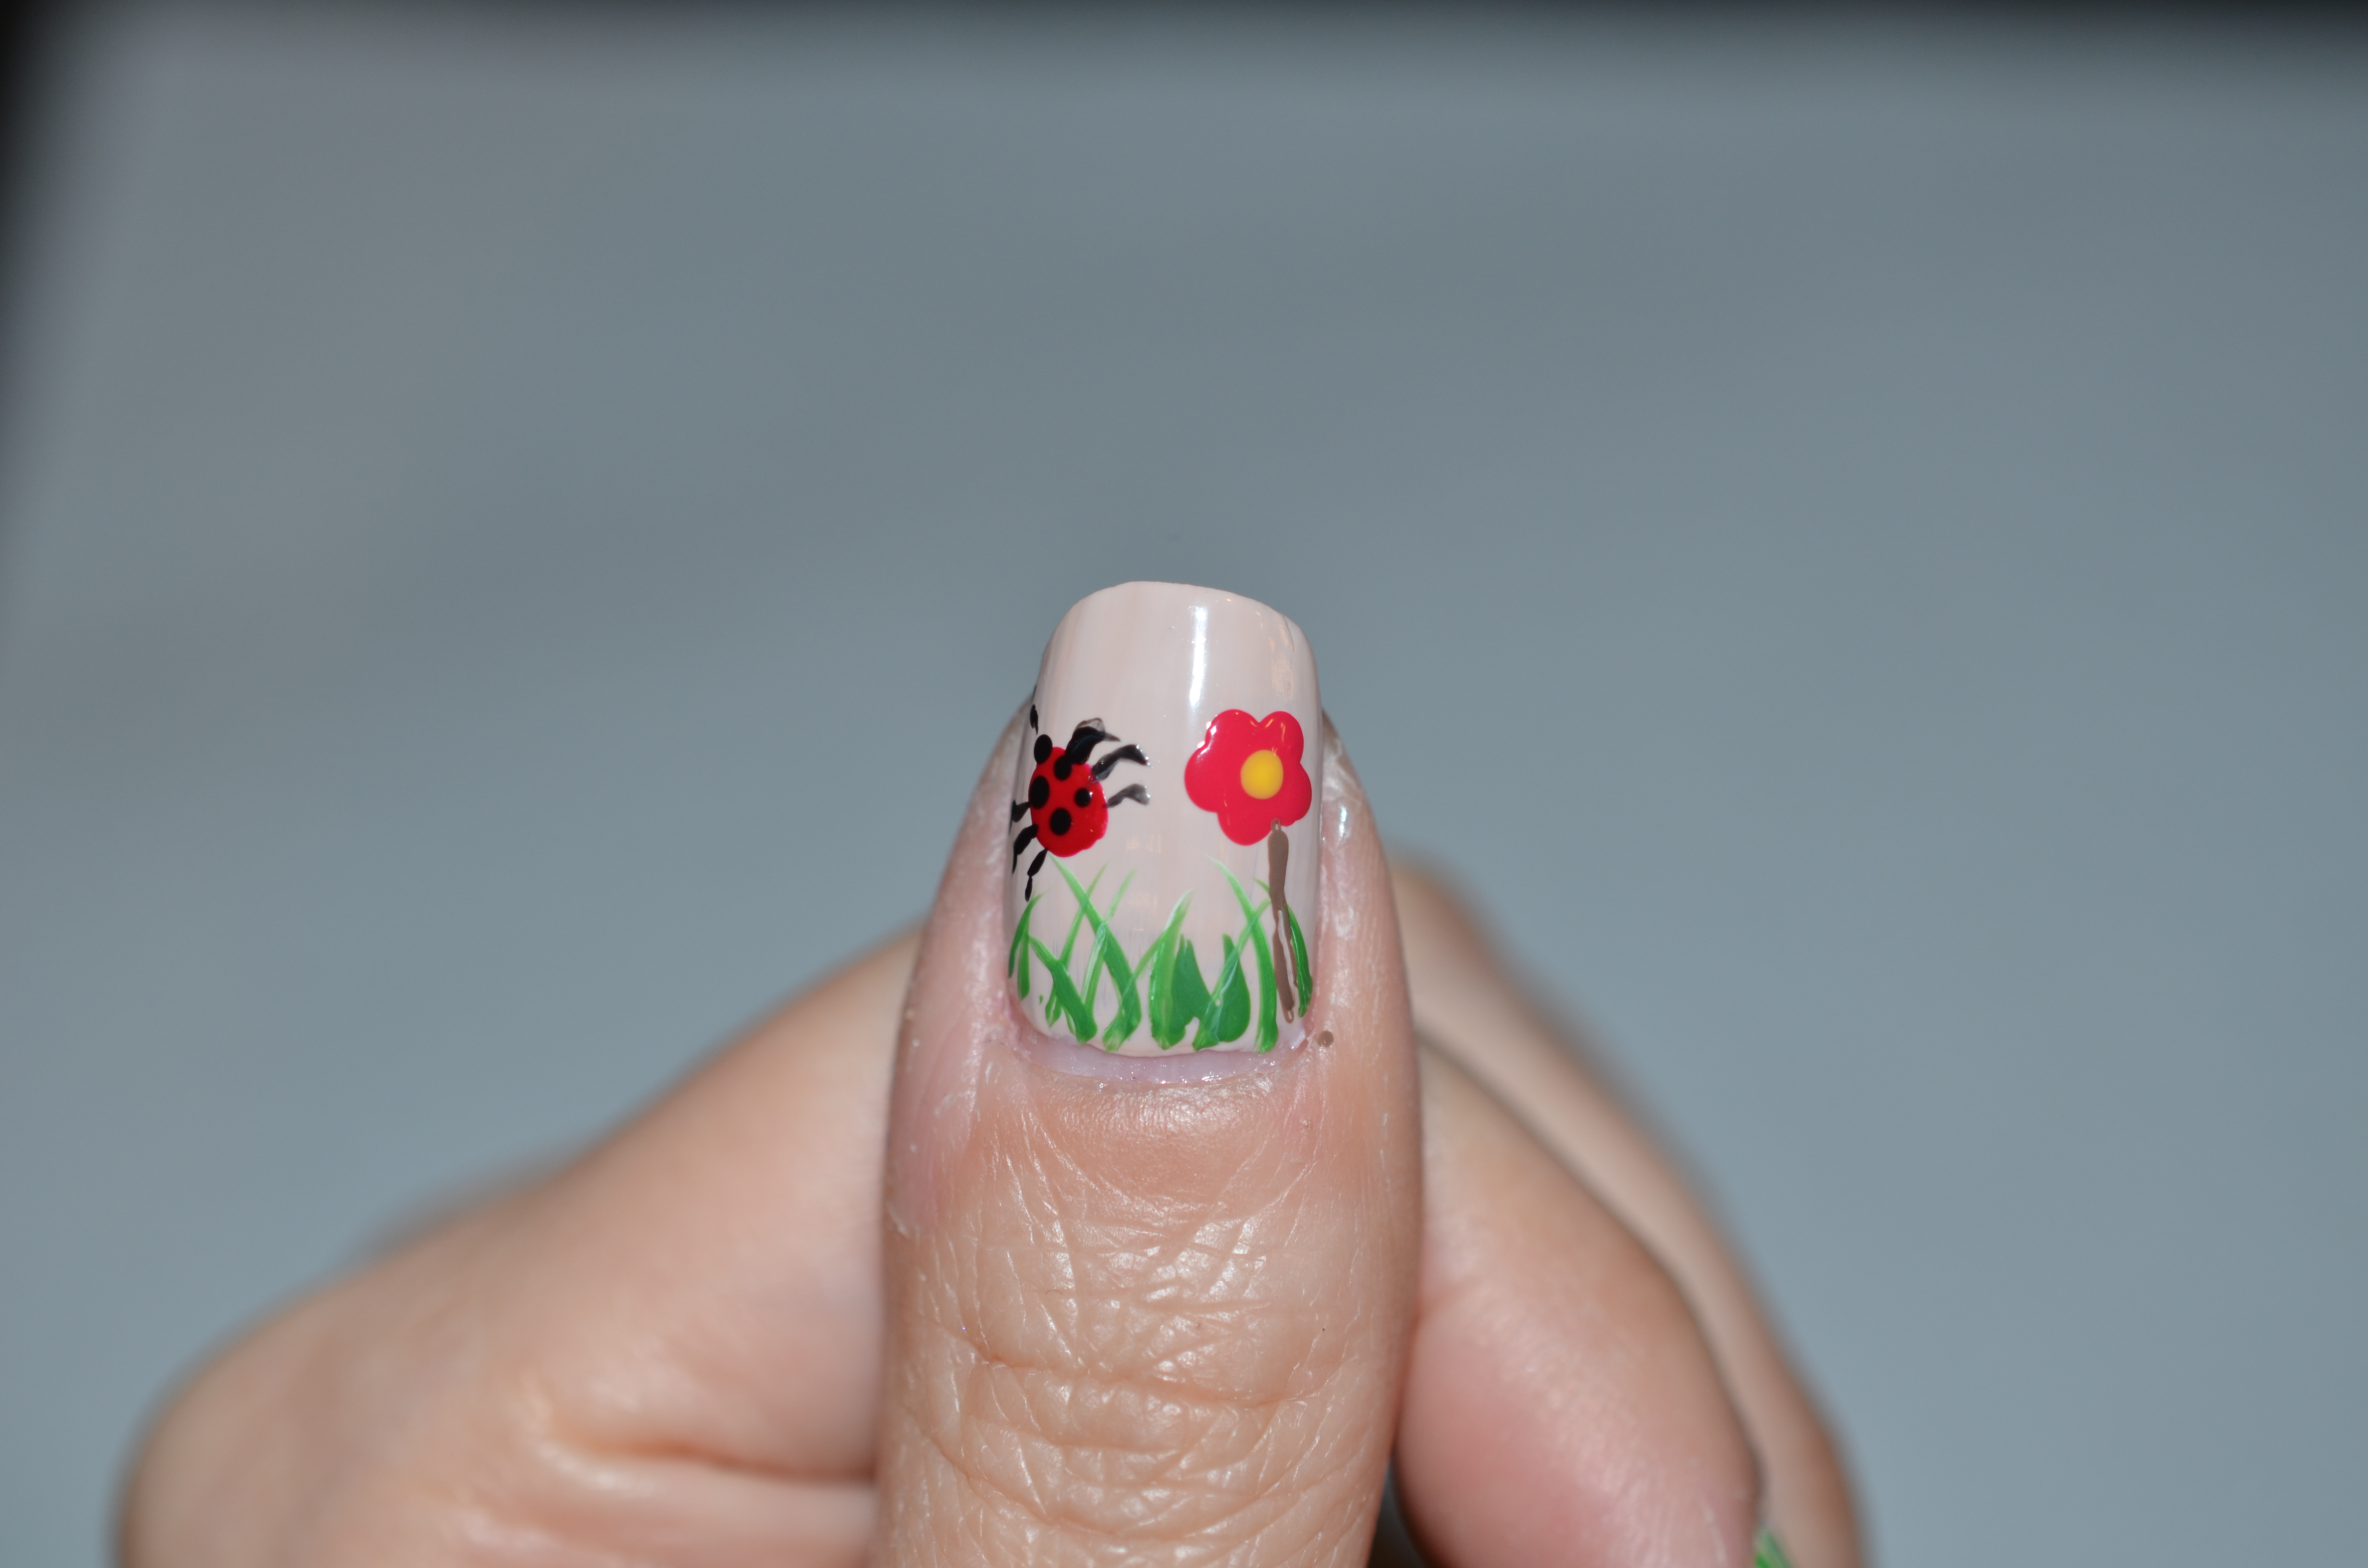
Today, I am going to show you my take of a Spring Garden on nails. I always envision a spring garden is filled with beautiful green grass, flowers, ladybugs and birds and this is exactly what I recreated on my nails. It is super simple like the other tutorials, and all you need is dotting tools and some toothpicks and you are ready to go. Now let’s get started:
Step 1: Apply your favourite base coat (Natural Nail Base Coat by OPI) to protect your natural nail.
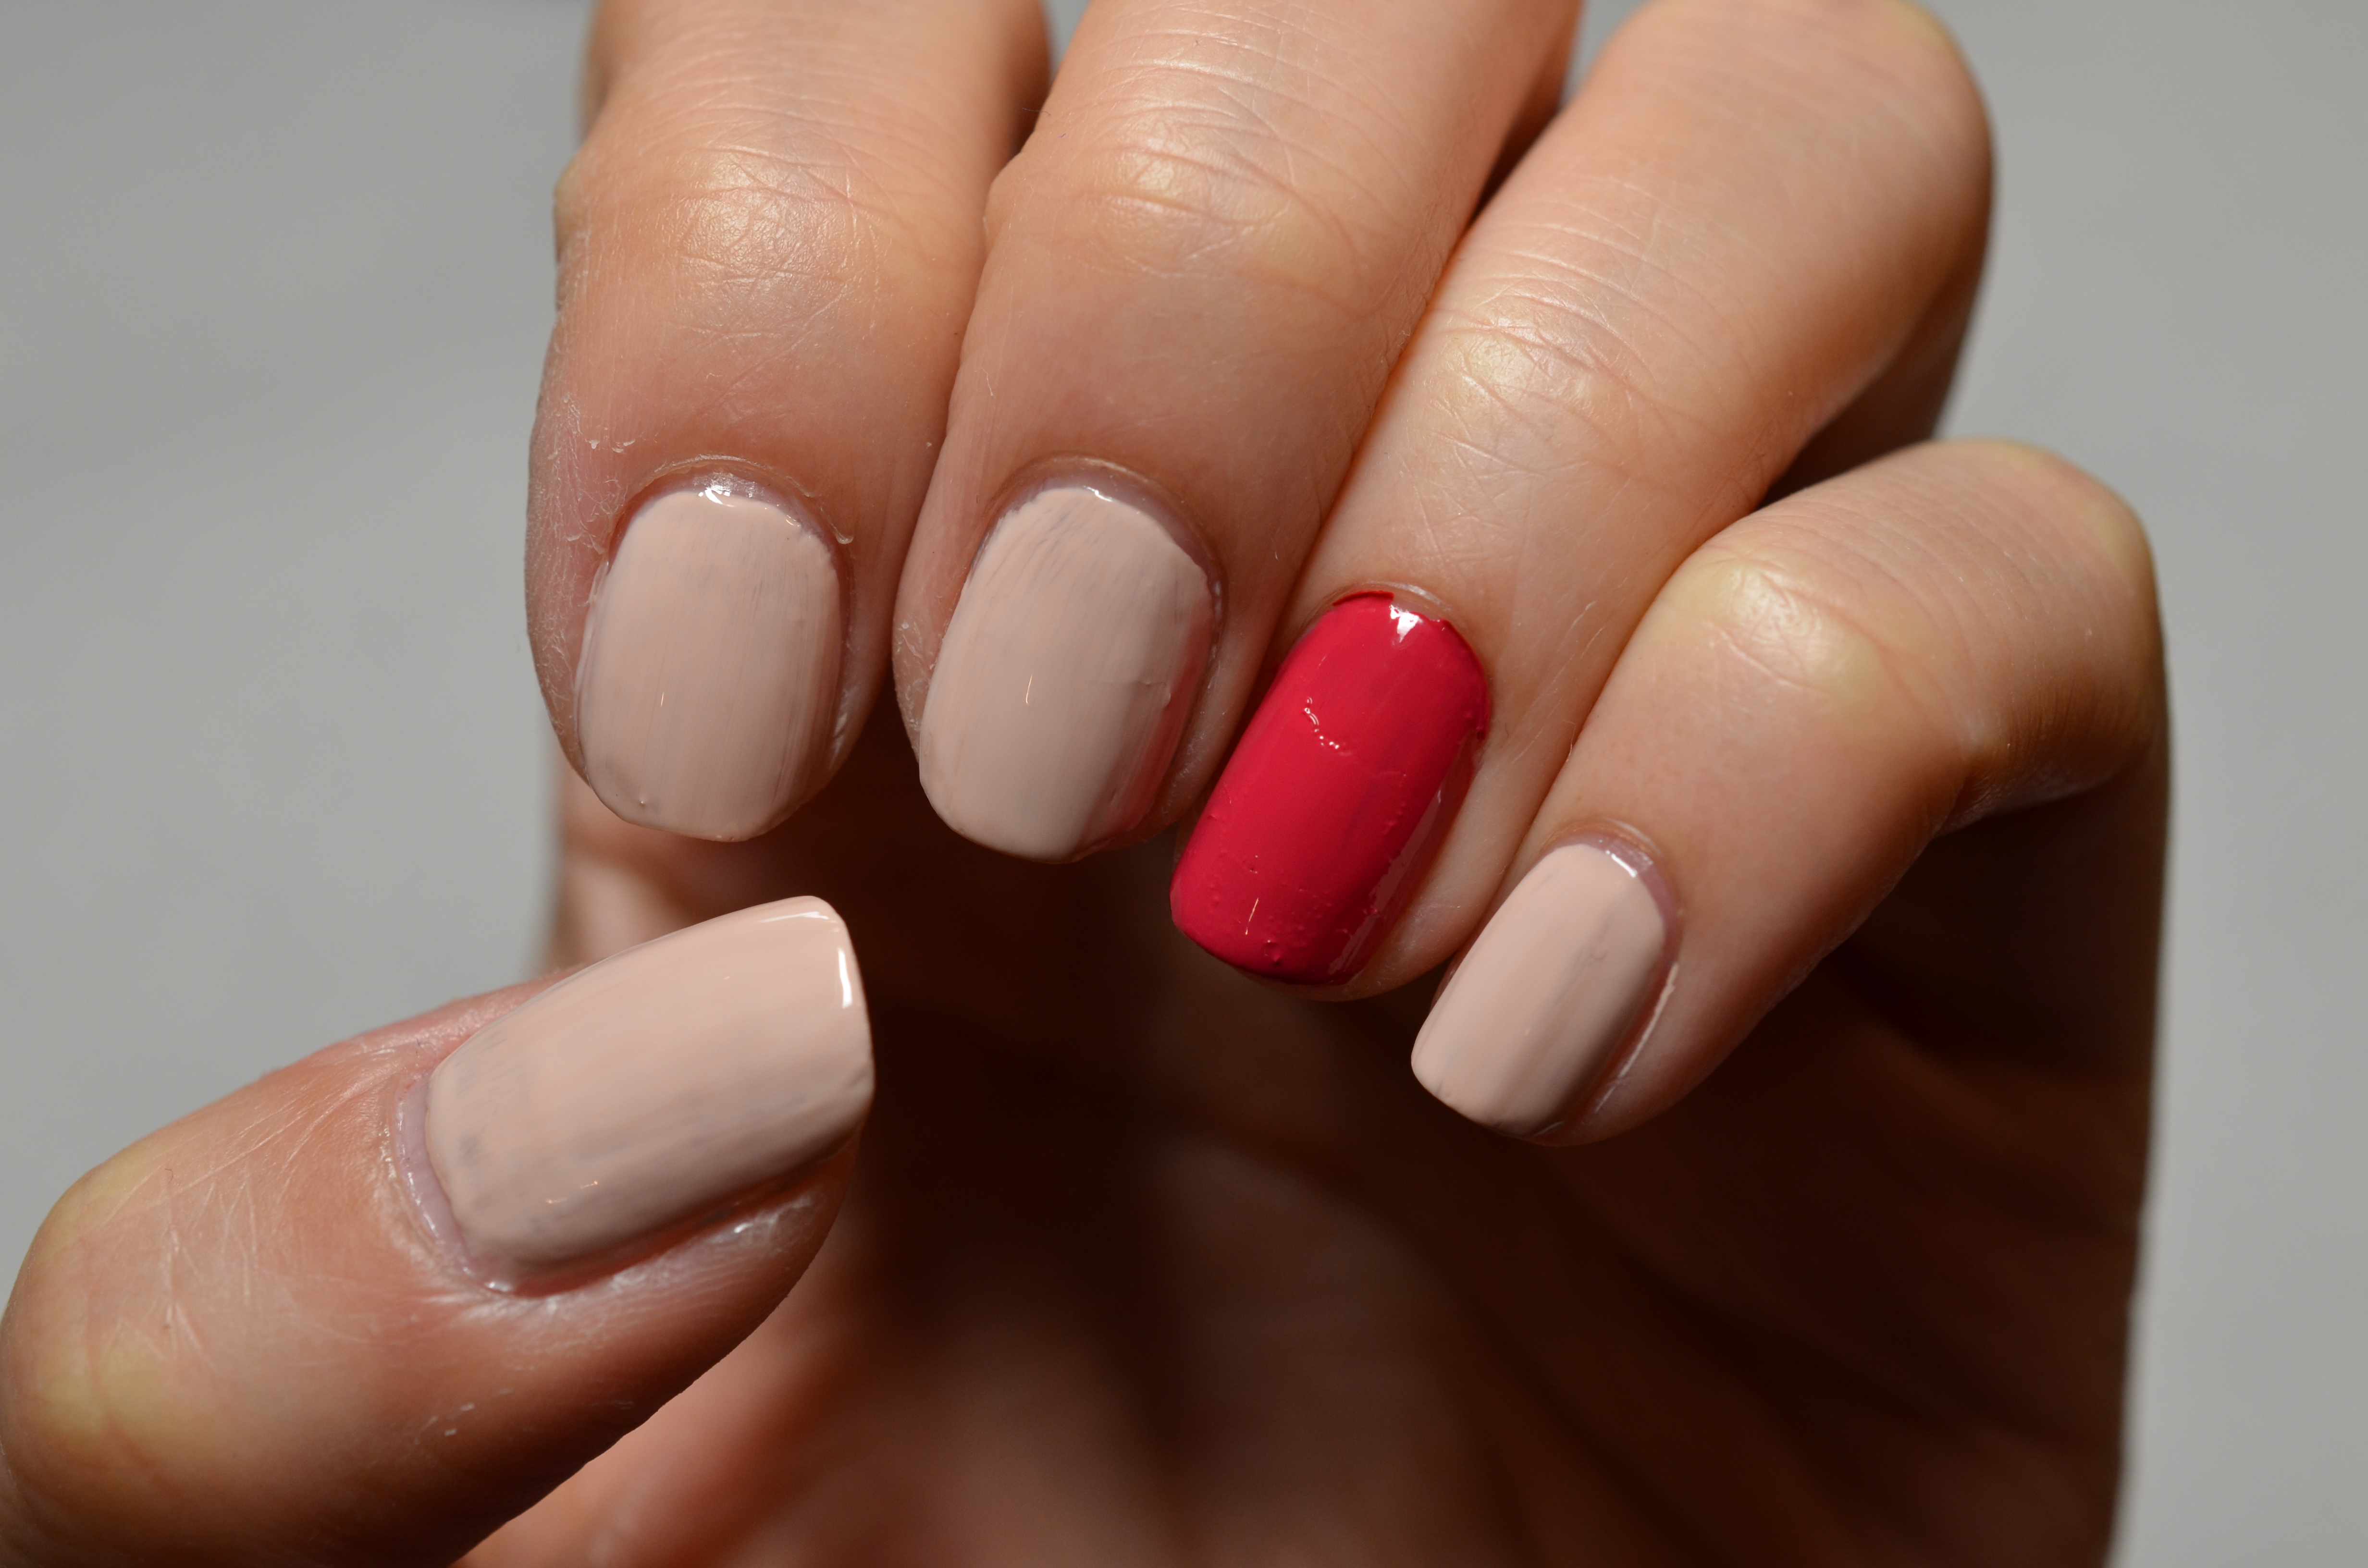
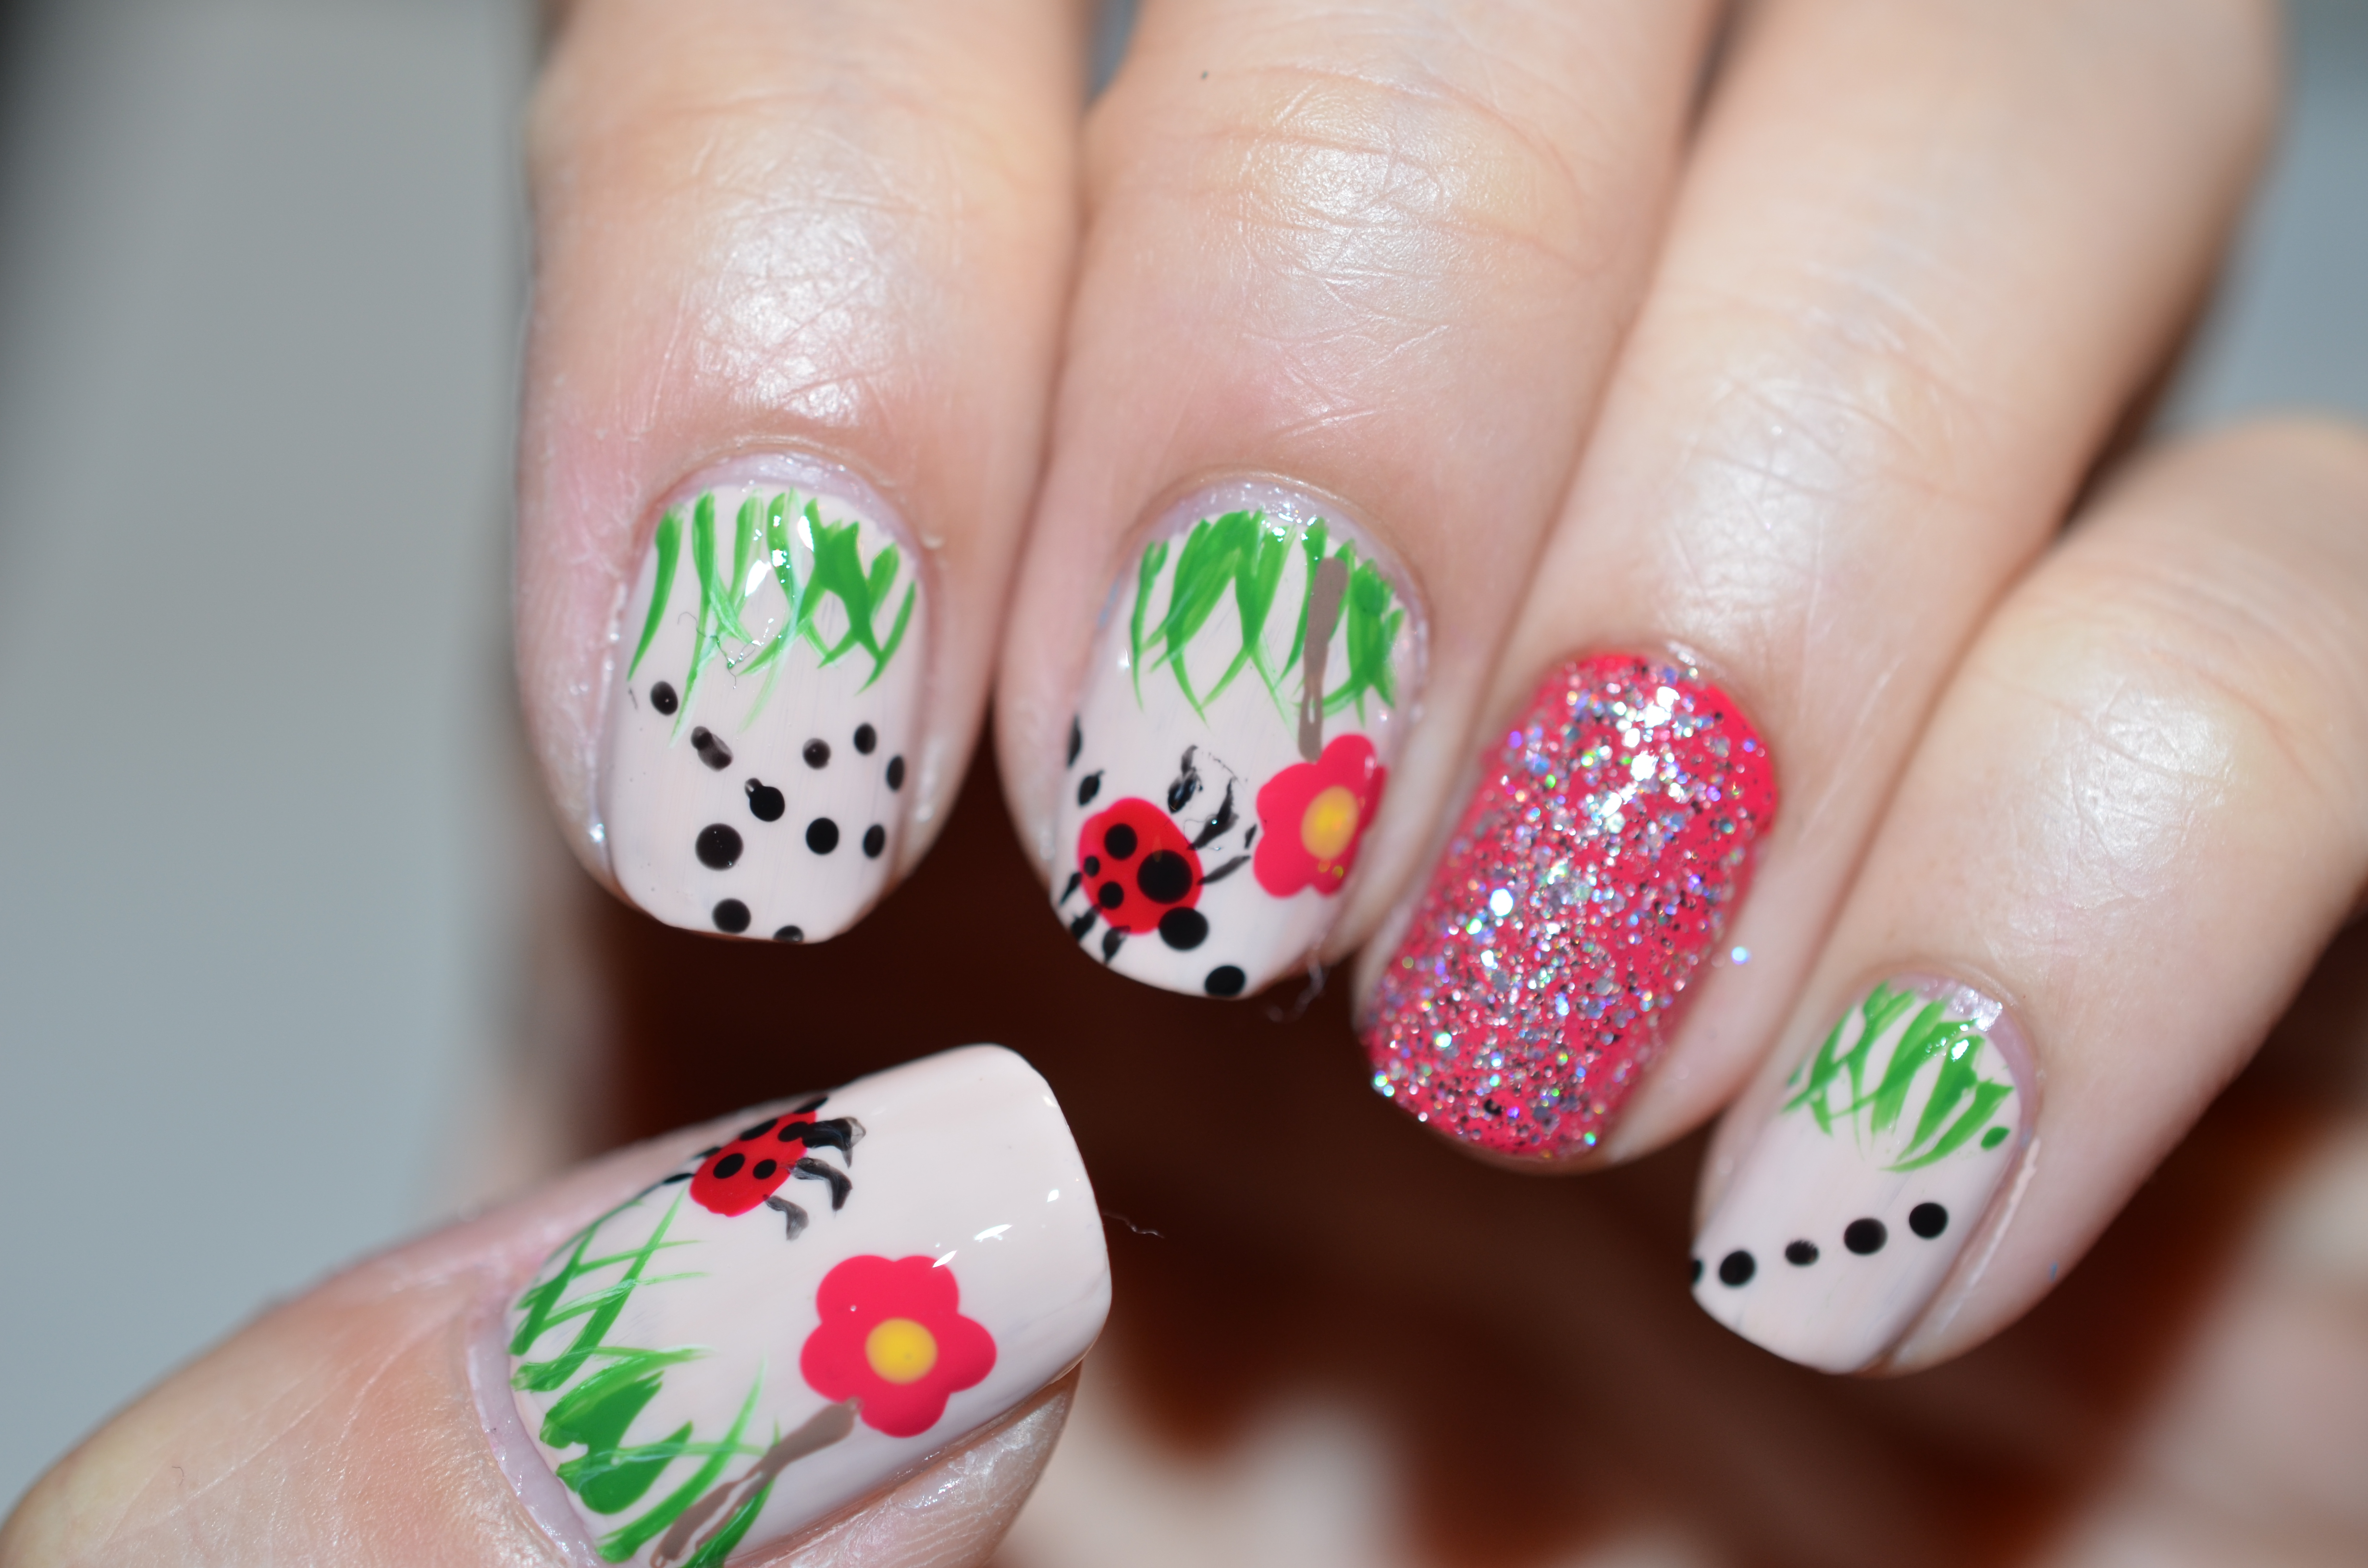
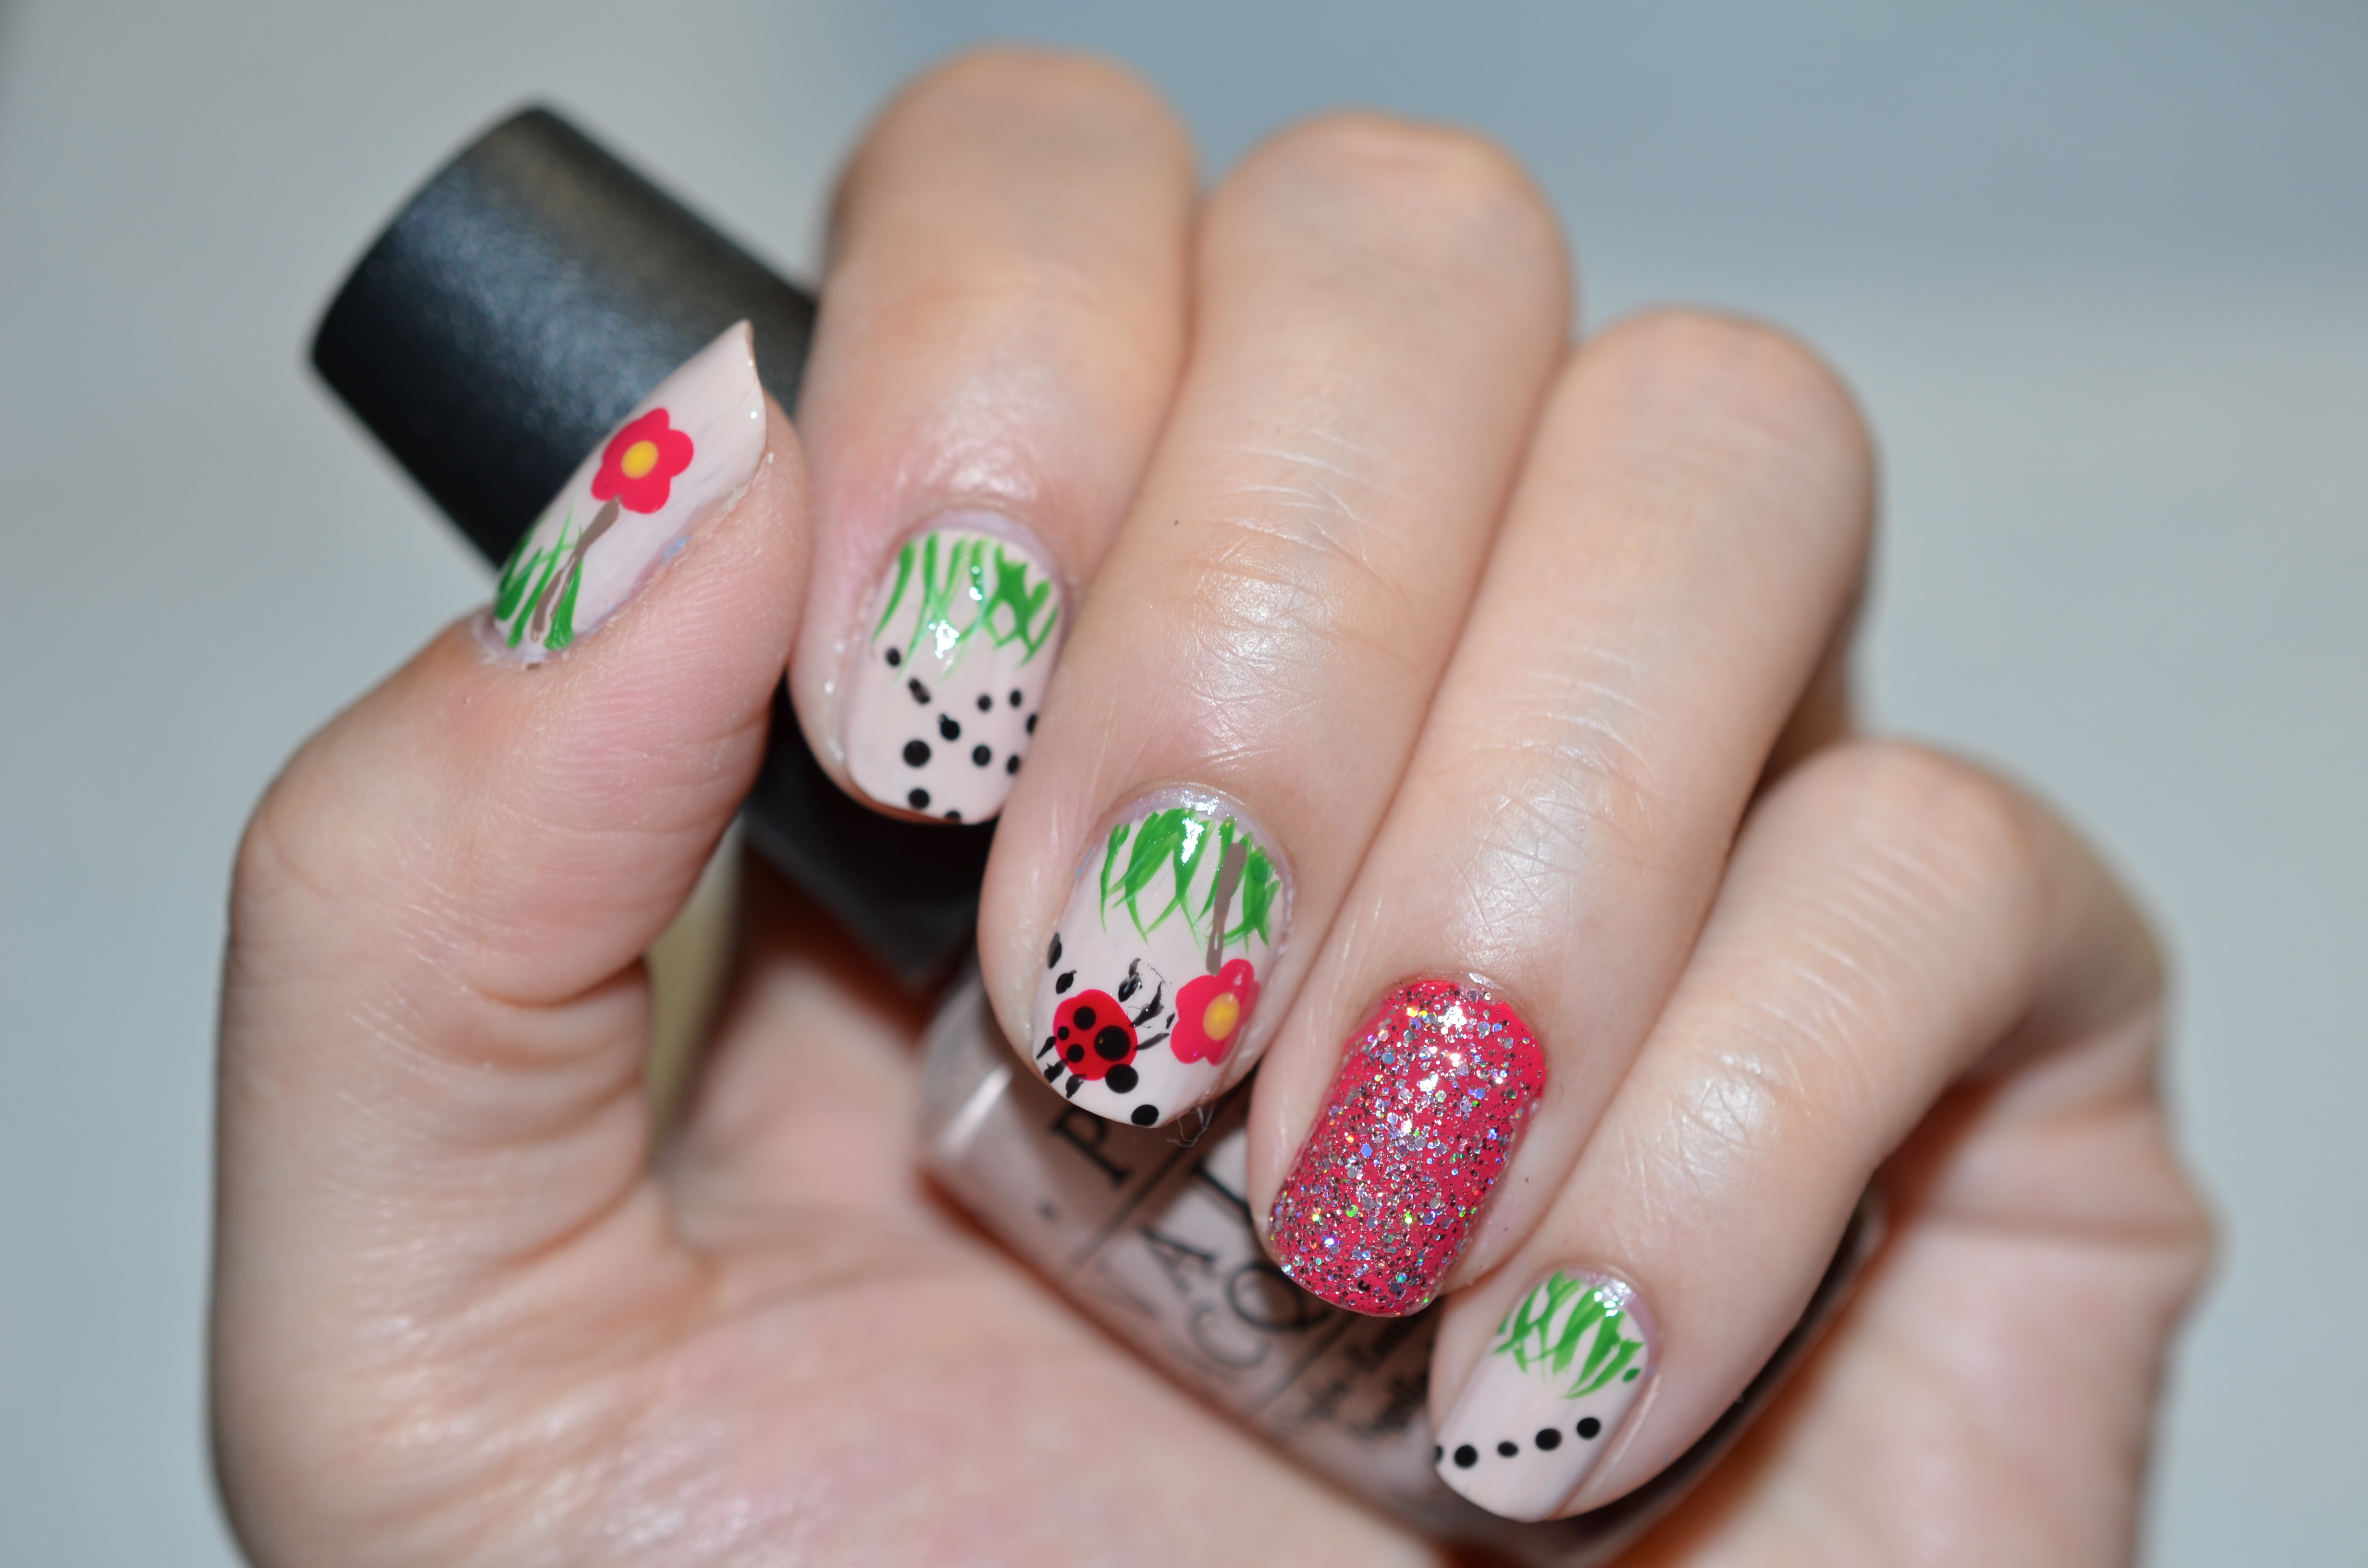
Step 2: Apply 2 coats of Beige (Don’t Pretzel my Buttons by OPI) on all fingers except for the ring finger. And apply 2 coats of Magenta (Crazy for Chic by L’Oreal) on your ring finger.
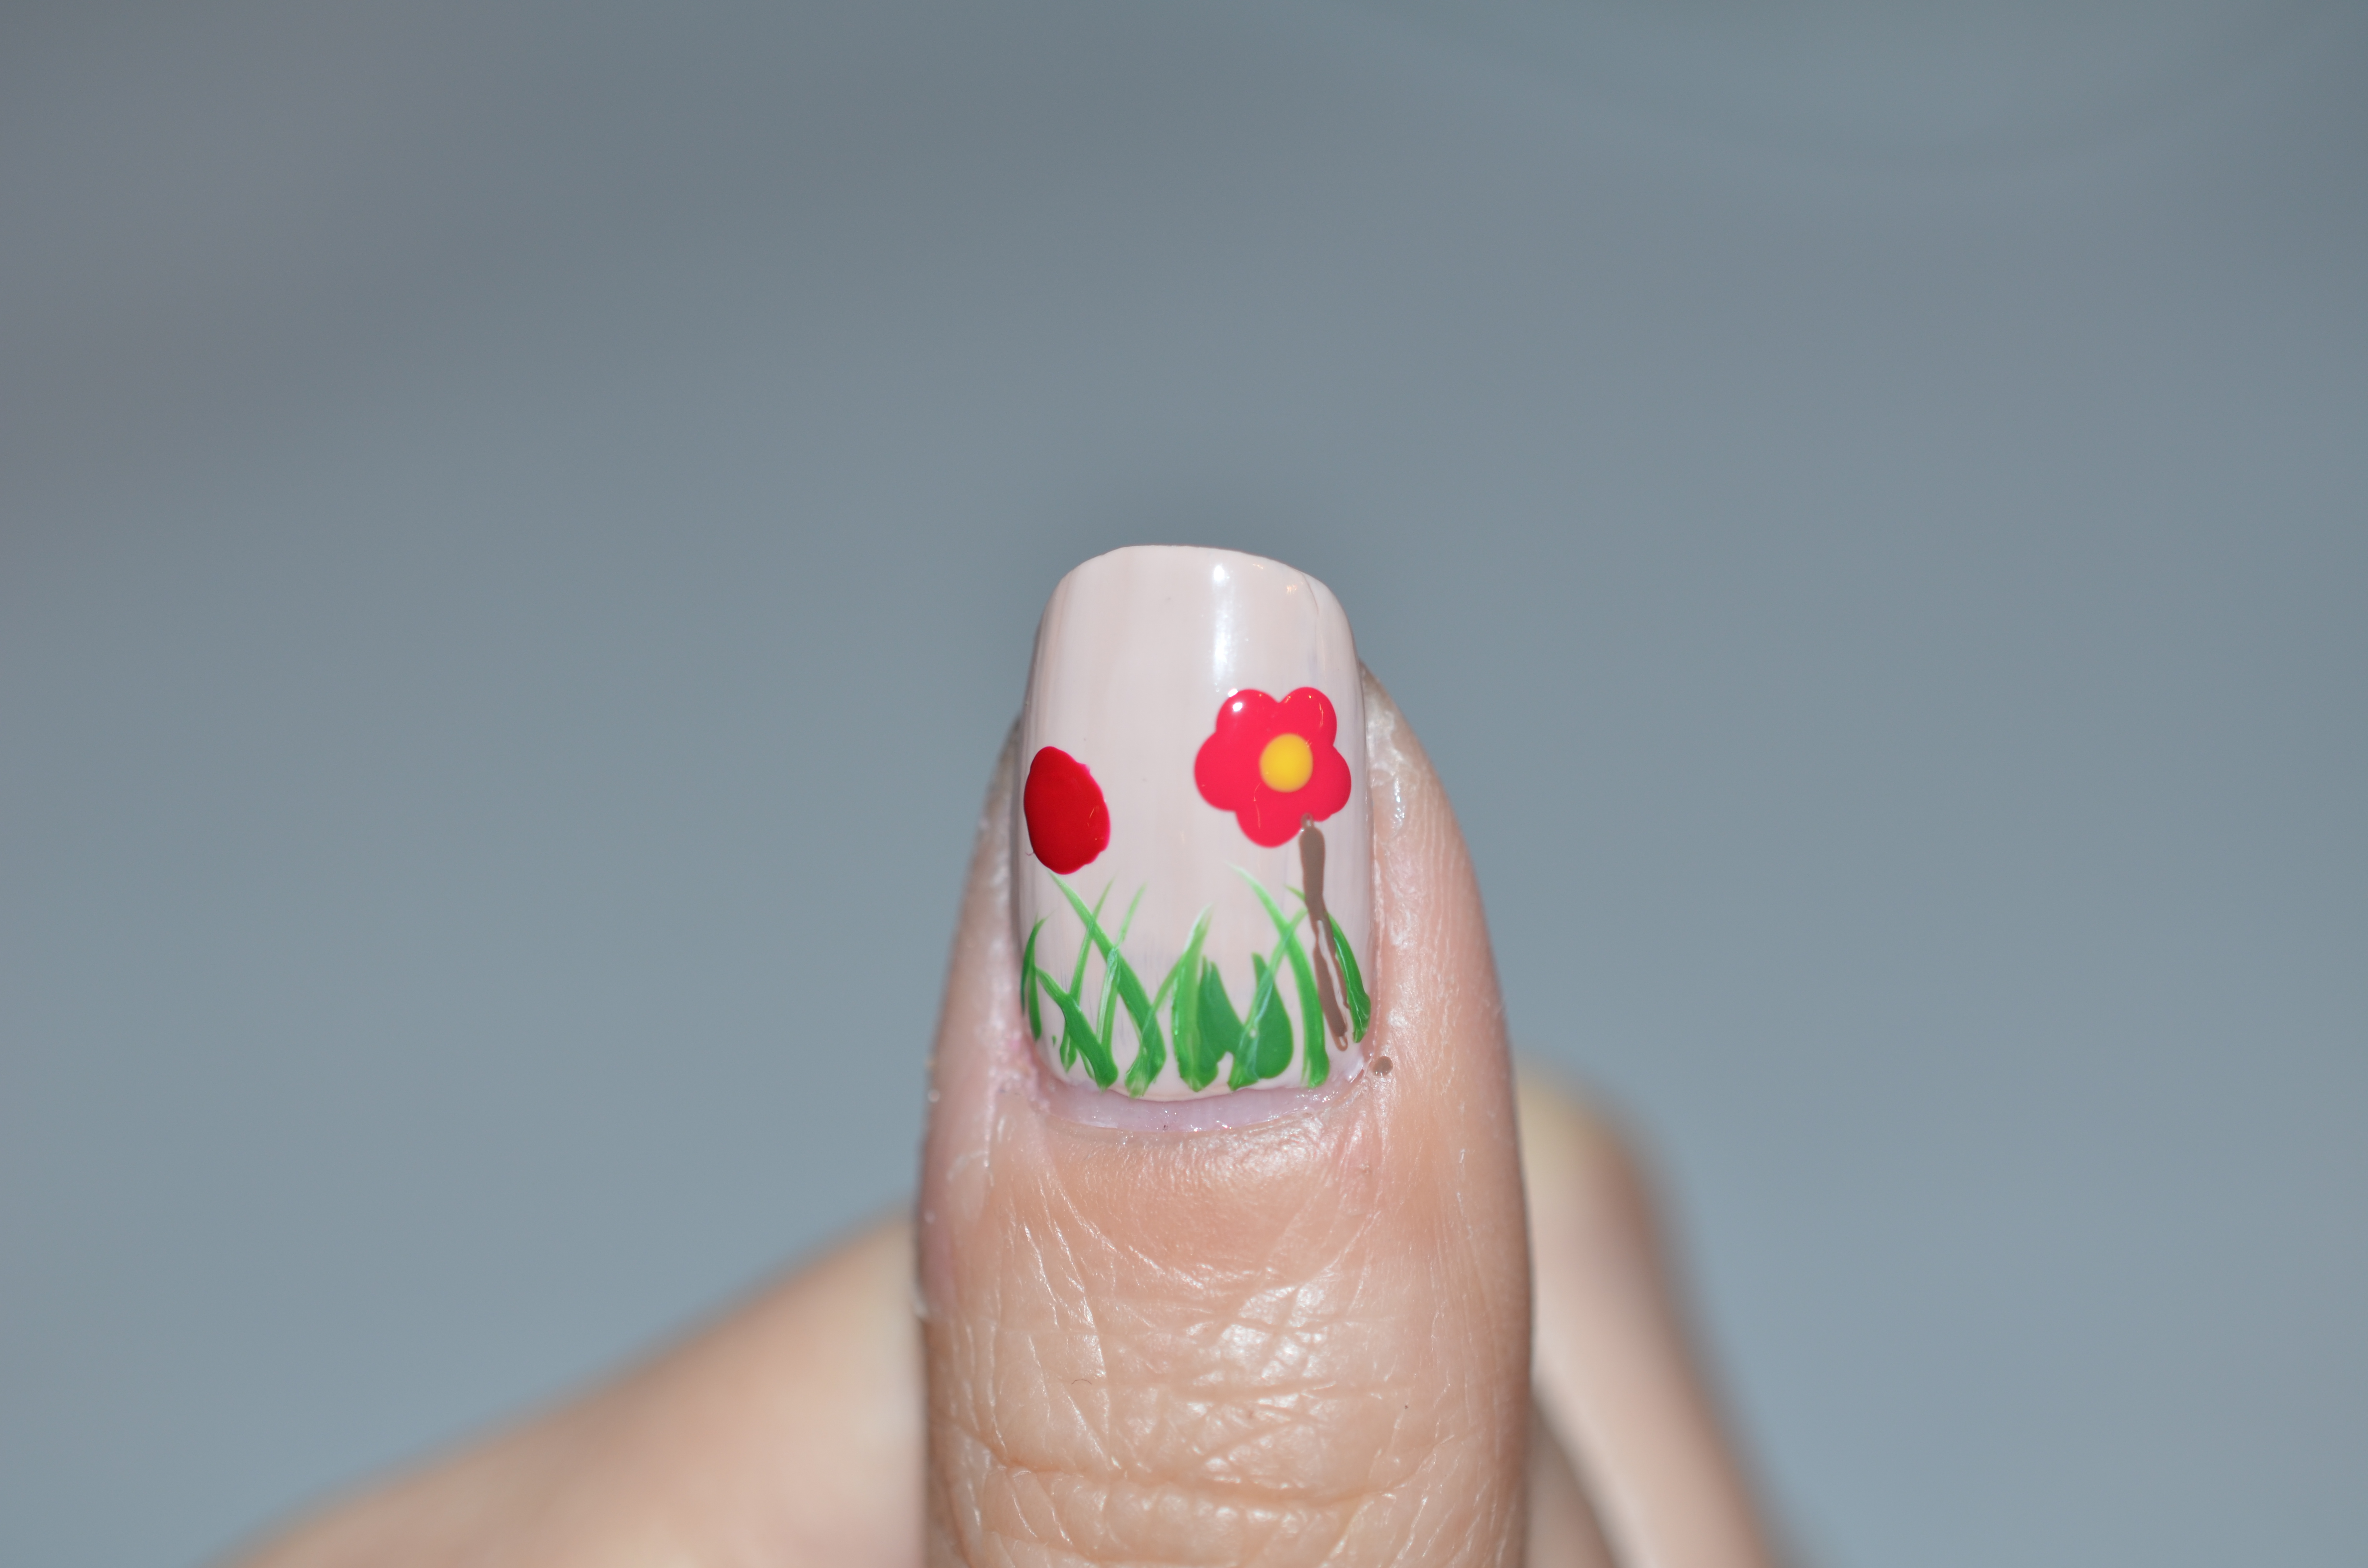
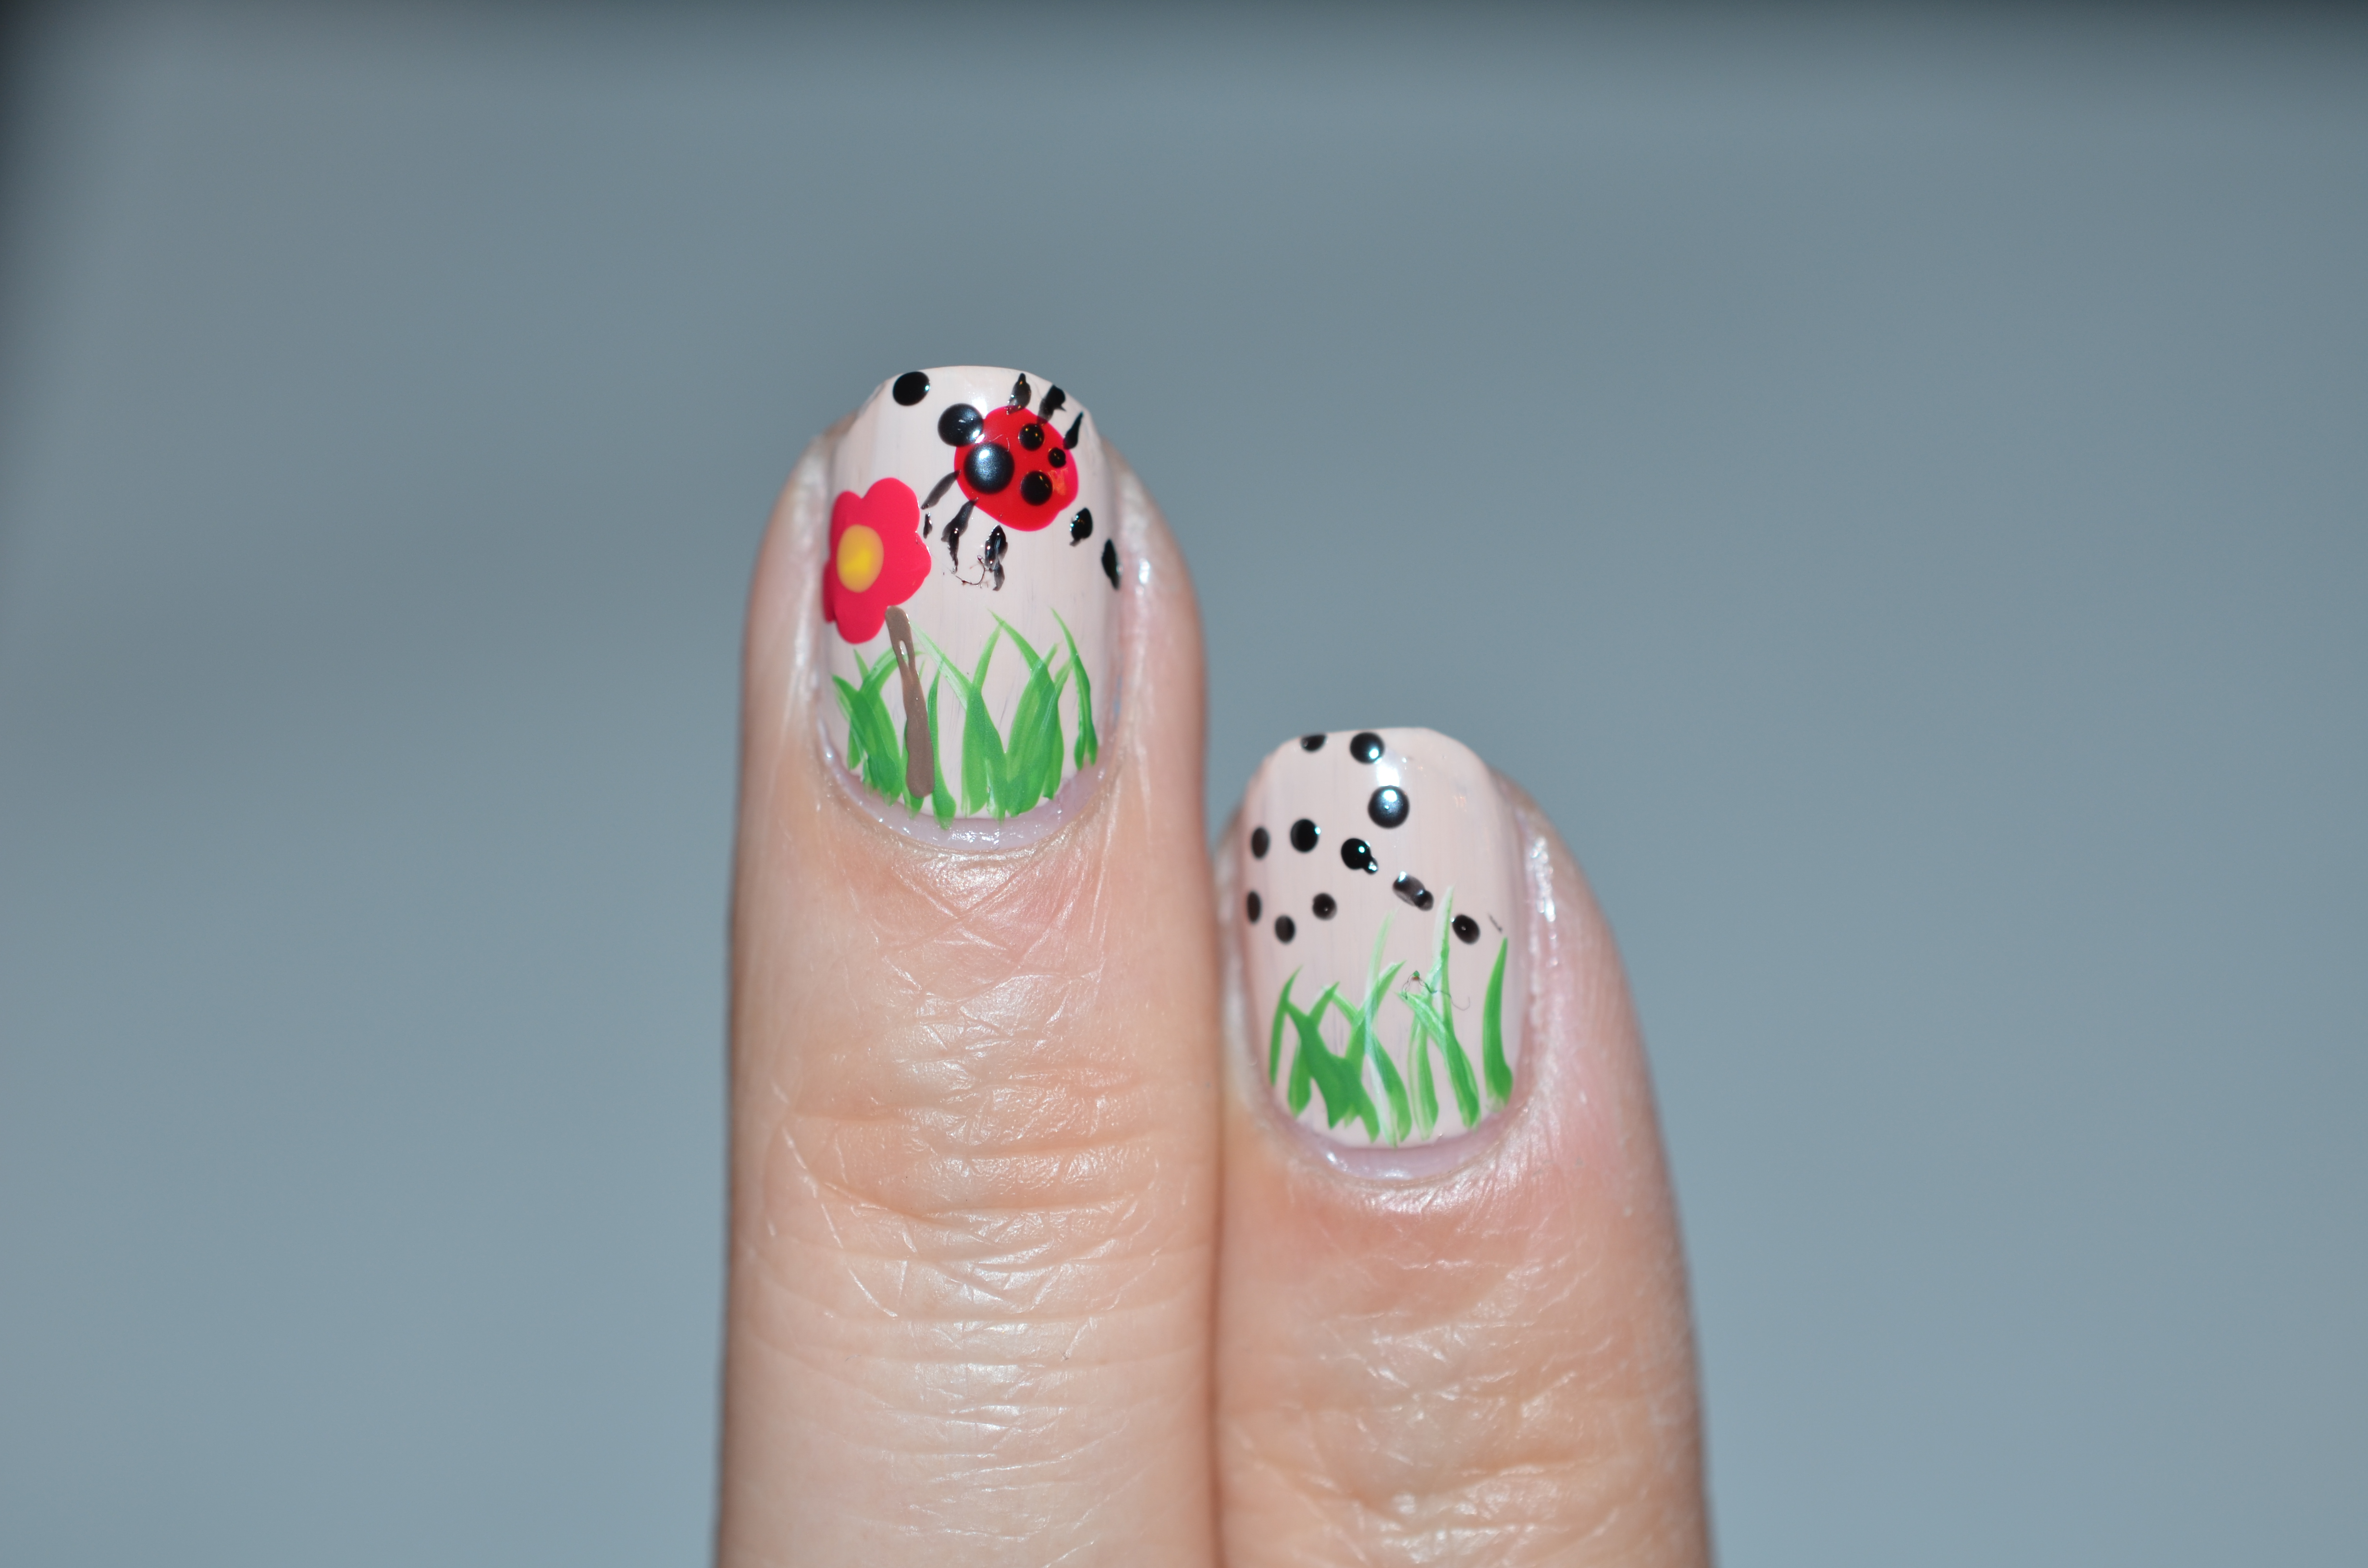
Step 3: Dip a toothpick into green polish and use a flicking motion to create grass at the bottom of all the nails except for ring finger.


Step 4: Dip your large dotting tool into a Magenta (Crazy for Chic by L’Oreal) polish and create 5 dots to make a daisy. (For more details on making a daisy, you can check out my Marc Jacob Daisy Inspired Tutorial). Also, use a yellow (Mellow Yellow by Sally Hansen) polish to dot the centre of the daisy. Do the same thing on the middle finger.


Step 5: Use a large dotting tool dip in a red polish (Red Cherry by Sally Hansen) to draw an oval to create the body of the lady bug. Do the same thing on the middle finger.
Step 6: Use the smallest dotting tool dip in black (Black Out by Sally Hansen) polish to create the head of the lady and create black dots on the body of the lady bug.

Step 7: Dip your toothpick in black (Black Out by Sally Hansen) to create legs for the ladybug. Also, use the same toothpick to create black dots as tracks.
Step 8: Put glitter (Strobe Light by Sally Hansen) on the ring finger.
Step 9: Apply Top Coat (Seche Vite) to seal in your design and add a beautiful shine!
Then you are DONE! If you recreate this nail design, please share them on my GlitterMommy Facebook Page and also #GlitterMommyNailArt on Instagram. Also, please remember to like my GlitterMommy Facebook Page to get the latest update. I am getting really close to 100 likes, so please show me some love and support by liking it. Once I hit that milestone I would love to do a giveaway to thank you guys.
Thank you very much for reading and have a wonderful night!!!
XoXo