It has been super cold (-20ºC or lower) where I live and to be honest there’s not much fun in this kind of extreme cold weather. The only thing that really cheers me up is I can finally break out my cashmere & wool Burberry coat. It’s definitely an investment piece but it’s so worth it. It’s so stylish and so warm and I am sure it will last me a life time.
Anyways, this nail tutorial is inspired by my coat and it’s so simple yet elegant. As long as you can draw lines, you can do this. So here we are:
Step 1: Apply base coat (OPI Natural Nail Base Coat) to protect your natural nail
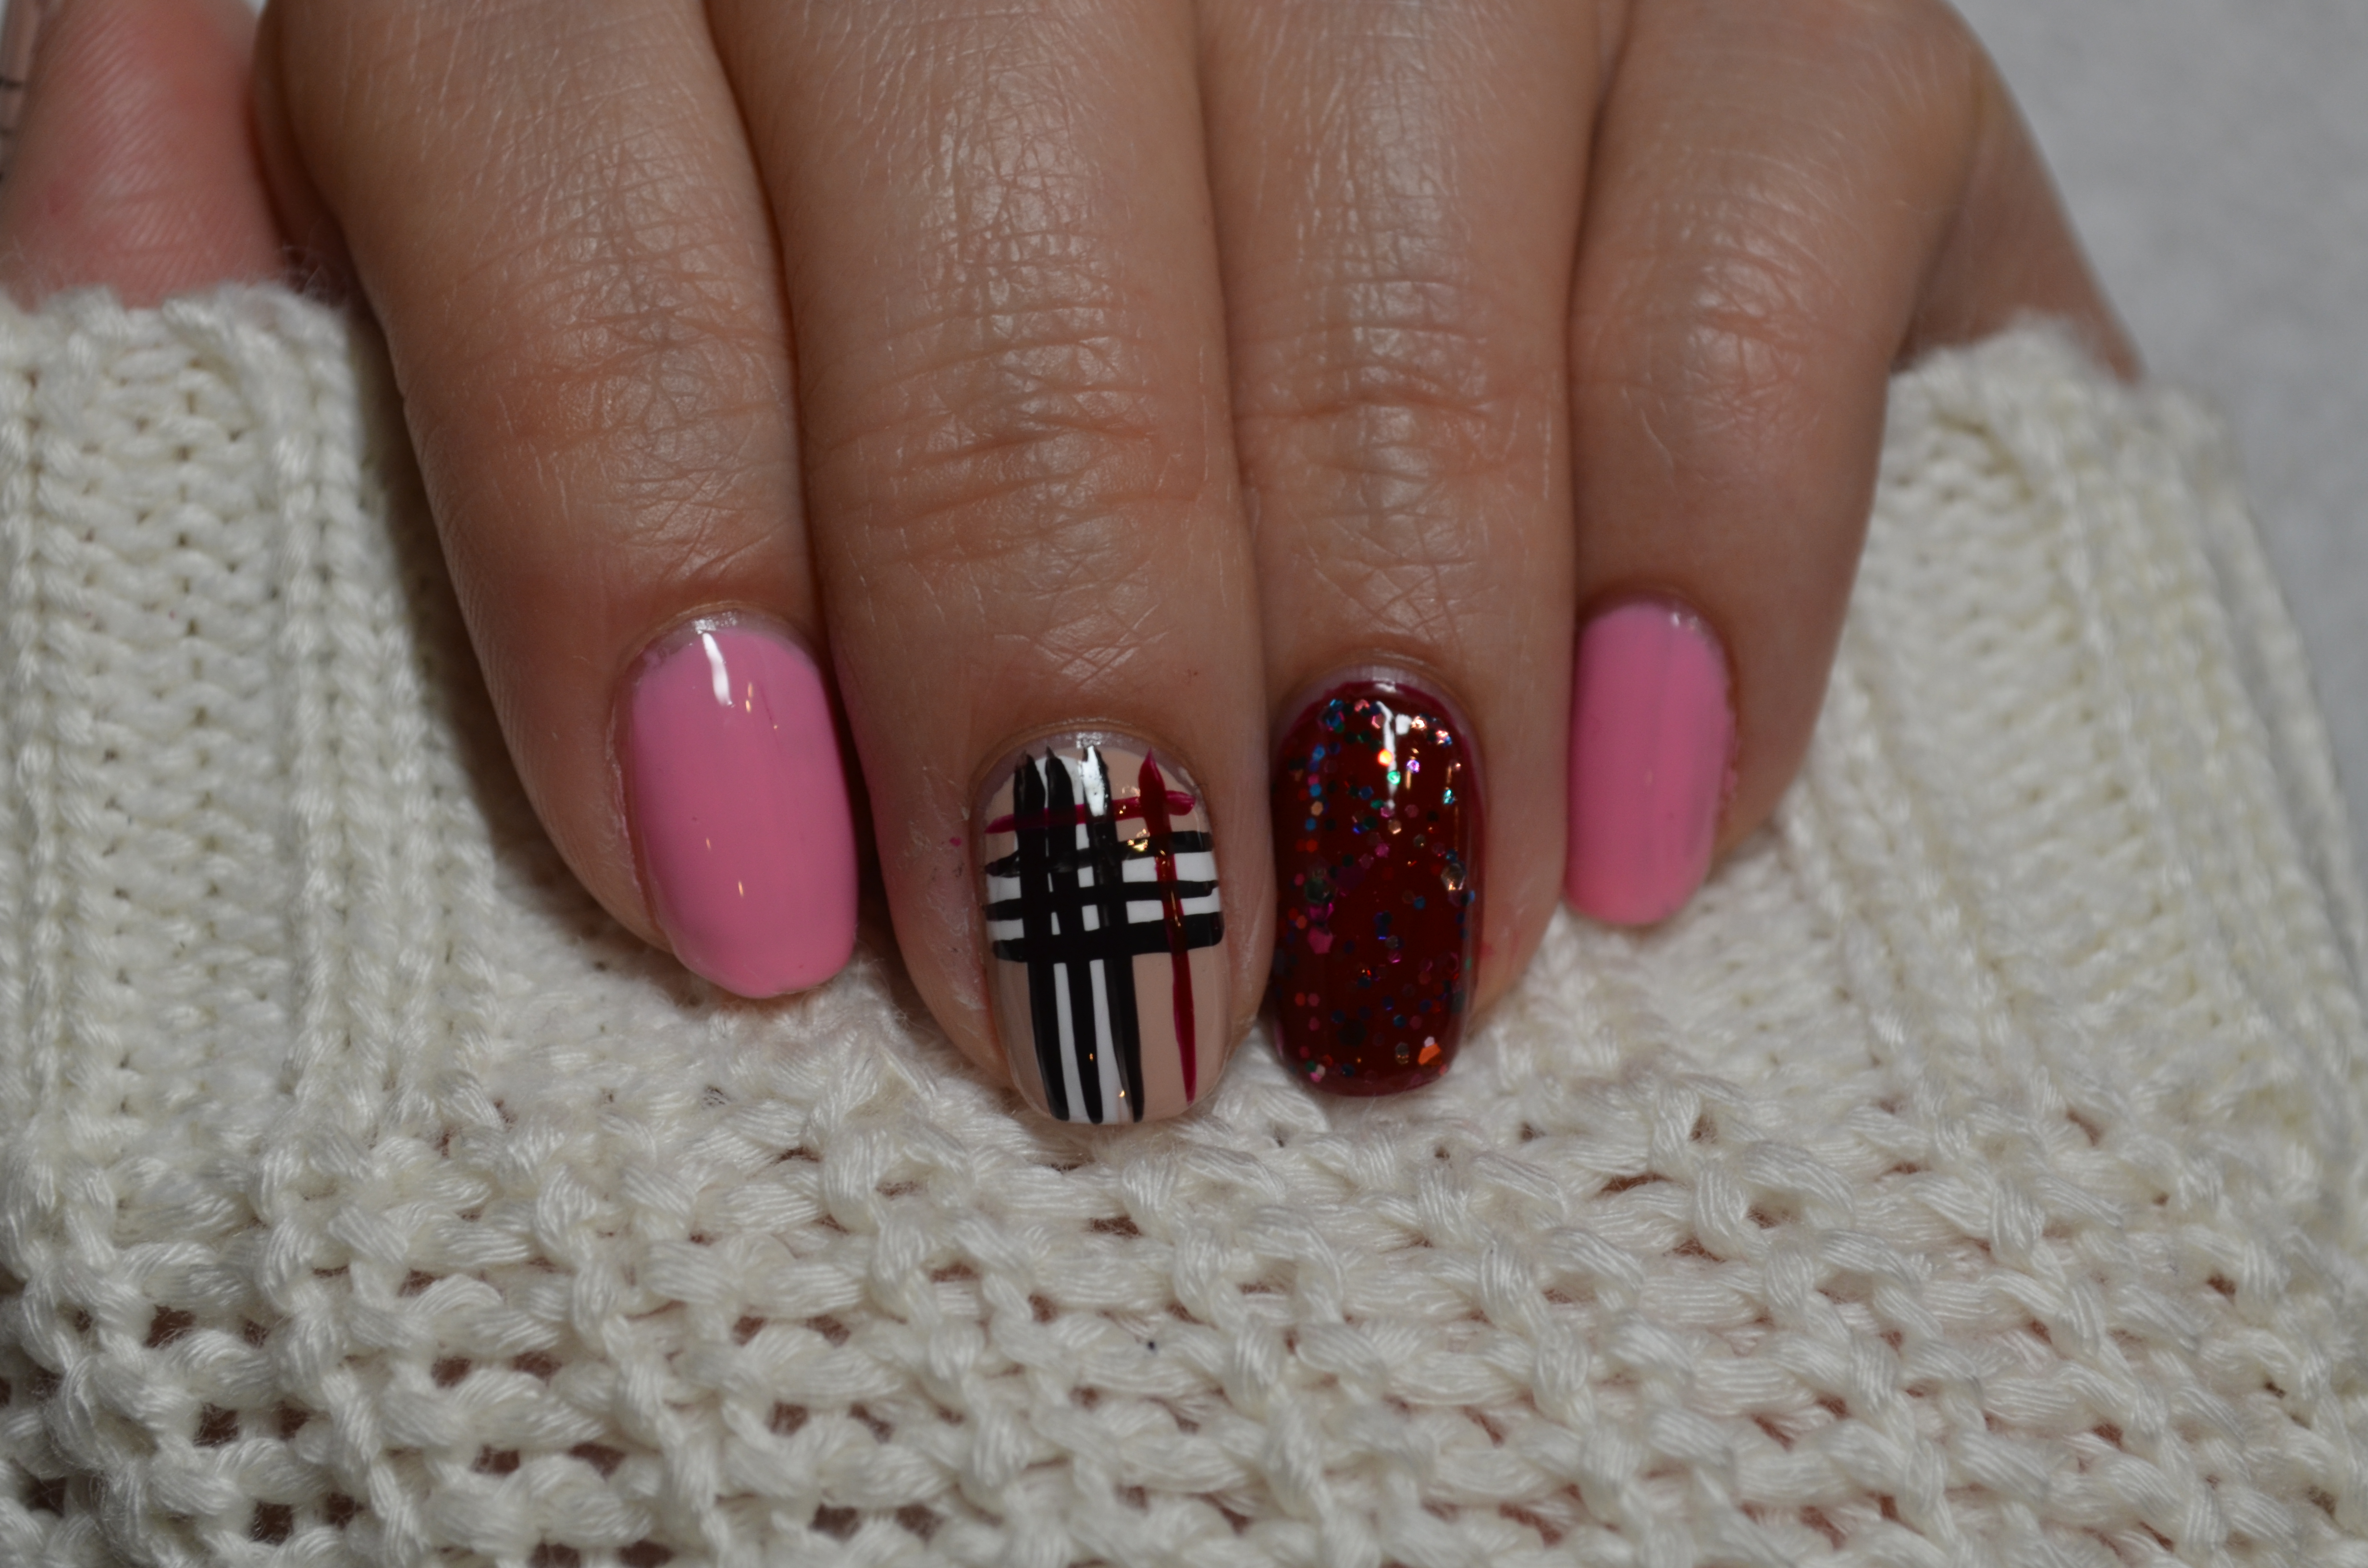
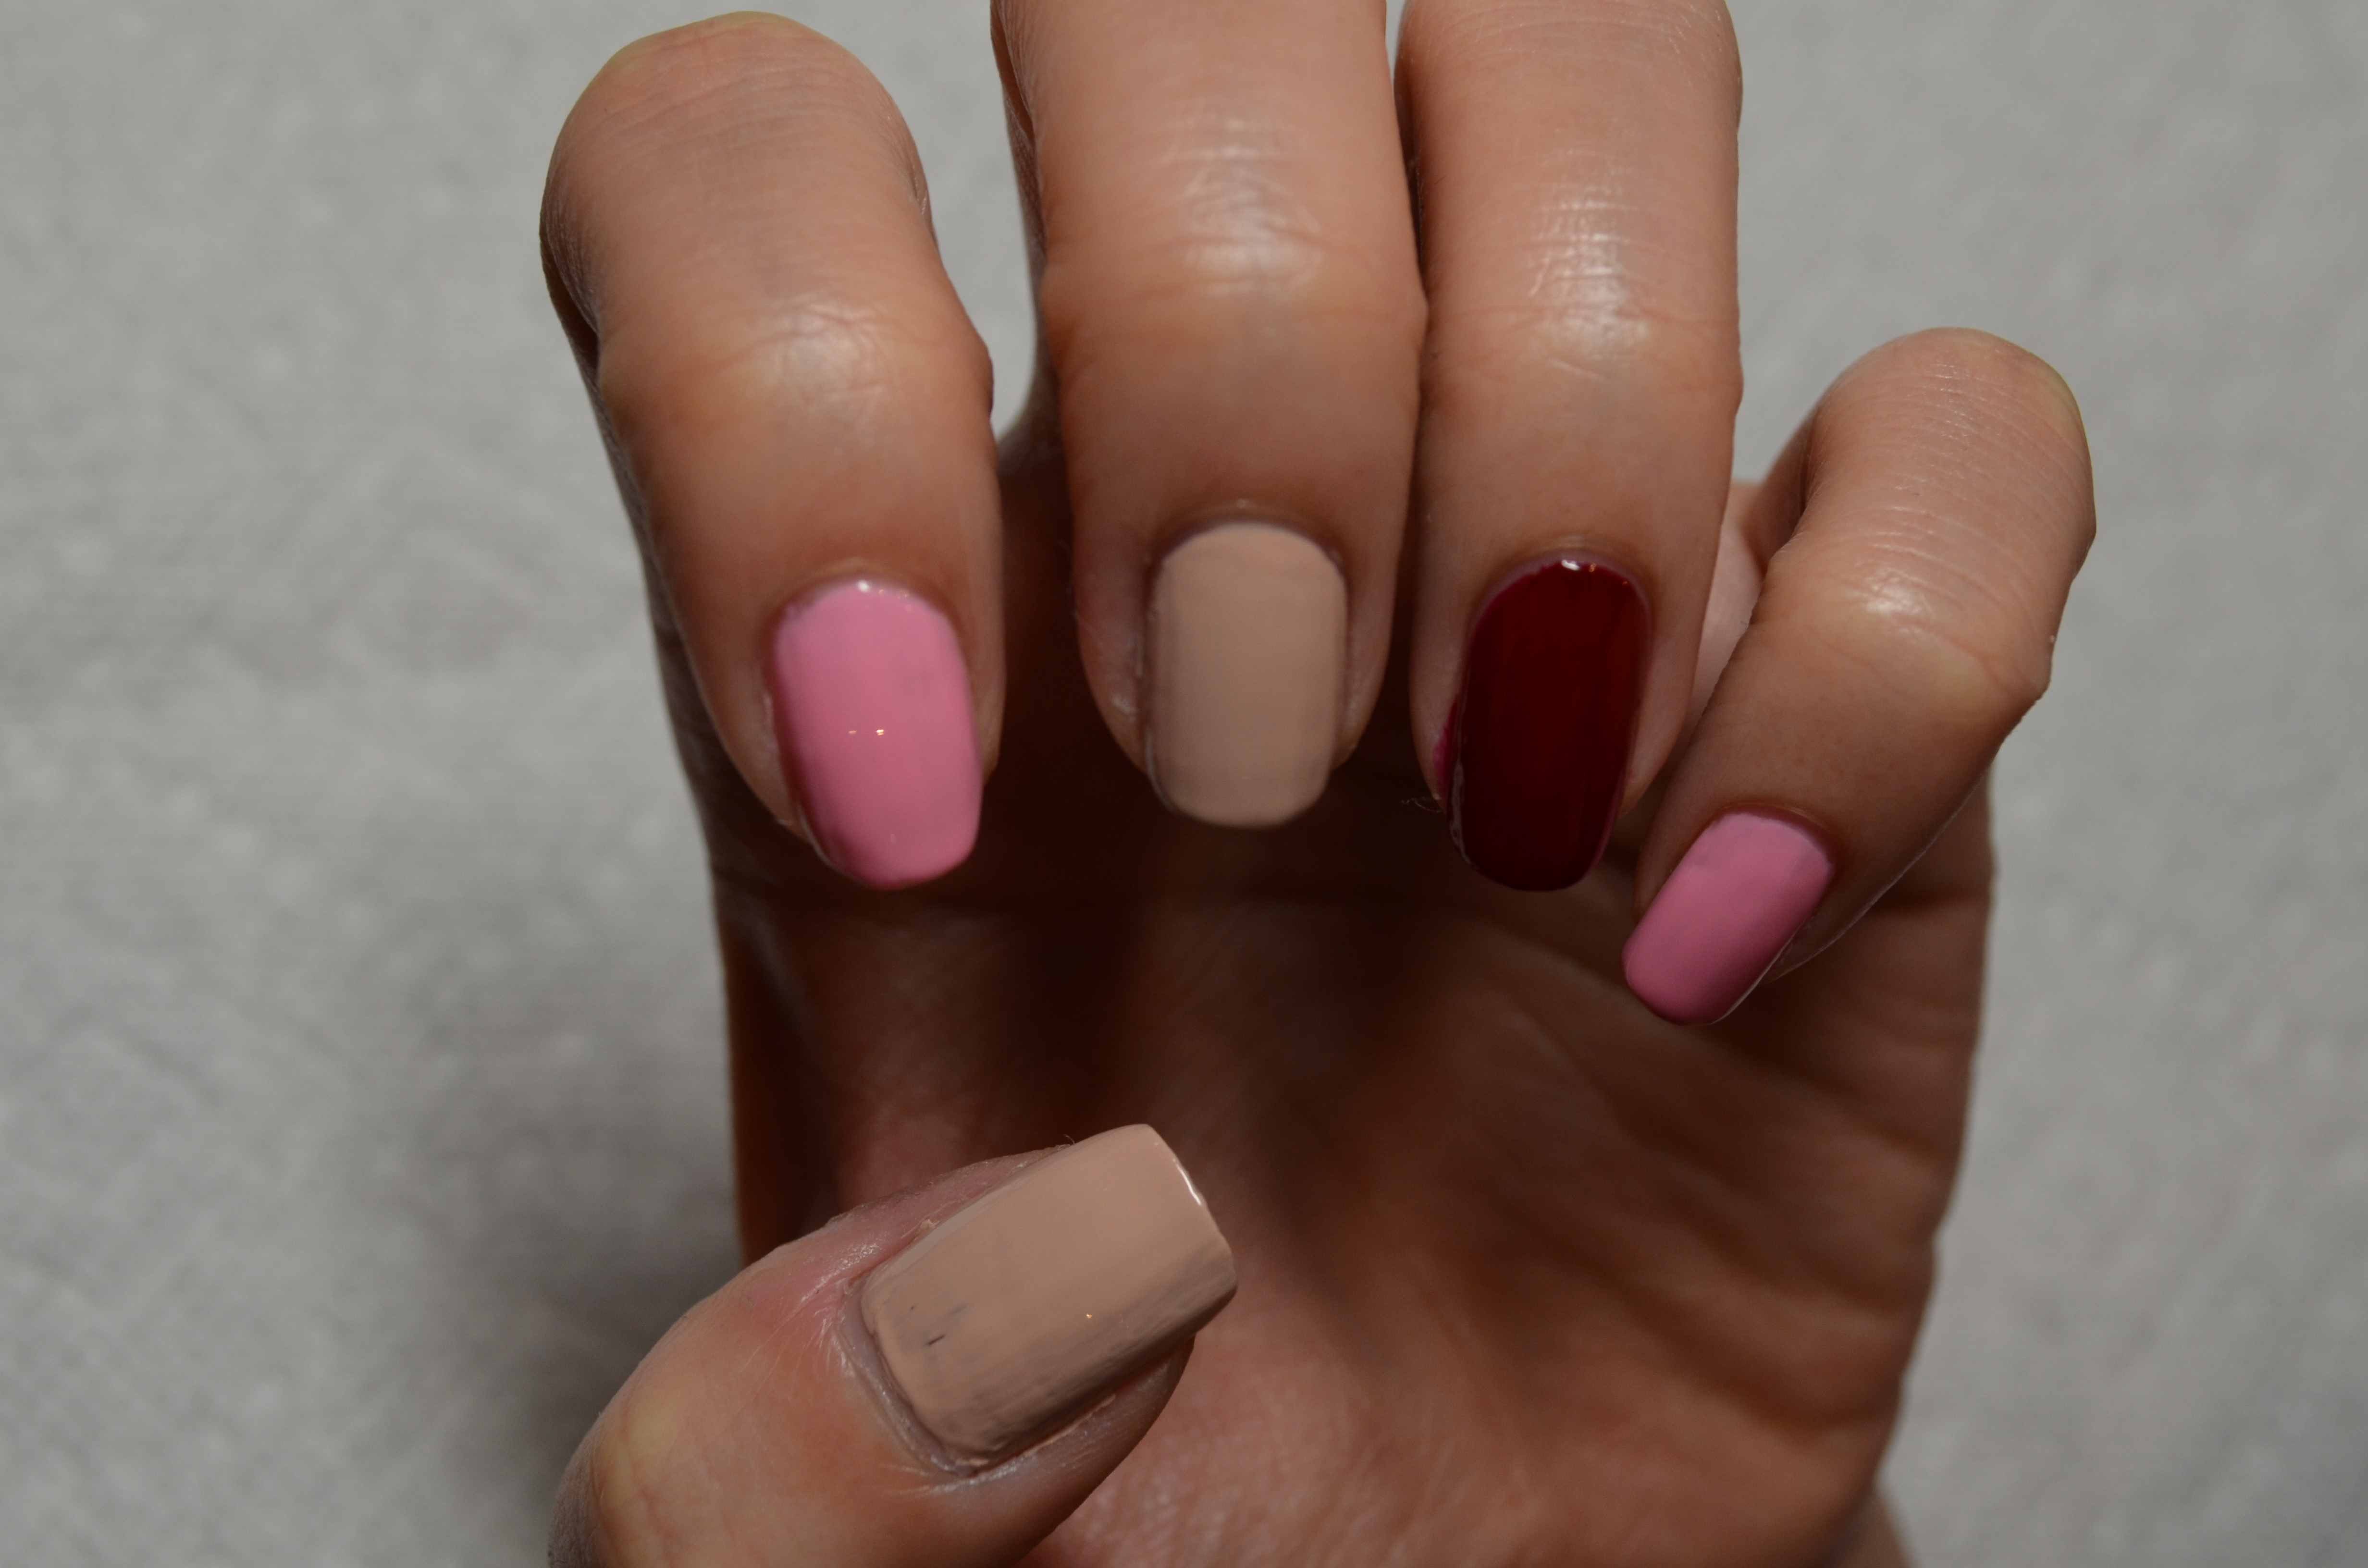
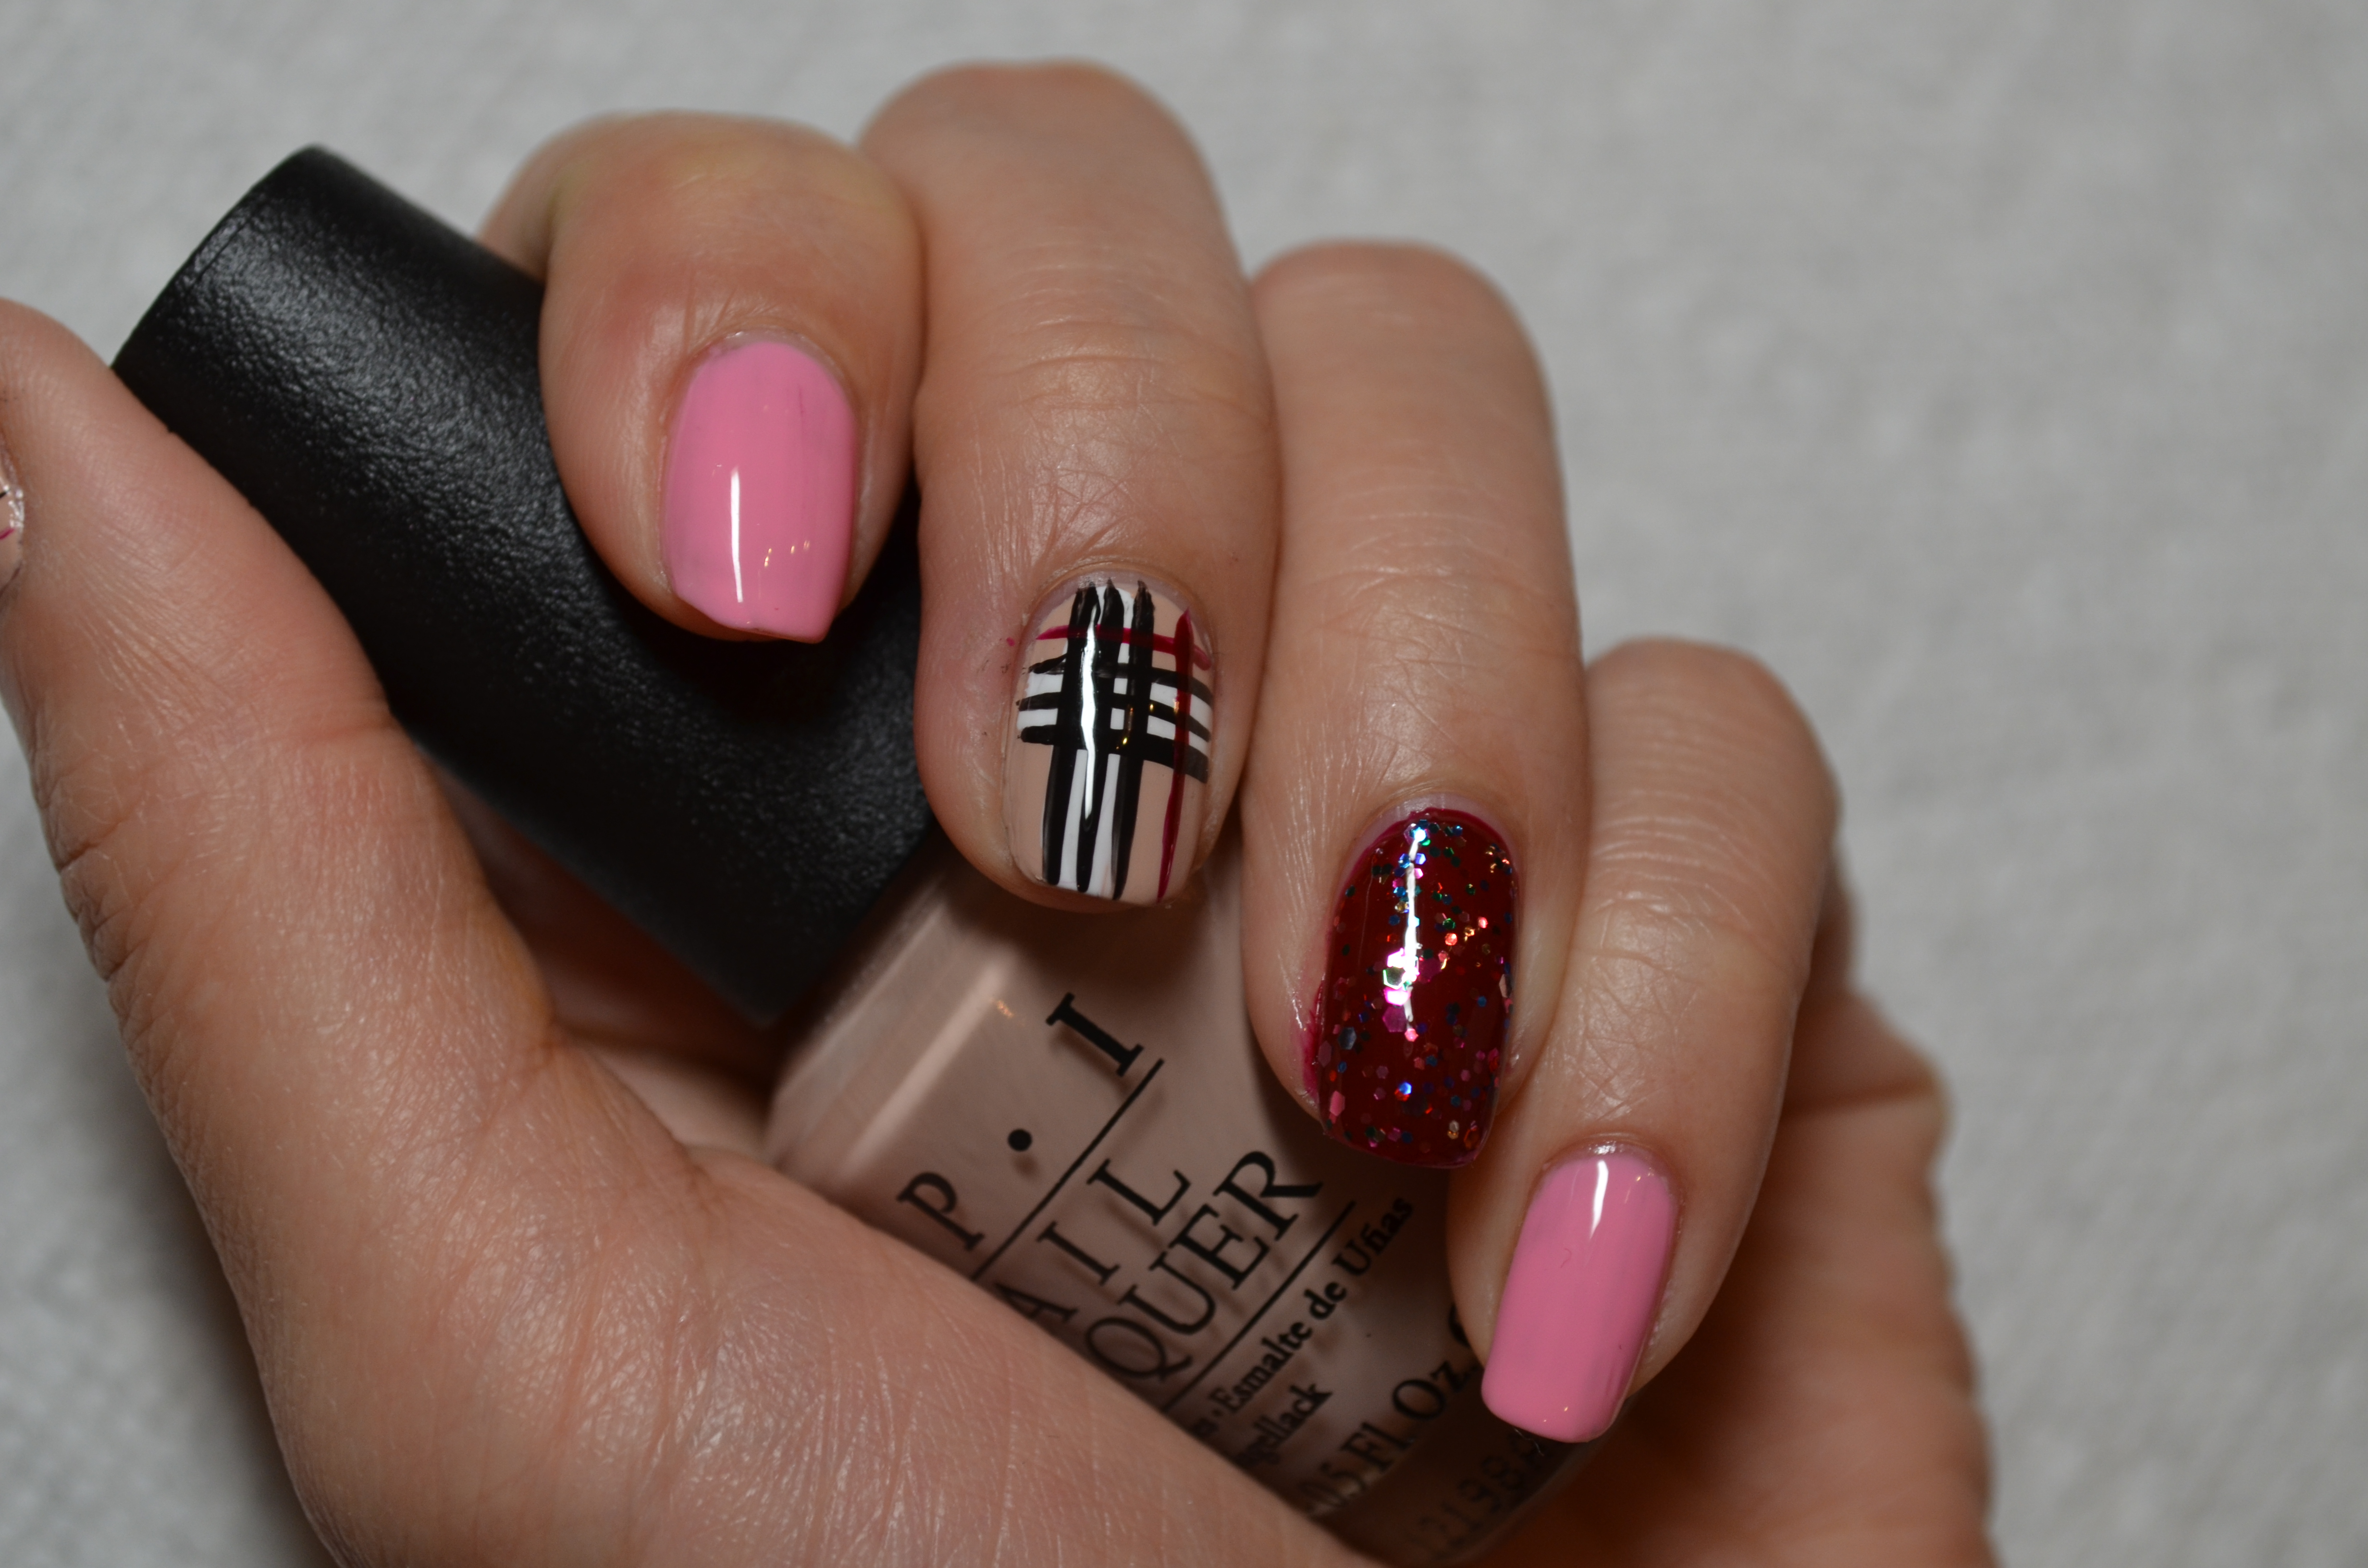
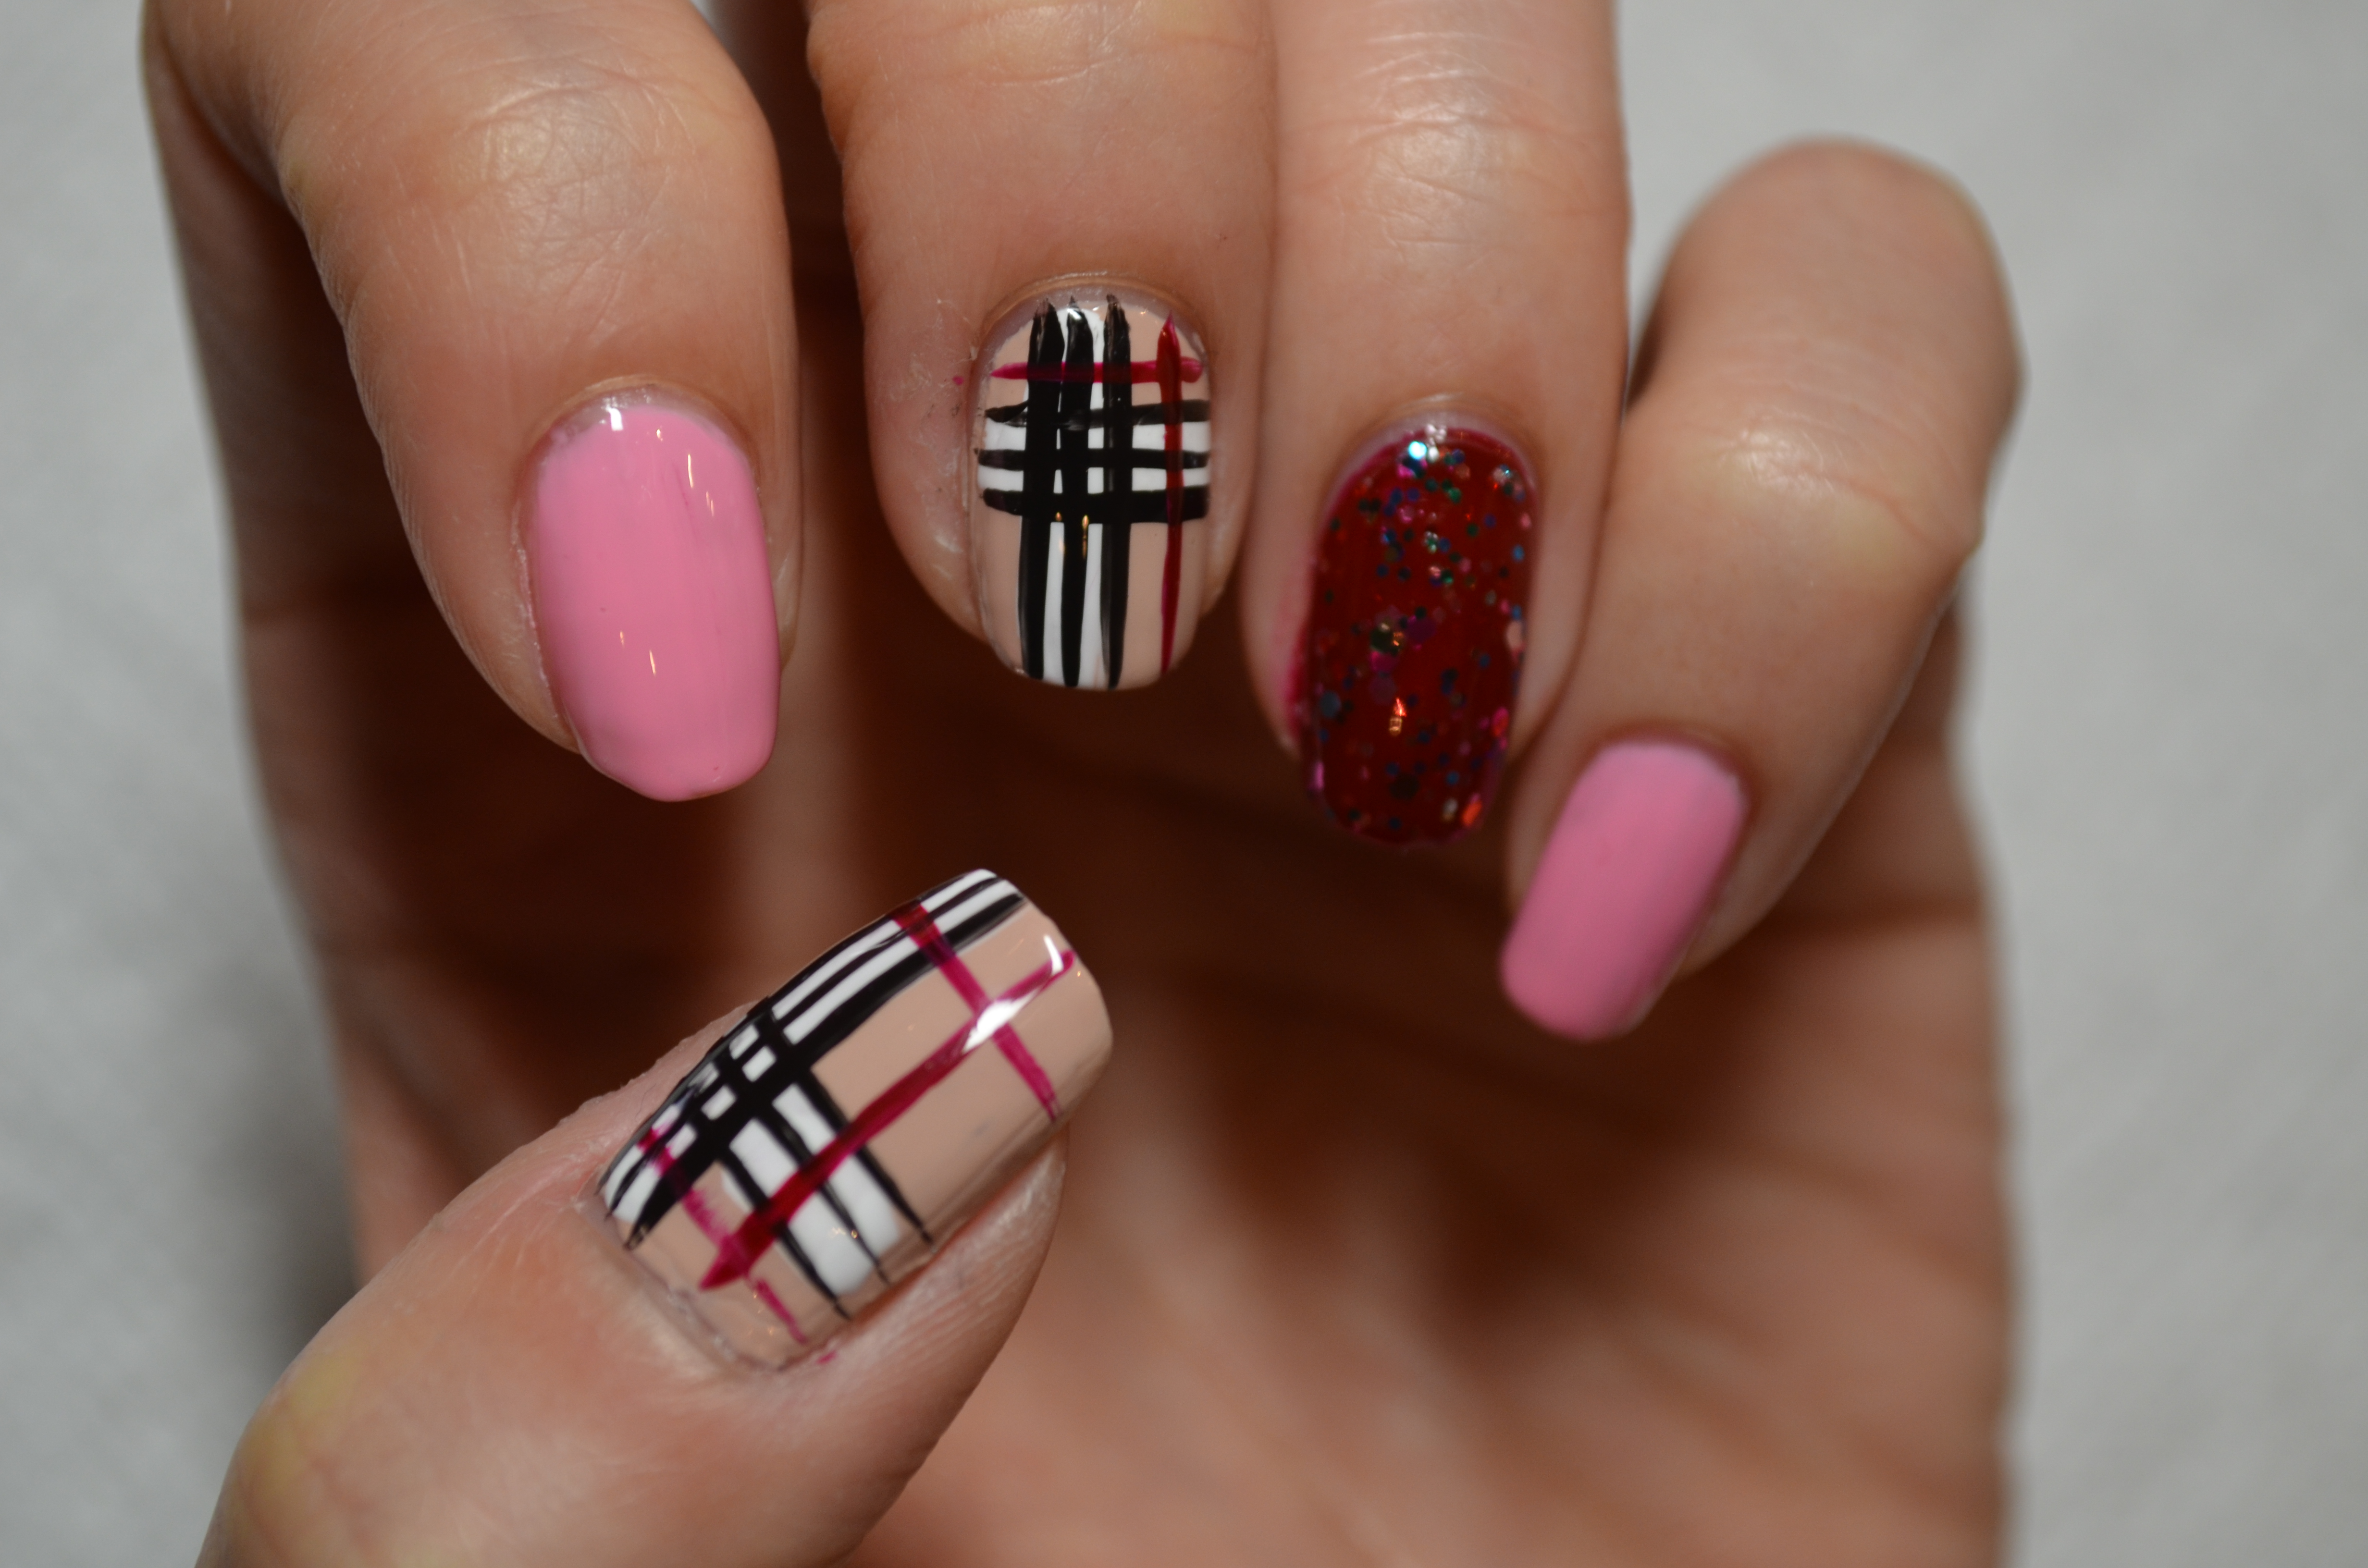
Step 2: Apply a light brown (Don’t Pretzel my Buttons by OPI) onto thumb and middle finger. Also, apply a light pink (Bon Bon by Covergirl Outlast Stay Brilliant) nail polish onto index finger and pinky. Lastly, apply a cherry red (Velvet Rope by Revlon Colourstay) nail polish onto your ring finger.
Step 3: Apply a second coat for each colour mentioned in Step 3.
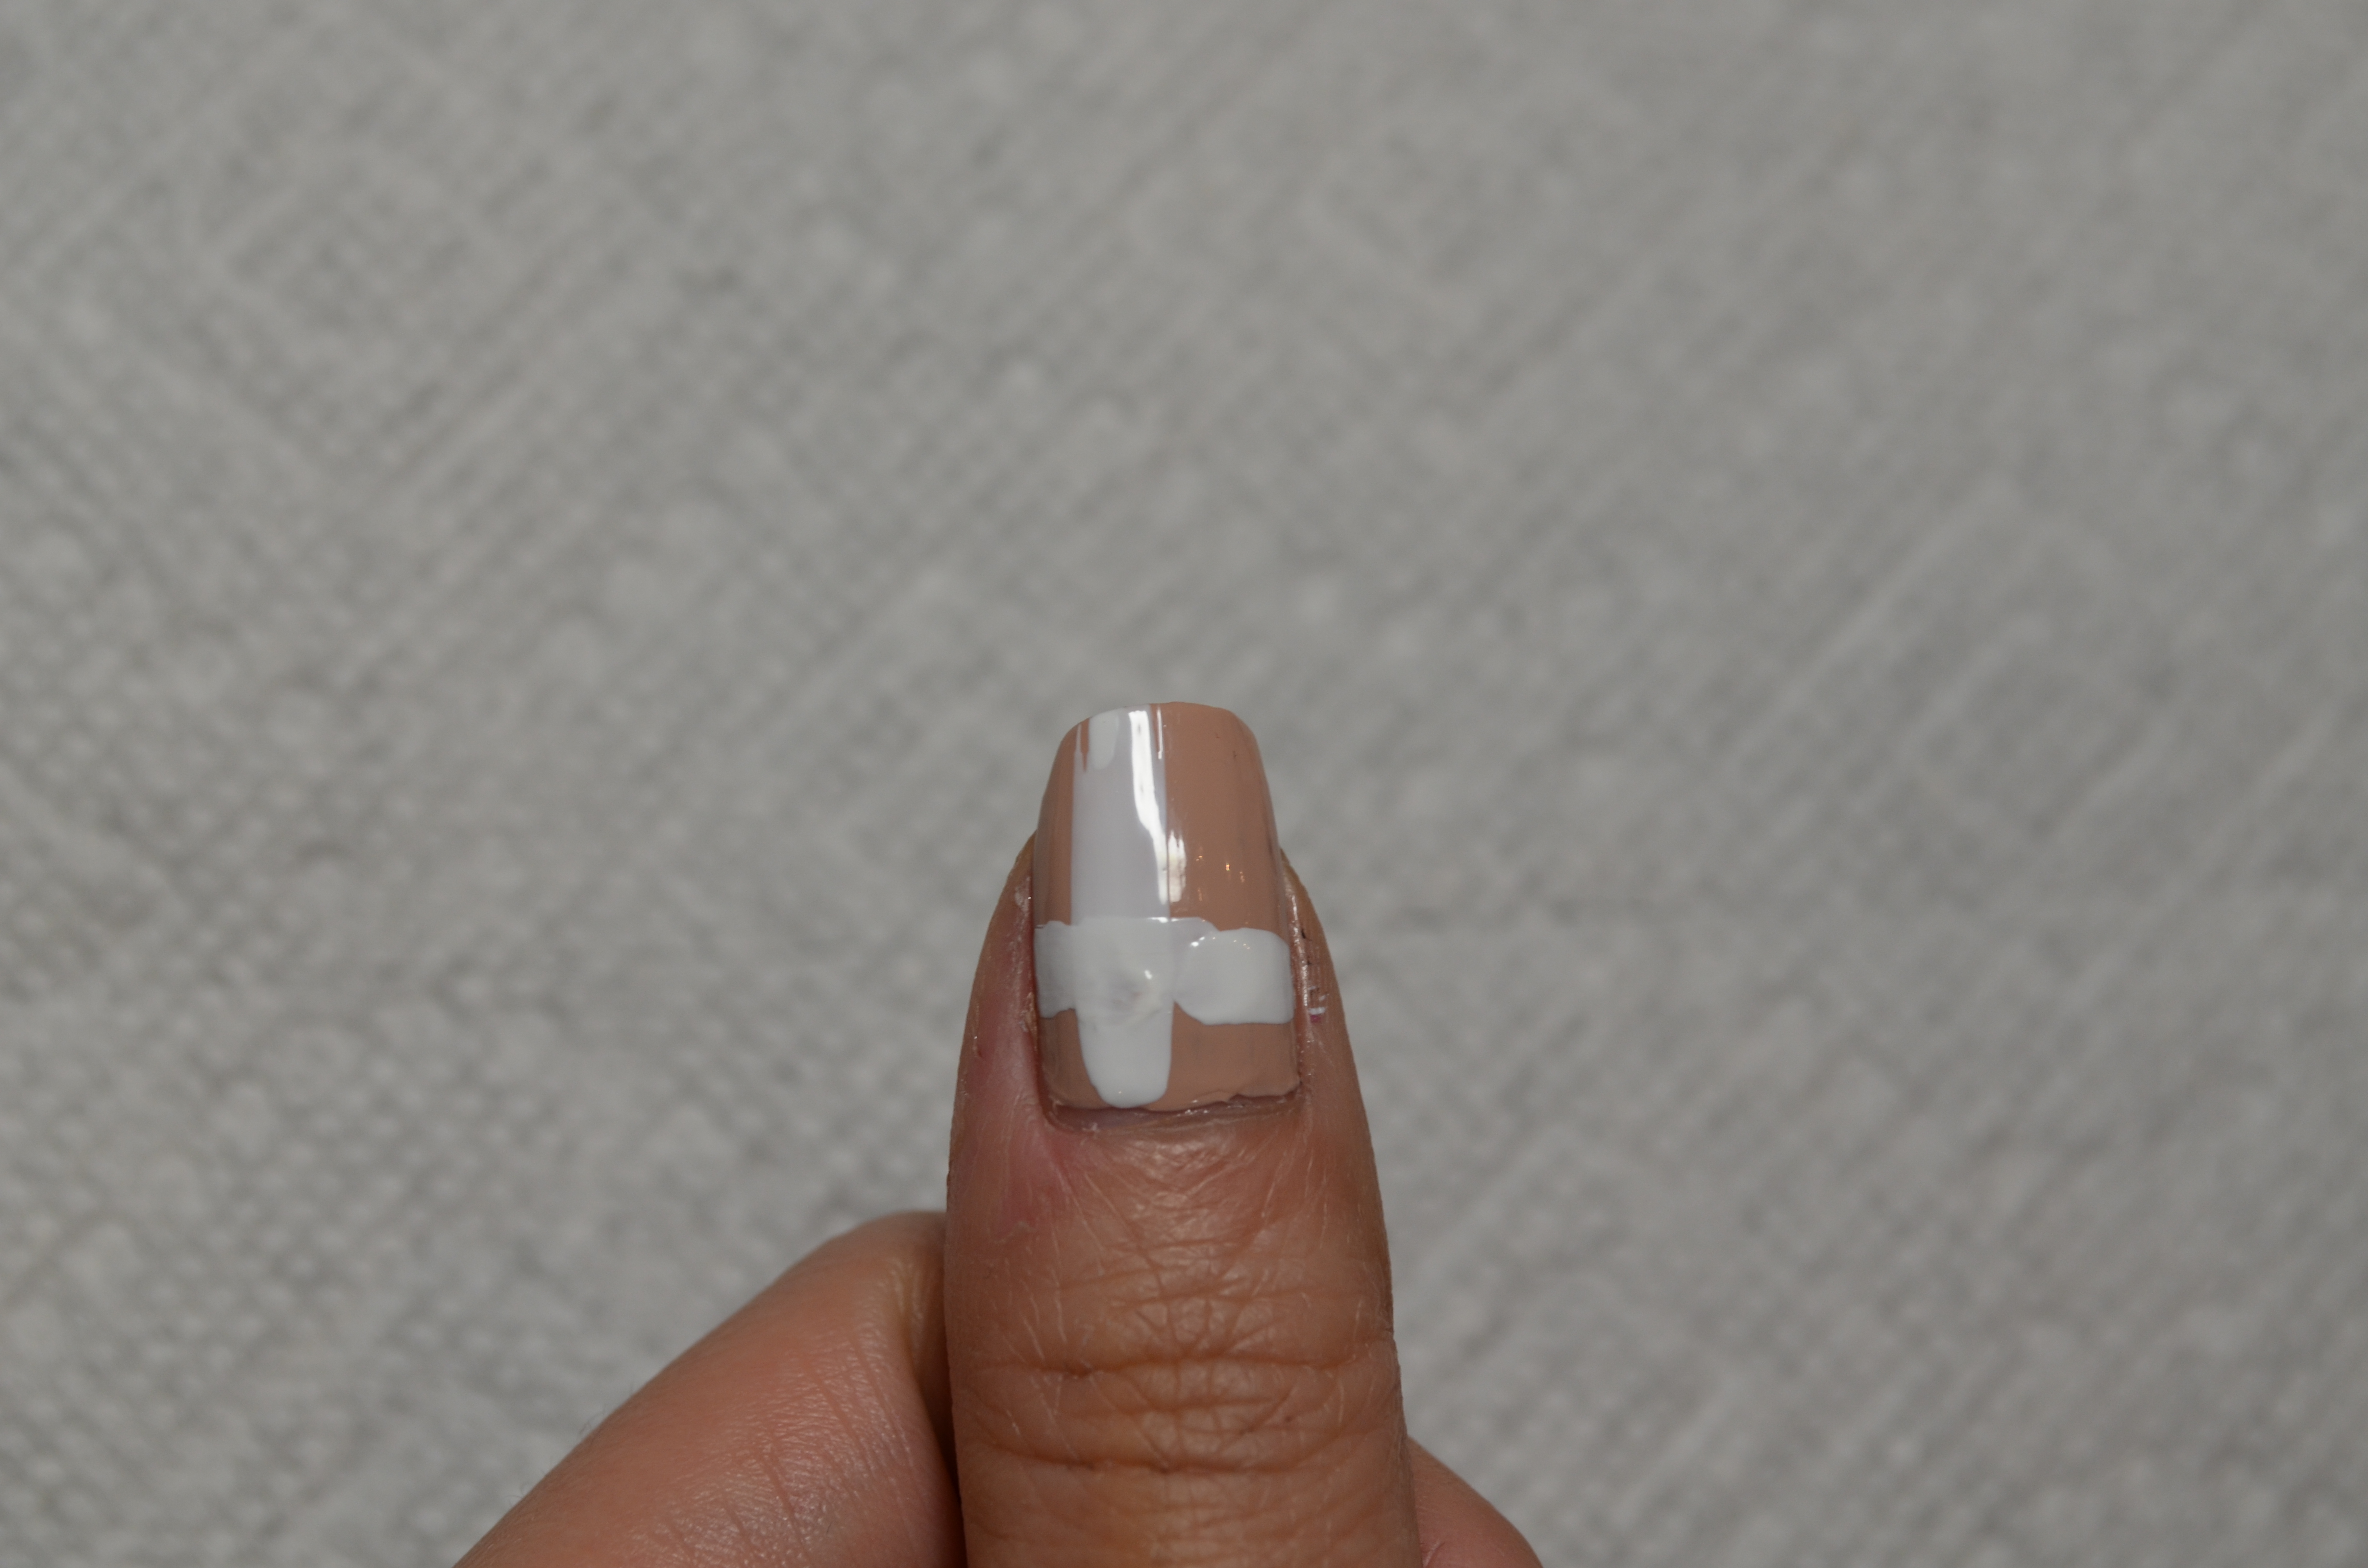
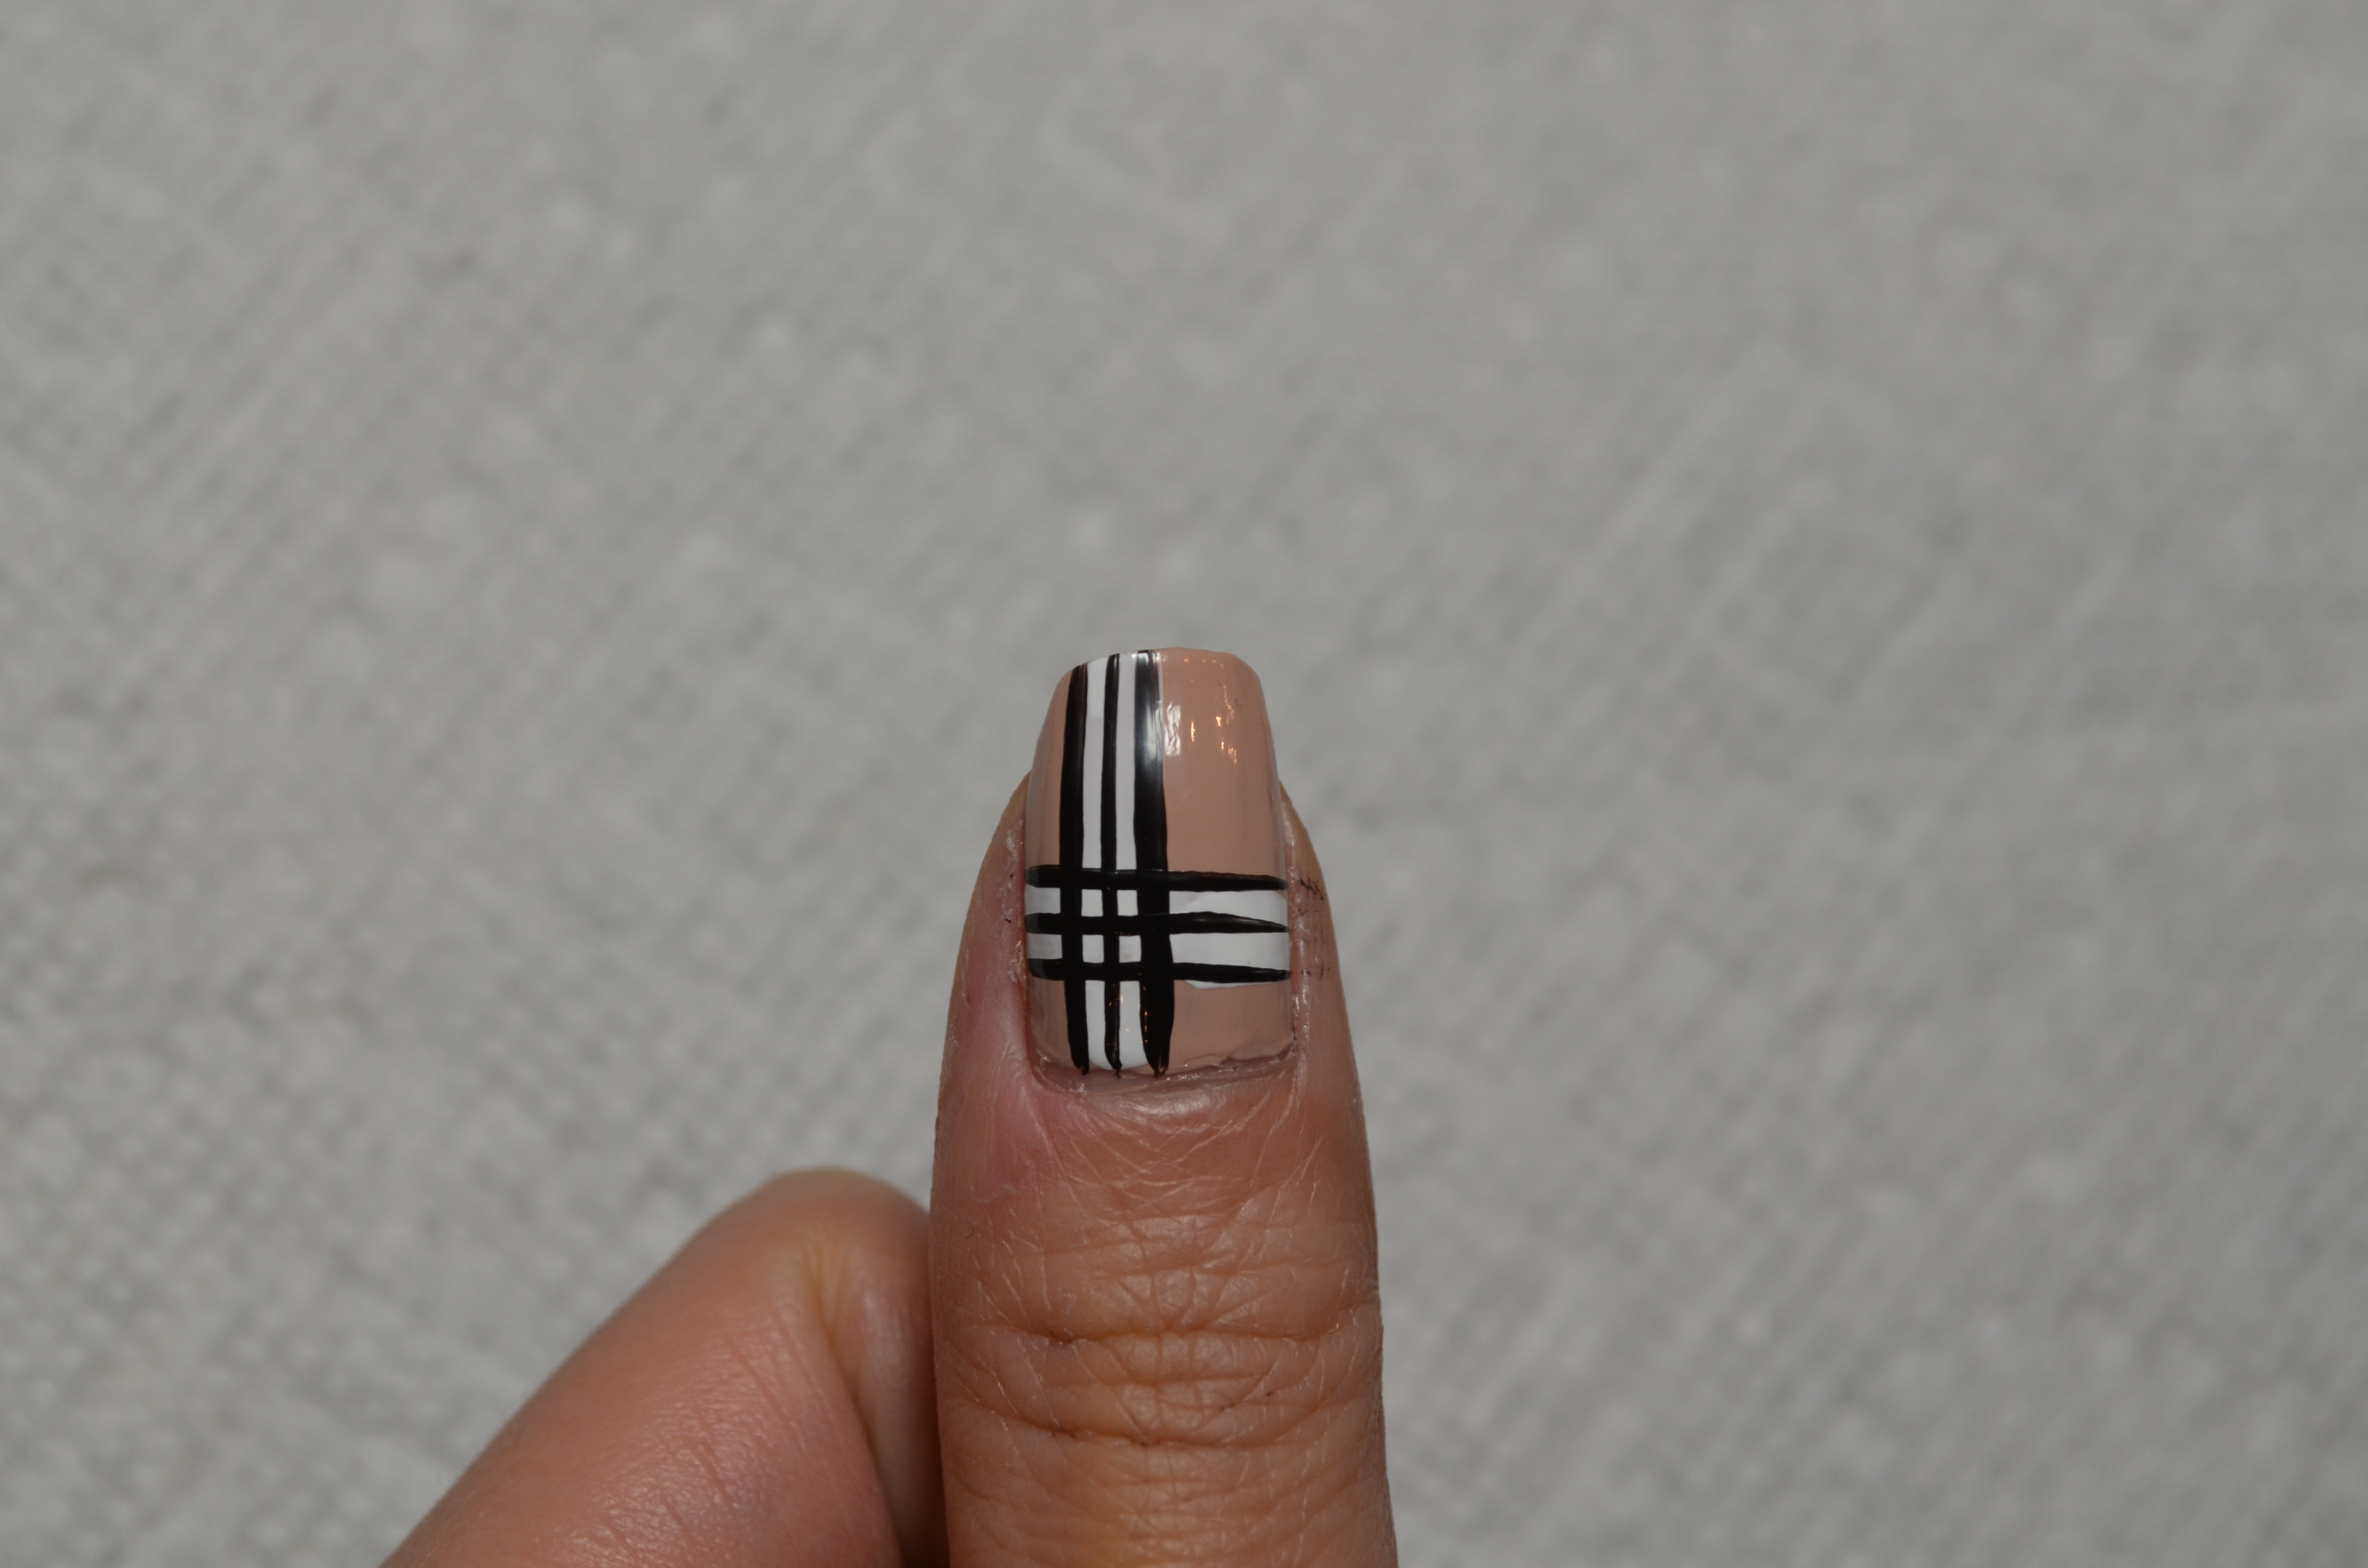
Step 4: Use a white (Alpine Snow by OPI) to draw 2 thick straight line, one goes horizontally and other one goes vertically on thumb and middle finger.
**Note:
- Instead of using your brush normally drawing the white stripes, turn the brush side way to get a thinner line.
- It’s okay if the white stripes edges aren’t perfect because you will cover it up with black stripes later.
- When you draw the horizontal white stripes, instead of rotating the brush you can try to rotate your finger to get a easier application.
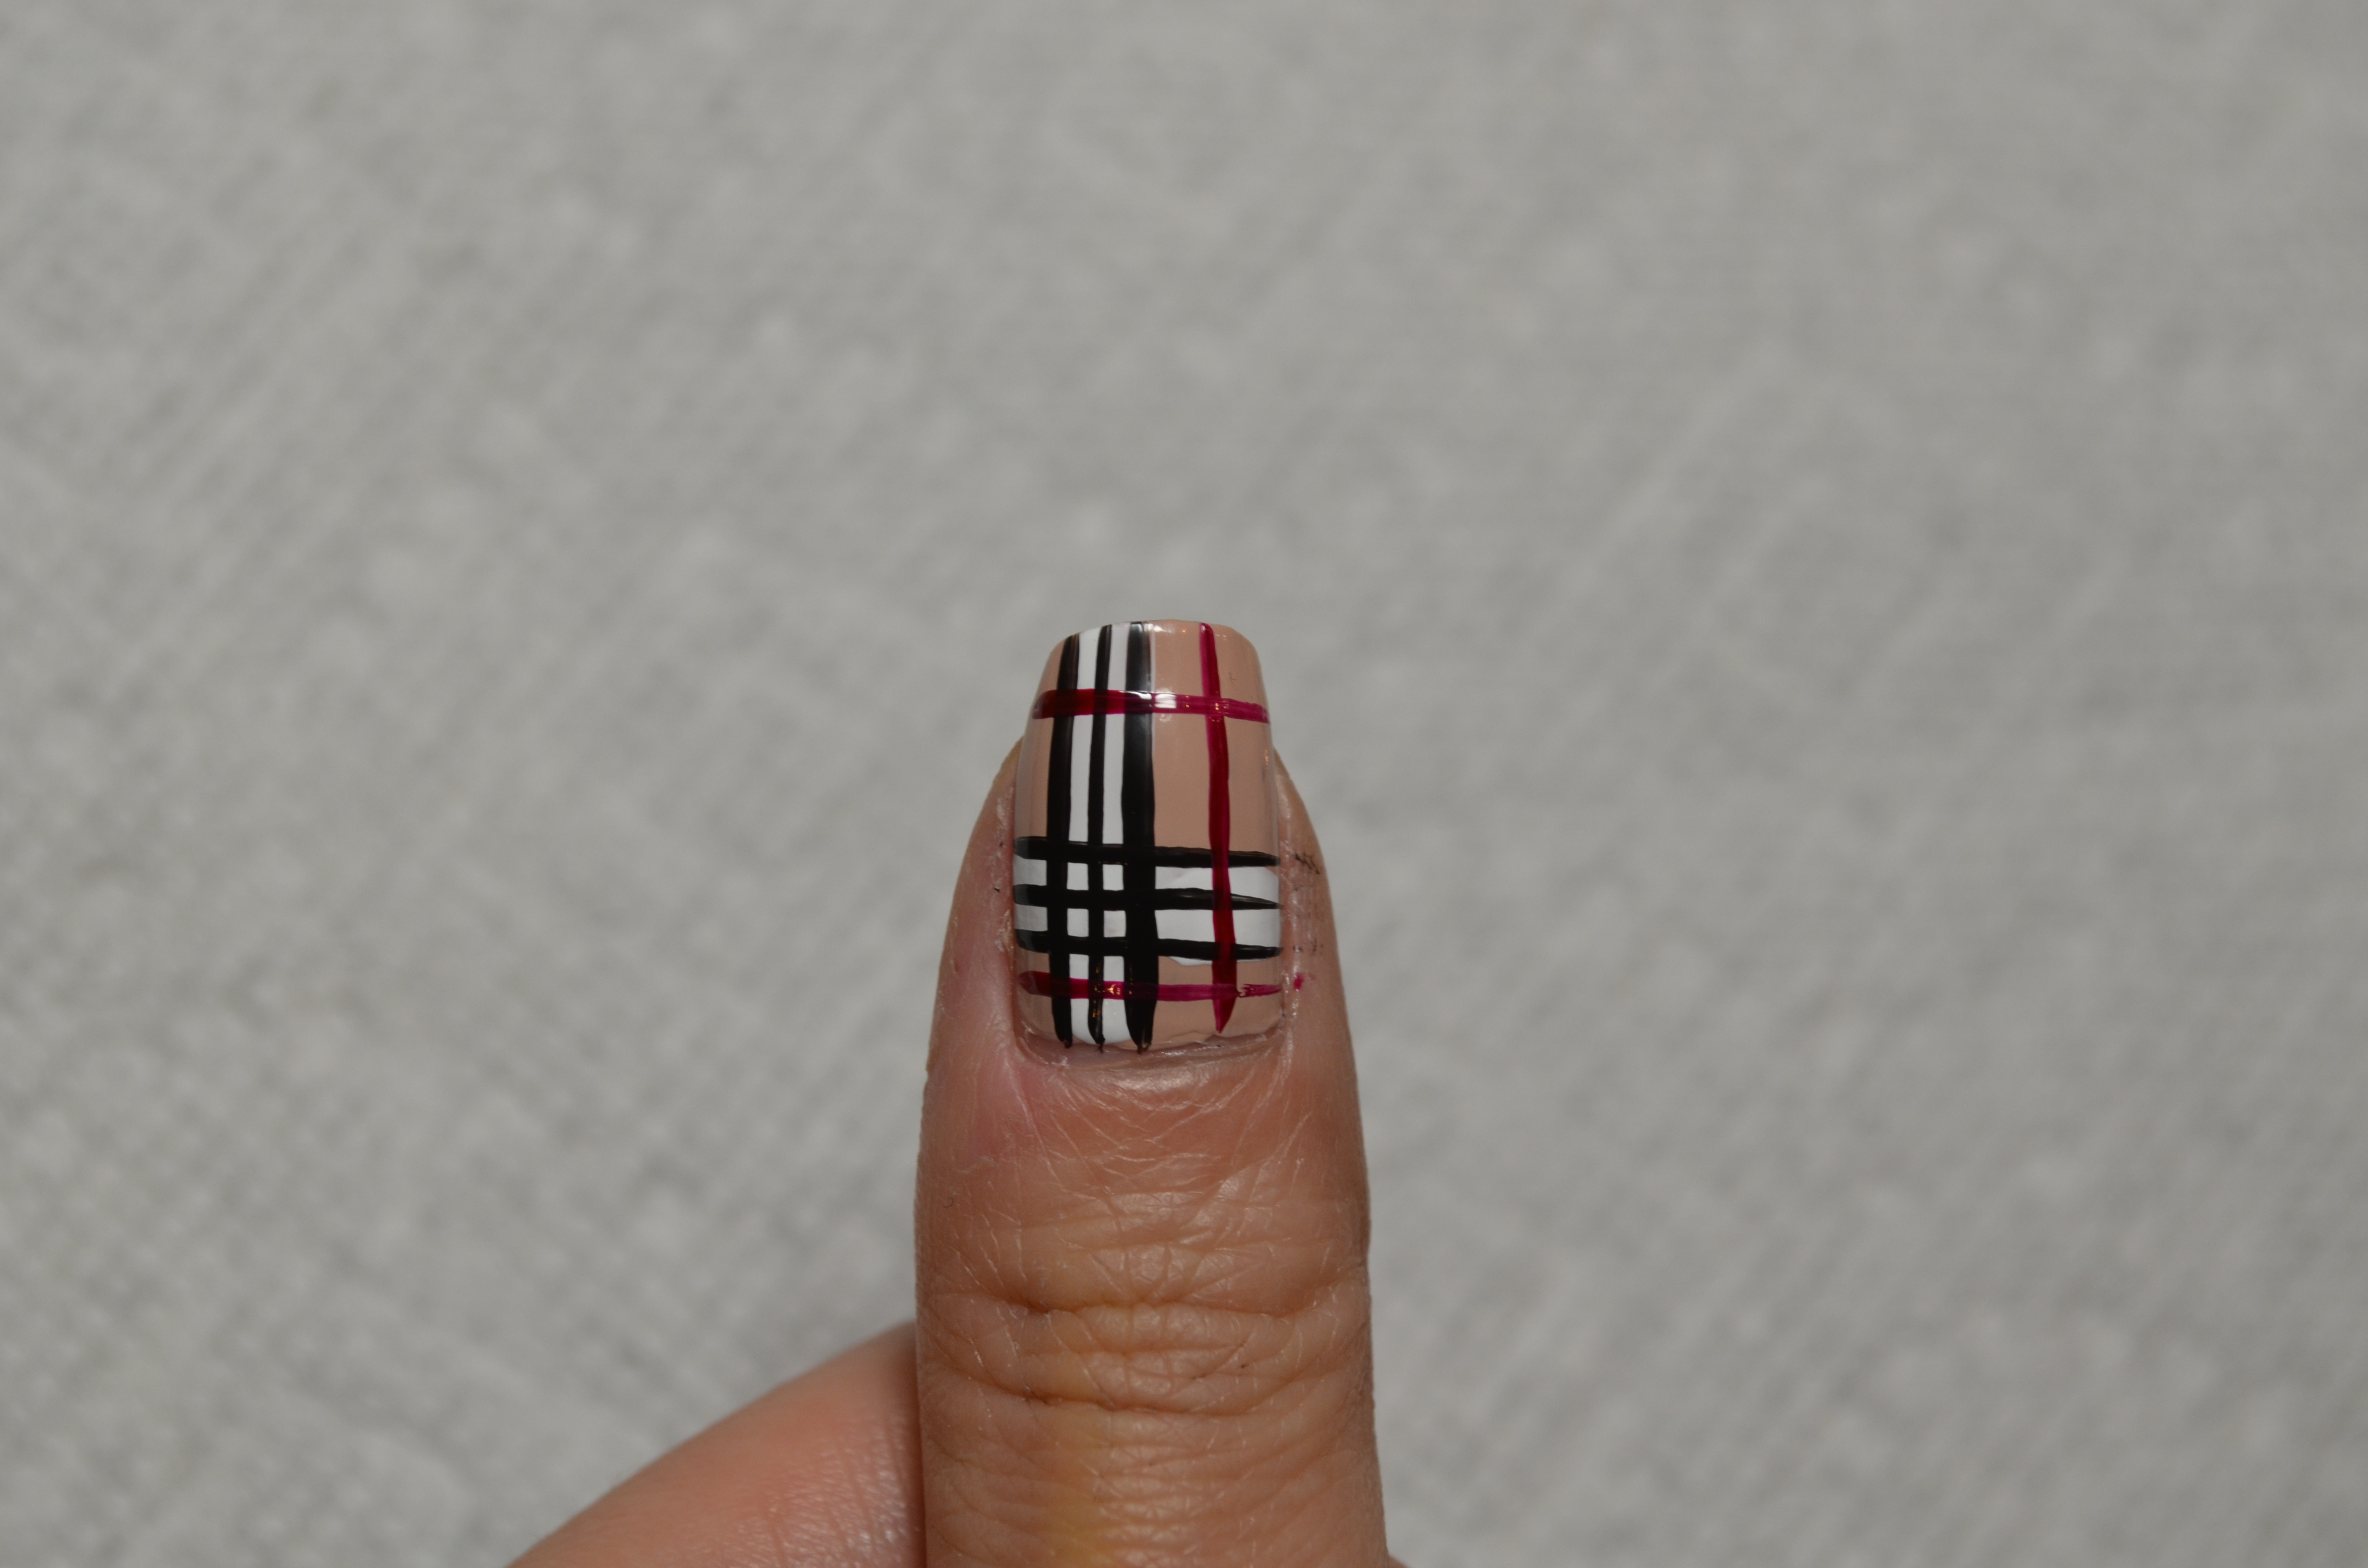
Step 5: Once the white stripes are dry, use a black nail striper to draw 3 lines for each thick white stripes.
Step 6: Use a red nail striper to draw 1 horizontal line under the horizontal white stripe and another red horizontal line on top of the nail. Lastly, use the same striper to draw a vertical line on the other side of the white stripe.
Step 7: Apply a glittery red polish (LuftBalloons by Deborah Lippmann) onto your ring finger.
Step 8: Apply Top Coat to seal in your design and add a beautiful shine.
Thank you very much for reading!! Don’t forget to like and show me your recreation on GlitterMommy Facebook Page. You can also share your re-creation on my instagram account @glittermommy_official
That’s it for now and I will have a new creation to share with you all next week!!!